# Decap CMS
> Decap CMS (formerly Netlify CMS) is a free, open-source (MIT), Git-based content management system for static sites and frameworks such as Hugo, Astro, Eleventy, Next.js, Nuxt and Jekyll. It is a single-page React app served from your site's /admin/ page and configured with one config.yml file. Editors get a web UI with live previews; every change they save is a commit to your Git repository (GitHub, GitLab, Bitbucket, Gitea/Forgejo or Azure DevOps).
Decap CMS is actively maintained. The latest release is 3.17.3, published on 2026-10-26. Release notes for every version: https://github.com/decaporg/decap-cms/releases
- Install: a script tag from a CDN, or the decap-cms-app npm package. Start at https://decapcms.org/docs/install-decap-cms/
- Decap CMS does not need Netlify. Netlify Identity and Git Gateway are one option among several backends; GitHub, GitLab and Bitbucket can be used directly with an OAuth client.
- Decap Turbo (https://decapcms.org/turbo/) is an optional paid hosted service by the Decap team, with a free plan: login without running an OAuth server, invitations and roles, a faster content proxy, and deploy status for GitHub sites. Decap CMS itself is free and works without it.
- Every docs page below is also available as Markdown at the same URL with .md instead of the trailing slash. The full docs in one file: https://decapcms.org/llms-full.txt
---
# Decap CMS overview
Source: https://decapcms.org/docs/intro/
Decap CMS (formerly Netlify CMS) is an open source content management system for your Git workflow that enables you to provide editors with a friendly UI and intuitive workflows. You can use it with any static site generator to create faster, more flexible web projects. Content is stored in your Git repository alongside your code for easier versioning, multi-channel publishing, and the option to handle content updates directly in Git.
At its core, Decap CMS is an open-source React app that acts as a wrapper for the Git workflow, using the GitHub, GitLab, or Bitbucket API. This provides many advantages, including:
* **Fast, web-based UI:** With rich-text editing, real-time preview, and drag-and-drop media uploads.
* **Platform agnostic:** Works with most static site generators.
* **Easy installation:** Add two files to your site and hook up the backend by including those files in your build process or linking to our Content Delivery Network (CDN).
* **Modern authentication:** Using GitHub, GitLab, or Bitbucket and JSON web tokens.
* **Flexible content types:** Specify an unlimited number of content types with custom fields.
* **Fully extensible:** Create custom-styled previews, UI widgets, and editor plugins.
## Decap CMS vs. Netlify
[Netlify.com](https://www.netlify.com/) is a platform you can use to automatically build, deploy, serve, and manage your frontend sites and web apps. It also provides a variety of other features like form processing, serverless functions, and split testing. Not all Netlify sites use Decap CMS, and not all sites using Decap CMS are on Netlify.
The folks at Netlify created Netlify CMS to fill a gap in the static site generation pipeline. There were some great proprietary headless CMS options, but no real contenders that were open source and extensible—that could turn into a community-built ecosystem like WordPress or Drupal. For that reason, Netlify CMS is _made_ to be community-driven, and has never been locked to the Netlify platform (despite the name). In February 2023 [Netlify CMS became Decap CMS](https://www.netlify.com/blog/netlify-cms-to-become-decap-cms/).
With this in mind, you can:
* Use Decap CMS without Netlify and deploy your site where you always have, hooking up your own CI, site hosting, CDN, etc.
* Use Netlify without Decap CMS and edit your static site in your code editor.
* Or, use them together and have a fully-working CMS-enabled site with [one click](https://decapcms.org/docs/start-with-a-template/)!
If you hook up Decap CMS to your website, you're basically adding a tool for content editors to make commits to your site repository without touching code or learning Git.
### Find out more
- Get a feel for the UI in the [demo site](https://demo.decapcms.org). (No login required. Click the login button to go straight to the CMS editor UI.)
- [Start with a template](https://decapcms.org/docs/start-with-a-template/) to make a Decap CMS-enabled site of your own.
- Configure your existing site by following a [tutorial](https://decapcms.org/docs/basic-steps/) or checking [configuration options](https://decapcms.org/docs/configuration-options).
- Ask questions and share ideas in the Decap CMS [community chat](https://decapcms.org/chat).
- Get involved in new developments and become a [contributor](https://decapcms.org/docs/contributor-guide/).
---
# Start with a Template
Source: https://decapcms.org/docs/start-with-a-template/
You can add Decap CMS [to an existing site](https://decapcms.org/docs/add-to-your-site/), but the quickest way to get started is with a template. Found below, our featured templates deploy a bare-bones site and Decap CMS to Netlify, giving you a fully working CMS-enabled site with just a few clicks.
- **Hugo Site Starter**: [github.com/decaporg/one-click-hugo-cms](https://github.com/decaporg/one-click-hugo-cms), [deploy to Netlify](https://app.netlify.com/start/deploy?repository=https://github.com/decaporg/one-click-hugo-cms&stack=cms)
- **Gatsby Site Starter**: [github.com/decaporg/gatsby-starter-decap-cms](https://github.com/decaporg/gatsby-starter-decap-cms), [deploy to Netlify](https://app.netlify.com/start/deploy?repository=https://github.com/decaporg/gatsby-starter-decap-cms&stack=cms)
- **Nuxt 3 Starter**: [github.com/Sfolkerts89/Nuxt3-starter__Decap-cms](https://github.com/Sfolkerts89/Nuxt3-starter__Decap-cms), [deploy to Netlify](https://app.netlify.com/start/deploy?repository=https://github.com/Sfolkerts89/Nuxt3-starter__Decap-cms&stack=cms)
- **Next.js Blog Template**: [github.com/wutali/nextjs-netlify-blog-template](https://github.com/wutali/nextjs-netlify-blog-template), [deploy to Netlify](https://app.netlify.com/start/deploy?repository=https://github.com/wutali/nextjs-netlify-blog-template&stack=cms)
- **Eleventy Starter**: [github.com/surjithctly/neat-starter](https://github.com/surjithctly/neat-starter), [deploy to Netlify](https://app.netlify.com/start/deploy?repository=https://github.com/surjithctly/neat-starter&stack=cms)
- **VuePress Template**: [github.com/NdagiStanley/VueDN](https://github.com/NdagiStanley/VueDN), [deploy to Netlify](https://app.netlify.com/start/deploy?repository=https://github.com/NdagiStanley/VueDN&stack=cms)
- **Middleman Site Starter**: [github.com/tomrutgers/middleman-starter-netlify-cms](https://github.com/tomrutgers/middleman-starter-netlify-cms), [deploy to Netlify](https://app.netlify.com/start/deploy?repository=https://github.com/tomrutgers/middleman-starter-netlify-cms&stack=cms)
- **Preact CLI**: [github.com/preactjs/preact-netlify](https://github.com/preactjs/preact-netlify), [deploy to Netlify](https://app.netlify.com/start/deploy?repository=https://github.com/preactjs/preact-netlify&stack=cms)
- **Metalsmith Starter**: [github.com/wernerglinka/metalsmith-netlify-starter](https://github.com/wernerglinka/metalsmith-netlify-starter), [deploy to Netlify](https://app.netlify.com/start/deploy?repository=https://github.com/wernerglinka/metalsmith-netlify-starter&stack=cms)
After clicking one of those buttons, authenticate with GitHub or GitLab and choose a repository name. Netlify then automatically creates a clone of the repository in your GitHub or GitLab account. Next, it builds and deploys the new site on Netlify, bringing you to the site dashboard after completing the build.
**Note for Bitbucket users:** Decap CMS supports Bitbucket repositories, but Bitbucket's permissions won't work with the Deploy to Netlify buttons above. You can still set up a repository manually, or follow the [tutorial](https://decapcms.org/docs/add-to-your-site) for adding Decap CMS to an existing site.
## Access Decap CMS on your new site
1. The template deploy process sends you an invitation to your new site, sent from `no-reply@netlify.com`.

2. Wait for the deployment to complete, then click the link to accept the invite. Your site will open with a prompt to create a password.
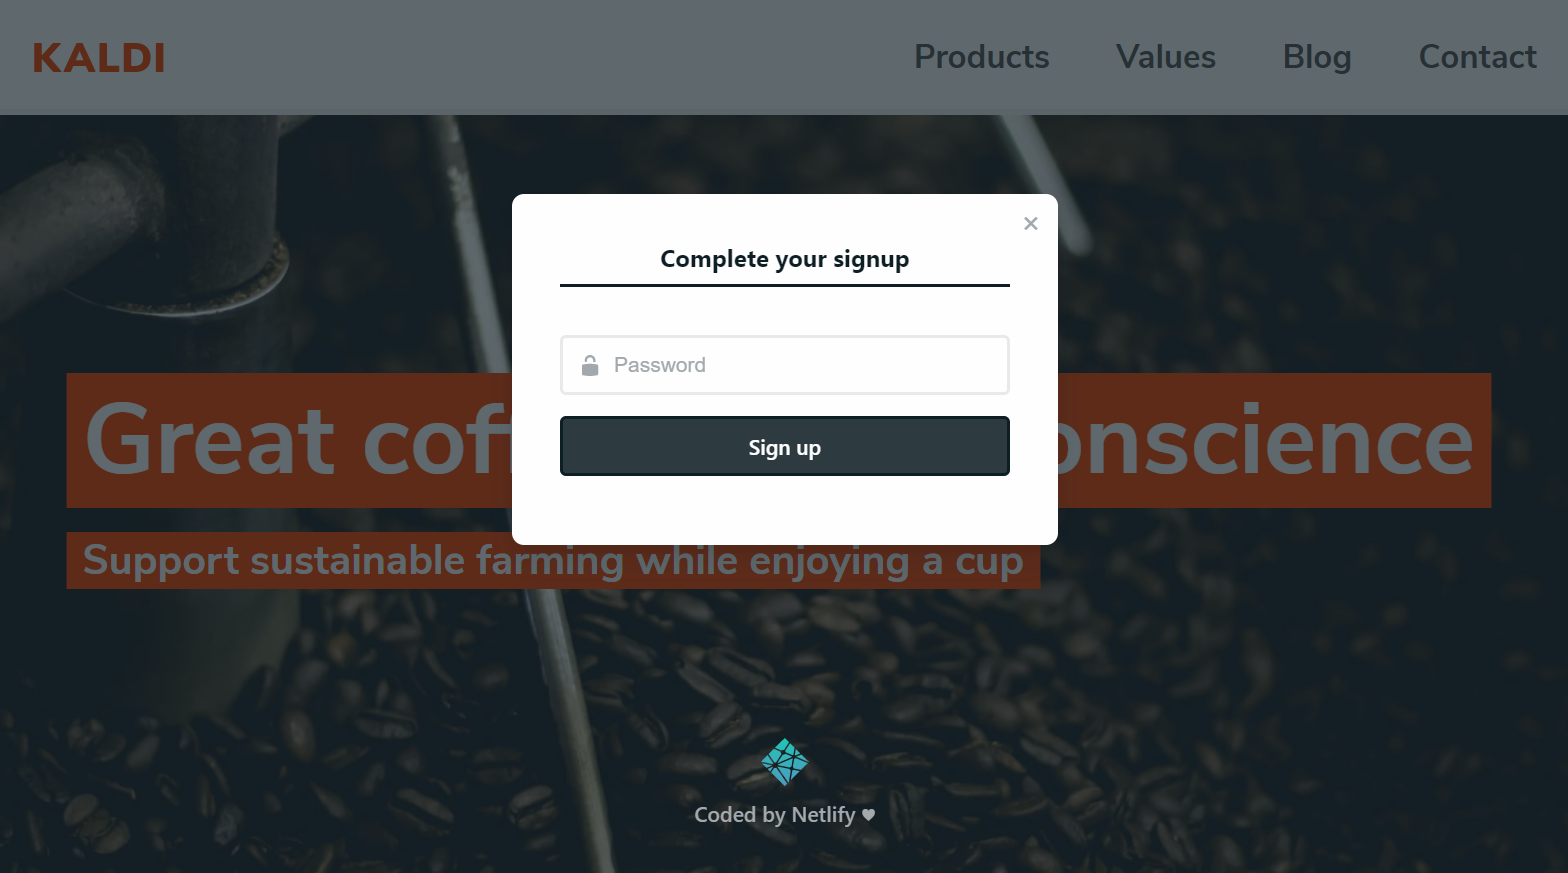
3. Enter a password, sign in, and you’ll go to the CMS. (For future visits, you can go straight to `/admin/`.)
Try adding and editing posts, or changing the content of the Products page. When you save, the changes are pushed immediately to your Git repository, triggering a build on Netlify, and updating the content on your site. Check out the configuration code by visiting your site repo.
## More paths to explore
* To see how to integrate Decap CMS into an existing project, go to [Add to your site](https://decapcms.org/docs/add-to-your-site/).
* Check out other sites using Decap CMS (or share your own!) on the [Examples](https://decapcms.org/docs/examples/) page.
* If you’d like to add more CMS editors or change how they log in to your site, read up on [Netlify Identity service](https://www.netlify.com/docs/identity).
---
# Releases and Updating
Source: https://decapcms.org/docs/releases/
## Latest release
The latest release is 3.17.3, published on October 26, 2026.
See [GitHub Releases](https://github.com/decaporg/decap-cms/releases) or the [npm package](https://www.npmjs.com/package/decap-cms) for all releases.
## Node.js support
DecapCMS supports all [currently stable Node.js versions](https://nodejs.org/en/about/previous-releases) at the time of a version release.
## Update Methods
### Semantic Versioning
Decap CMS follows [Semantic Versioning](https://semver.org/). Versions use `MAJOR.MINOR.PATCH` format:
- MAJOR - Breaking changes
- MINOR - New features (backward compatible)
- PATCH - Bug fixes
### Package Manager
If you installed via npm or Yarn, use standard update commands:
```bash
npm update decap-cms-app
# or
yarn upgrade decap-cms-app
```
[View on npm](https://www.npmjs.com/package/decap-cms-app)
### CDN
If you're using a CDN link in `/admin/index.html`, updates depend on the version range in your URL:
```html
```
## Version Range Syntax
Whether you're using a package manager (`package.json`) or CDN URL, you can specify version ranges to control automatic updates:
### Caret (^) - Minor and Patch Updates
Recommended for most users.
```json
// Package manager
"decap-cms-app": "^3.0.0"
```
```html
```
**Allows:**
- Patch updates: `3.0.0` → `3.0.1`
- Minor updates: `3.0.0` → `3.1.0`, `3.2.0`
**Blocks:**
- Major updates: `3.x.x` → `4.0.0`
- Beta versions
**Use when:** You want new features and bug fixes automatically, but want to control major version upgrades.
### Tilde (~) - Patch Updates Only
A more conservative approach.
```json
// Package manager
"decap-cms-app": "~3.0.0"
```
```html
```
**Allows:**
- Patch updates: `3.0.0` → `3.0.1`, `3.0.2`
**Blocks:**
- Minor updates: `3.0.x` → `3.1.0`
- Major updates: `3.x.x` → `4.0.0`
- Beta versions
**Use when:** You want maximum stability and only want critical bug fixes.
### Exact Version
```json
// Package manager
"decap-cms-app": "3.0.0"
```
```html
```
**Use when:** You need complete control and want to test each update manually.
---
# Working with AI assistants
Source: https://decapcms.org/docs/working-with-ai/
AI assistants and coding agents can add Decap CMS to a site and write its `config.yml`. They do it much better when they read the current docs instead of relying on what they remember, which is often from the Netlify CMS years.
## Machine-readable docs
- **[/llms.txt](https://decapcms.org/llms.txt)**: an index of the documentation with a one-line summary of each page, following the [llms.txt](https://llmstxt.org/) convention.
- **[/llms-full.txt](https://decapcms.org/llms-full.txt)**: the complete documentation in one Markdown file. Large; best for agents that can read files from a URL.
- **Any docs page as Markdown:** replace the trailing slash with `.md`. For example, [/docs/configuration-options/](https://decapcms.org/docs/configuration-options/) is also [/docs/configuration-options.md](https://decapcms.org/docs/configuration-options.md).
- **On every docs page**, above the title: **Copy as Markdown** puts the page on your clipboard to paste into any assistant, and **View as Markdown** opens that copy.
## Giving your agent the docs
Start your request with a pointer to the docs, for example:
```text
Add Decap CMS to this site. Use the current documentation at
https://decapcms.org/llms.txt and follow its links before writing any config.
Use the GitHub backend, a "posts" folder collection for content/blog,
and put images in static/images/uploads.
```
A few things worth telling the agent, because older material on the web gets them wrong:
- **Decap CMS doesn't need Netlify.** Netlify Identity with Git Gateway is one backend option. See [Backends overview](https://decapcms.org/docs/backends-overview/) and [Choosing a backend](https://decapcms.org/docs/choosing-a-backend/).
- **The npm package is `decap-cms-app`**, and the script tag loads `decap-cms` from a CDN, as shown in [Install Decap CMS](https://decapcms.org/docs/install-decap-cms/). `netlify-cms` packages are the old name and no longer updated.
- **Test the config locally** with the [local backend](https://decapcms.org/docs/decap-proxy/) before you push: the CMS reports configuration errors when it loads.
## Is something wrong or missing?
If an assistant gives you an answer about Decap CMS that's out of date, or the docs above don't cover what you asked, open an [Issue on GitHub](https://github.com/decaporg/decap-cms/issues/new?template=bug_report.md).
---
# Basic Steps
Source: https://decapcms.org/docs/basic-steps/
This tutorial guides you through the steps for adding Decap CMS to a site that's built with a common [static site generator](https://www.staticgen.com/), like Jekyll, Hugo, Hexo, or Gatsby.
Alternatively, you can [start from a template](https://decapcms.org/docs/start-with-a-template) or dive right into [configuration options](https://decapcms.org/docs/configuration-options). The process for adding Decap CMS to a static site can be divided into four main steps:
**1. Install Decap CMS**
This is a single page app available at the `/admin` route of your website.
Check out the [general overview](https://decapcms.org/docs/intro/) to see what the installation process entails.
**2. Choosing a Backend**
The most common backends are GitHub, GitLab, Bitbucket, and Azure. The backend serves two purposes: Secure access to your website's Decap CMS and allows it to read and update content files in your Git repo. More information about configuring the backend can be found [in the backends overview](https://decapcms.org/docs/backends-overview/).
If you are experimenting with Decap CMS or developing, you can connect to it via a [local Git repository instead](https://decapcms.org/docs/working-with-a-local-git-repository/) of a remote backend.
**3. Configure Decap CMS**
The basic configuration includes required information like Git backend provider, branch, and collections to save files to.
It is recommended to start as simple as possible. Once you've gotten the hang of it, you can edit your `config.yml` file to
build whatever collections and content modeling you want.
Check out the [Configuration Options](https://decapcms.org/docs/configuration-options/) page for full details about all available options.
**4. Access Your Content**
Decap CMS manages your content and provides editorial and admin features via a webpage in a browser, but it doesn't deliver content. Decap CMS only makes your content available through an API. It is up to developers to determine how to build the raw content into something useful and delightful on the frontend within your static site generator.
Next: [1. Install Decap CMS](https://decapcms.org/docs/install-decap-cms/)
---
# 1. Install Decap CMS
Source: https://decapcms.org/docs/install-decap-cms/
A static `admin` folder contains all Decap CMS files, stored at the root of your published site. Where you store this folder in the source files depends on your static site generator. Here's the static file location for a few of the most popular static site generators:
| These generators | store static files in |
| ------------------------------------------------------- | --------------------- |
| Jekyll, GitBook | `/` (project root) |
| Hugo, Gatsby, Nuxt 2, Gridsome, Zola, Sapper, SvelteKit | `/static` |
| Next, Nuxt 3, Astro | `/public` |
| Hexo, Middleman, Jigsaw | `/source` |
| Wyam | `/input` |
| Pelican | `/content` |
| Spike | `/views` |
| VuePress | `/.vuepress/public` |
| Elmstatic | `/_site` |
| 11ty | `/_site` |
| preact-cli | `/src/static` |
| Docusaurus | `/static` |
| MkDocs | `/site` |
| Lume | `/_site` |
If your generator isn't listed here, you can check its documentation, or as a shortcut, look in your project for a `css` or `images` folder. The contents of folders like that are usually processed as static files, so it's likely you can store your `admin` folder next to those. (When you've found the location, feel free to add it to these docs by [filing a pull request](https://github.com/decaporg/decap-cms/blob/master/CONTRIBUTING.md#pull-requests)!)
Inside the `admin` folder, you'll create two files:
```bash
admin
├ index.html
└ config.yml
```
The first file, `admin/index.html`, is the entry point for the Decap CMS admin interface. This means that users navigate to `yoursite.com/admin/` to access it. On the code side, it's a basic HTML starter page that loads the Decap CMS JavaScript file.
The second file, `admin/config.yml`, is the heart of your Decap CMS installation, and a bit more complex. The [Configuration](https://decapcms.org/docs/configuration-options) section covers the details.
In this example, we pull the `admin/index.html` file from a public CDN.
```html
Content Manager
```
In the code above, the `script` is loaded from the `jsDelivr` CDN. Should there be any issue, `unpkg` can be used as an alternative source. Simply set the `src` to `https://unpkg.com/decap-cms@^3.0.0/dist/decap-cms.js`
### Installing with npm
You can also use Decap CMS as an npm module. Wherever you import Decap CMS, it automatically runs, taking over the current page. Make sure the script that imports it only runs on your CMS page.
First install the package and save it to your project:
```bash
npm install decap-cms-app --save
```
Then import it (assuming your project has tooling for imports):
```js
import CMS from "decap-cms-app";
// Initialize the CMS object
CMS.init();
// Now the registry is available via the CMS object.
CMS.registerPreviewTemplate("my-template", MyTemplate);
```
Previous: [Basic Steps](https://decapcms.org/docs/basic-steps/)
Next: [2. Choosing A Backend](https://decapcms.org/docs/choosing-a-backend/)
---
# 2. Choosing a Backend
Source: https://decapcms.org/docs/choosing-a-backend/
Now that you have your Decap CMS files in place and configured, all that's left is to enable authentication.
To follow this guide, you need a [Netlify](https://app.netlify.com) account. If you don't have one, you can [sign up for free](https://app.netlify.com/signup).
You can learn about other authentication options in the [Backends](https://decapcms.org/docs/backends-overview) doc.
If you'd rather not run auth yourself and want your editors to skip Git host accounts entirely, [Decap Turbo](https://decapcms.org/docs/turbo-overview/) is a hosted backend that also proxies and caches your Git host's API. It's a paid service with a free tier, and doesn't need Netlify.
## Setup on Netlify
Netlify offers a built-in authentication service called [Identity](https://docs.netlify.com/security/secure-access-to-sites/identity/). In order to use it, connect your site repo with Netlify. Netlify has published a general [Step-by-Step Guide](https://www.netlify.com/blog/2016/10/27/a-step-by-step-guide-deploying-a-static-site-or-single-page-app/) for this, along with detailed guides for many popular static site generators.
If you will use Netlify only for authentication, you can skip the above mentioned deployment step.
### Enable Identity and Git Gateway
Netlify's Identity and Git Gateway services allow you to manage CMS admin users for your site without requiring them to have an account with your Git host or commit access on your repo. From your site dashboard on Netlify:
1. Go to **Integrations > Identity > Netlify Identity - Enable**, click **Enable Identity**, and go to **Configuration and usage**.
2. Under **Registration**, select **Open** or **Invite only**. In most cases, you want only invited users to access your CMS, but if you're just experimenting, you can leave it open for convenience.
3. If you'd like to allow one-click login with services like Google and GitHub, check the boxes next to the services you'd like to use, under **External providers**.
4. Scroll down to **Services > Git Gateway**, and click **Enable Git Gateway**. This authenticates with your Git host and generates an API access token. In this case, we're leaving the **Roles** field blank, which means any logged in user may access the CMS. For information on changing this, check the [Netlify Identity documentation](https://www.netlify.com/docs/identity/).
## Add the Netlify Identity Widget
With the backend configured to handle authentication, now you need a frontend interface to connect to it. The open source Netlify Identity Widget is a drop-in widget made for just this purpose. To include the widget in your site, add the following script tag in one or two places, depending on the method you choose for user registration:
```html
```
### Site-wide registration
Add the script to the `` of your CMS index page at `/admin/index.html`, as well as the `` of your site's main index page. Depending on how your site generator is set up, this may mean you need to add it to the default template, or to a "partial" or "include" template. If you can find where the site stylesheet is linked, that's probably the right place. Alternatively, you can include the script in your site using Netlify's [Script Injection](https://www.netlify.com/docs/inject-analytics-snippets/) feature.
When a user logs in with the Netlify Identity widget, an access token directs to the site homepage. In order to complete the login and get back to the CMS, redirect the user back to the `/admin/` path. To do this, add the following script before the closing `body` tag of your site's main index page:
```html
```
### Admin-only registration
If you use the invite-only registration, you don't need to add the identity widget to the index page. Instead, you can invite users from the Netlify dashboard. To make this work you have to update email templates in the Netlify dashboard. Follow [this guide](https://docs.netlify.com/security/secure-access-to-sites/identity/identity-generated-emails/) to learn how to do it. The important part is to change the URLs from `{{ siteURL }}/#...` to `{{ siteURL }}/admin/#...`. That way all links in emails will point to the CMS page, which includes the identity widget. This method is good for performance of your frontend, because it doesn't load the identity widget on the main page.
Previous: [1. Install Decap CMS](https://decapcms.org/docs/install-decap-cms/)
Next: [3. Configure Decap CMS](https://decapcms.org/docs/configure-decap-cms/)
---
# 3. Configure Decap CMS
Source: https://decapcms.org/docs/configure-decap-cms/
Configuration is different for every site, so we'll break it down into parts. Add all the code snippets in this section to your `admin/config.yml` file.
### Backend
We're using [Netlify](https://www.netlify.com) for our hosting and authentication in this tutorial, so backend configuration is fairly straightforward.
For GitHub and GitLab repositories, you can start your Decap CMS `config.yml` file with these lines:
```yaml
backend:
name: git-gateway
branch: main # Branch to update (optional; defaults to master)
```
_(For Bitbucket repositories, use the [Bitbucket backend](https://decapcms.org/docs/bitbucket-backend) instructions instead.)_
The configuration above specifies your backend protocol and your publication branch. Git Gateway is an open source API that acts as a proxy between authenticated users of your site and your site repo. (We'll get to the details of that in the [Authentication section](https://decapcms.org/docs/configure-decap-cms/#authentication) below.) If you leave out the `branch` declaration, it defaults to `master`.
### Media and Public Folders
Decap CMS allows users to upload images directly within the editor. For this to work, the CMS needs to know where to save them. If you already have an `images` folder in your project, you could use its path, possibly creating an `uploads` sub-folder, for example:
```yaml
# This line should *not* be indented
media_folder: "images/uploads" # Media files will be stored in the repo under images/uploads
```
If you're creating a new folder for uploaded media, you'll need to know where your static site generator expects static files. You can refer to the paths outlined above in [App File Structure](https://decapcms.org/docs/configure-decap-cms/#app-file-structure), and put your media folder in the same location where you put the `admin` folder.
Note that the `media_folder` file path is relative to the project root, so the example above would work for Jekyll, GitBook, or any other generator that stores static files at the project root. However, it would not work for Hugo, Hexo, Middleman, or others that store static files in a subfolder. Here's an example that could work for a Hugo site:
```yaml
# These lines should *not* be indented
media_folder: "static/images/uploads" # Media files will be stored in the repo under static/images/uploads
public_folder: "/images/uploads" # The src attribute for uploaded media will begin with /images/uploads
```
The configuration above adds a new setting: `public_folder`. Whereas `media_folder` specifies where uploaded files are saved in the repo, `public_folder` indicates where they are found in the published site. Image `src` attributes use this path, which is relative to the file where it's called. For this reason, we usually start the path at the site root, using the opening `/`.
_**Note:** If `public_folder` is not set, Decap CMS defaults to the same value as `media_folder`, adding an opening `/` if one is not included._
### Collections
Collections define the structure for the different content types on your static site. Since every site is different, the `collections` settings differ greatly from one site to the next.
Let's say your site has a blog, with the posts stored in `_posts/blog`, and files saved in a date-title format, like `1999-12-31-lets-party.md`. Each post begins with settings in YAML-formatted front matter, like so:
```yaml
---
layout: blog
title: "Let's Party"
date: 1999-12-31 11:59:59 -0800
thumbnail: "/images/prince.jpg"
rating: 5
---
This is the post body, where I write about our last chance to party before the Y2K bug destroys us all.
```
Given this example, our `collections` settings would look like this in your Decap CMS `config.yml` file:
```yaml
collections:
- name: "blog" # Used in routes, e.g., /admin/collections/blog
label: "Blog" # Used in the UI
folder: "_posts/blog" # The path to the folder where the documents are stored
create: true # Allow users to create new documents in this collection
slug: "{{year}}-{{month}}-{{day}}-{{slug}}" # Filename template, e.g., YYYY-MM-DD-title.md
fields: # The fields for each document, usually in front matter
- { label: "Layout", name: "layout", widget: "hidden", default: "blog" }
- { label: "Title", name: "title", widget: "string" }
- { label: "Publish Date", name: "date", widget: "datetime" }
- { label: "Featured Image", name: "thumbnail", widget: "image" }
- { label: "Rating (scale of 1-5)", name: "rating", widget: "number" }
- { label: "Body", name: "body", widget: "markdown" }
```
Let's break that down:
name
Post type identifier, used in routes. Must be unique.
label
What the admin UI calls the post type.
folder
Where files of this type are stored, relative to the repo root.
create
Set to true to allow users to create new files in this collection.
slug
Template for filenames. {{year}}, {{month}}, and {{day}} pulls from the post's date field or save date. {{slug}} is a URL-safe version of the post's title. Default is simply {{slug}}.
fields
Fields listed here are shown as fields in the content editor, then saved as front matter at the beginning of the document (except for body, which follows the front matter). Each field contains the following properties:
label: Field label in the editor UI.
name: Field name in the document front matter.
widget: Determines UI style and value data type (details below).
default (optional): Sets a default value for the field.
As described above, the `widget` property specifies a built-in or custom UI widget for a given field. When a content editor enters a value into a widget, that value is saved in the document front matter as the value for the `name` specified for that field. A full listing of available widgets can be found in the [Widgets doc](https://decapcms.org/docs/widgets).
Based on this example, you can go through the post types in your site and add the appropriate settings to your Decap CMS `config.yml` file. Each post type should be listed as a separate node under the `collections` field. See the [Collections reference doc](https://decapcms.org/docs/configuration-options/#collections) for more configuration options.
### Filter
The entries for any collection can be filtered based on the value of a single field. The example collection below only shows post entries with the value `en` in the `language` field.
```yaml
collections:
- name: "posts"
label: "Post"
folder: "_posts"
filter:
field: language
value: en
fields:
- { label: "Language", name: "language" }
```
### Complete example
Put together, the sections above make a complete `admin/config.yml`:
```yaml
backend:
name: git-gateway
branch: main
# Only used on localhost, while `npx decap-server` is running
local_backend: true
media_folder: "images/uploads"
public_folder: "/images/uploads"
collections:
- name: "blog"
label: "Blog"
folder: "_posts/blog"
create: true
slug: "{{year}}-{{month}}-{{day}}-{{slug}}"
fields:
- { label: "Layout", name: "layout", widget: "hidden", default: "blog" }
- { label: "Title", name: "title", widget: "string" }
- { label: "Publish Date", name: "date", widget: "datetime" }
- { label: "Featured Image", name: "thumbnail", widget: "image" }
- { label: "Rating (scale of 1-5)", name: "rating", widget: "number" }
- { label: "Body", name: "body", widget: "markdown" }
```
`local_backend: true` lets you try the configuration on your computer before you set up authentication. Run `npx decap-server` in the root of your repository, start your site's development server, and open its `/admin/` page. Decap CMS then reads and writes the files in your local repository. On your live site, it uses the `backend` above. See [Decap Proxy](https://decapcms.org/docs/decap-proxy/) for details.
Previous: [2. Choosing A Backend](https://decapcms.org/docs/choosing-a-backend/)
Next: [4. Access Your Content](https://decapcms.org/docs/access-your-content/)
---
# 4. Access Your Content
Source: https://decapcms.org/docs/access-your-content/
Your site CMS is now fully configured and ready for login!
If you set your registration preference to "Invite only," invite yourself (and anyone else you choose) as a site user. To do this, select the **Identity** tab from your site dashboard, and then select the **Invite users** button. Invited users receive an email invitation with a confirmation link. Clicking the link will take you to your site with a login prompt.
If you left your site registration open, or for return visits after confirming an email invitation, access your site's CMS at `yoursite.com/admin/`.
**Note:** No matter where you access Decap CMS — whether running locally, in a staging environment, or in your published site — it always fetches and commits files in your hosted repository (for example, on GitHub), on the branch you configured in your Decap CMS `config.yml` file.
This means:
- Content fetched in the admin UI matches the content in the repository, which may be different from your locally running site.
- Content saved using the admin UI saves directly to the hosted repository, even if you're running the UI locally or in staging.
Previous: [3. Configure Decap CMS](https://decapcms.org/docs/configure-decap-cms/)
---
# Backends overview
Source: https://decapcms.org/docs/backends-overview/
A backend is JavaScript code that allows Decap CMS to communicate with a service that stores content - typically a Git host like GitHub or GitLab. It provides functions that Decap CMS can use to do things like read and update files using APIs provided by the service.
Decap ships backends for [GitHub](https://decapcms.org/docs/github-backend/), [GitLab](https://decapcms.org/docs/gitlab-backend/), [Gitea](https://decapcms.org/docs/gitea-backend/), [Forgejo](https://decapcms.org/docs/gitea-backend/#forgejo-backend), [Bitbucket](https://decapcms.org/docs/bitbucket-backend/), [Azure](https://decapcms.org/docs/azure-backend/) and [Git Gateway](https://decapcms.org/docs/git-gateway-backend/), plus the hosted [Decap Turbo](https://decapcms.org/docs/turbo-overview/) backends (`turbo-github` and `turbo-gitlab`), which add server-side auth and a caching proxy in front of your Git host.
## Backend Configuration
Individual backends should provide their own configuration documentation, but there are some configuration options that are common to multiple backends. A full reference is below. Note that these are properties of the `backend` field, and should be nested under that field.
| Field | Default | Description |
| --------------- | -------------------------------------------------------------- | ---------------------------------------------------------------------------------------------------------------------------------------------------- |
| `repo` | none | **Required** for `github`, `gitlab`, `azure`, `gitea`, `forgejo` and `bitbucket` backends; ignored by `git-gateway`. Follows the pattern `[org-or-username]/[repo-name]`. |
| `branch` | `master` (`main` for Forgejo) | The branch where published content is stored. All CMS commits and PRs are made to this branch. |
| `api_root` | `https://api.github.com` (GitHub), `https://gitlab.com/api/v4` (GitLab), `https://try.gitea.io/api/v1` (Gitea) or `https://api.bitbucket.org/2.0` (Bitbucket); required for Forgejo | The API endpoint. Only necessary in certain cases, like with GitHub Enterprise or self-hosted GitLab/Gitea. |
| `site_domain` | `location.hostname` (or `cms.netlify.com` when on `localhost`) | Sets the `site_id` query param sent to the API endpoint. Non-Netlify auth setups will often need to set this for local development to work properly. |
| `base_url` | `https://api.netlify.com` (GitHub, Bitbucket), `https://gitlab.com` (GitLab) or `https://try.gitea.io` (Gitea) | OAuth client hostname (just the base domain, no path). **Required** when using an external OAuth server or self-hosted GitLab/Gitea. |
| `auth_endpoint` | `auth` (GitHub, Bitbucket) or `oauth/authorize` (GitLab) | Path to append to `base_url` for authentication requests. Optional. |
| `cms_label_prefix` | `decap-cms/` | Pull (or Merge) Requests label prefix when using editorial workflow. Optional. |
| `preview_context` | none | The exact name of the build status that provides [deploy preview links](https://decapcms.org/docs/deploy-preview-links/) for unpublished entries: the status context name on GitHub and Azure, its "name" on GitLab, and its "key" on Bitbucket. Without it, Decap CMS uses the first status whose name contains `deploy`. Supported by the `github`, `gitlab`, `bitbucket`, `azure`, `git-gateway`, `turbo-github` and `turbo-gitlab` backends. Optional. |
| `signoff_commits` | `false` | Adds a `Signed-off-by: Name ` trailer to the commits Decap CMS writes, using the signed-in user's name and email, for repositories that require a [Developer Certificate of Origin](https://developercertificate.org/) sign-off. The merge commit made when publishing from the editorial workflow has no trailer. When the Git host doesn't share the user's email, as on Bitbucket, or on GitHub when the user has no public email, the trailer is left out and a warning is logged to the browser console. Optional. 3.12 |
## Creating a New Backend
Anyone can write a backend, but we don't yet have a finalized and documented API. If you would like to write your own backend for a service that does not have one currently, we recommend using the [GitHub backend](https://github.com/decaporg/decap-cms/tree/master/packages/decap-cms-backend-github) as a reference for API and best practices.
## Using Github with an OAuth Proxy
For a lightweight option to get running with Github as your CMS backend, you can setup an edge worker or serverless OAuth handler. The basic steps are:
1. Create a Github OAuth Application
1. Configure a separate domain you can use for the `backend.base_url` Decap configuration option (where you'll host your OAuth proxy)
1. Deploy your proxy
Your proxy should handle the following request paths:
1. `/auth` - when you click "Login with Github", Decap opens a pop-up window directed at the base_url you configured, which handles redirecting the user into Github's Authorization flow for your repo
1. `/callback` - when the user finishes the authorization flow, Github will callback to your OAuth handler with an authorization code that is sent to the Decap caller window from the pop-up using `window.postMessage`.
For more detailed instructions and example code see this [Cloudflare Worker template](https://github.com/sterlingwes/decap-proxy).
Alternatively, [Decap Turbo](https://decapcms.org/turbo/) runs this proxy for you and also shields your GitHub or GitLab API from rate limits — no server to deploy or maintain.
---
# Git Gateway
Source: https://decapcms.org/docs/git-gateway-backend/
[Git Gateway](https://github.com/netlify/git-gateway) is a Netlify open source project that allows you to add editors to your site CMS without giving them direct write access to your GitHub or GitLab repository. (For Bitbucket repositories, use the [Bitbucket backend](https://decapcms.org/docs/bitbucket-backend/) instead.)
## Git Gateway with Netlify
The [Netlify Identity](https://www.netlify.com/docs/identity/) service can handle the authentication and provides a simple interface for user management. The Decap CMS [featured templates](https://decapcms.org/docs/start-with-a-template) are working examples of this backend.
To use it in your own project stored on GitHub or GitLab, follow these steps:
1. Head over to the [Netlify Identity docs](https://www.netlify.com/docs/identity) and follow the steps to get started.
2. Add the following lines to your Decap CMS `config.yml` file:
```yaml
backend:
name: git-gateway
```
## Reconnect after Changing Repository Permissions
If you change ownership on your repository, or convert a repository from public to private, you may need to reconnect Git Gateway with proper permissions. Find further instructions in the [Netlify Git Gateway docs](https://www.netlify.com/docs/git-gateway/#reconnect-after-changing-repository-permissions).
## Git Gateway without Netlify
You can use [Git Gateway](https://github.com/netlify/git-gateway) without Netlify by setting up your own Git Gateway server and connecting it with your own instance of [GoTrue](https://www.gotrueapi.org) (the open source microservice that powers Netlify Identity), or with any other identity service that can issue JSON Web Tokens (JWT).
To configure in Decap CMS, use the same `backend` settings in your Decap CMS `config.yml` file as described in Step 2 of the [Git Gateway with Netlify](https://decapcms.org/docs/git-gateway-backend/#git-gateway-with-netlify) instructions above.
## PKCE with custom Git-Gateway
3.8.3
To use a custom Git-Gateway implementation with PKCE authentication, use a configuration similar to the following:
```yaml
backend:
name: git-gateway
# Enables PKCE authentication with the git-gateway backend. After auth,
# sends the access_token for all requests to the git-gateway host.
auth_type: pkce
# The base OAuth2 URL. Here is an obfuscated AWS Cognito example.
base_url: https://your-cognito-instance.auth.us-east-1.amazoncognito.com
# If you need to customize the authorize or token endpoints for PKCE, do that here
#auth_endpoint: oauth2/authorize
#auth_token_endpoint: oauth2/token
# The OAuth2 client ID
app_id: your-oauth2-client-id
# The base URL of your custom git-gateway. Note that the last part of the path
# should be "bitbucket", "gitlab", or "github", so the implementation can automatically
# determine which backend API to use when making requests.
gateway_url: https://your.gitgateway.host/git-gateway/bitbucket/
# Override the Netlify git-gateway status check
status_endpoint: https://your.gitgateway.host/api/v2/components.json
# Optional: defaults to "master"
branch: main
```
---
# Azure
Source: https://decapcms.org/docs/azure-backend/
For repositories stored on [Azure](https://portal.azure.com), the `azure` backend allows CMS users to log in directly with their Azure account. Note that all users must have write access to your content repository for this to work.
In order to get Decap CMS working with Azure DevOps, you need a Tenant Id and an Application Id.
1. If you do not have an Azure account, [create one here](https://azure.microsoft.com/en-us/free/?WT.mc_id=A261C142F) and make sure to have a credit card linked to the account.
2. If you do not have an Azure Entra ID Tenant Id, [set one up here](https://learn.microsoft.com/en-us/entra/identity-platform/quickstart-create-new-tenant).
3. [Register an application with Azure Entra ID](https://learn.microsoft.com/en-us/entra/identity-platform/quickstart-register-app). Configure it as a Single tenant Web application and add a redirect URI (e.g. `http://localhost:8080/`)
4. Add the `Azure DevOps->user_impersonation` [permission](https://docs.microsoft.com/en-us/azure/active-directory/develop/quickstart-configure-app-access-web-apis#add-permissions-to-access-your-web-api) for the created application.
5. [Grant admin consent](https://docs.microsoft.com/en-us/azure/active-directory/develop/quickstart-configure-app-access-web-apis#admin-consent-button) for the application.
6. Under `Authentication->Implicit grant` enable [Access tokens](https://docs.microsoft.com/en-us/azure/active-directory/develop/access-tokens) for the application and click `Save`.
7. Verify your Azure DevOps organization is connected to the same directory as your tenant under: `https://dev.azure.com//_settings/organizationAad`
8. Add the following lines to your Decap CMS `config.yml` file:
```yaml
backend:
name: azure
repo: organization/project/repo # replace with actual path
tenant_id: tenantId # replace with your tenantId
app_id: appId # replace with your appId
```
### Limitations
1. Pagination is not supported so some endpoints might return missing data
2. Nested collections are partially supported as Azure doesn't allow [renaming and editing](https://docs.microsoft.com/en-us/rest/api/azure/devops/git/pushes/create?view=azure-devops-rest-6.1&source=docs#rename-a-file) in a single operation
---
# Bitbucket
Source: https://decapcms.org/docs/bitbucket-backend/
For repositories stored on [Bitbucket](https://bitbucket.org), the `bitbucket` backend allows CMS users to log in directly with their Bitbucket account. Note that all users must have write access to your content repository for this to work.
To enable it:
1. Follow the authentication provider setup steps in the [Netlify docs](https://www.netlify.com/docs/authentication-providers/#using-an-authentication-provider).
2. Add the following lines to your Decap CMS `config.yml` file:
```yaml
backend:
name: bitbucket
repo: owner-name/repo-name # Path to your Bitbucket repository
```
### Client-Side Implicit Grant (Bitbucket)
Bitbucket [stopped supporting the OAuth implicit grant](https://community.developer.atlassian.com/t/deprecation-notice-oauth-1-0-and-implicit-grant-flows-for-bitbucket-cloud/97520) on February 27, 2026, so `auth_type: implicit` no longer works. Use the authentication provider setup above instead.
---
# Gitea / Forgejo
Source: https://decapcms.org/docs/gitea-backend/
For repositories stored on [Gitea](https://gitea.com) or [Forgejo](https://forgejo.org) instances, the `gitea` backend allows CMS users to log in directly with their Gitea/Forgejo account. Note that all users must have push access to your content repository for this to work.
Forgejo instances, such as [Codeberg](https://codeberg.org), can also use the [`forgejo` backend](https://decapcms.org/docs/gitea-backend/#forgejo-backend), which adds the editorial workflow and open authoring.
*Note on supported versions*
* Only Gitea **1.20** and upwards is supported due to API limitations in previous versions
* Only Forgejo **1.21.4** and upwards is supported due to CORS functionality
* [CORS](https://forgejo.org/docs/latest/admin/config-cheat-sheet/#cors-cors) must be enabled and configured
## Authentication
With PKCE authorization, users can authenticate with Gitea or Forgejo directly from the client. To do this:
1. Create an OAuth2 application in your user or organization settings, or in the site administration panel of your Gitea or Forgejo instance.
2. For the **Redirect URIs**, enter the addresses where you access Decap CMS, for example, `https://www.mysite.com/admin/`.
3. Uncheck the **Confidential Client** checkbox. Decap CMS logs in from the browser and doesn't send a client secret, so login fails with `invalid empty client secret` when the application is confidential.
4. Copy the **Client ID** and add it to your `config.yml` file as `app_id`, along with the other options:
```yaml
backend:
name: gitea
repo: owner-name/repo-name # Path to your Gitea repository
app_id: your-client-id # The Client ID provided by Gitea
api_root: https://gitea.example.com/api/v1 # API URL of your Gitea instance
base_url: https://gitea.example.com # Root URL of your Gitea instance
# optional, defaults to master
# branch: main
```
The `gitea` backend doesn't support the [editorial workflow](https://decapcms.org/docs/editorial-workflows/). With `publish_mode: editorial_workflow`, the CMS shows a configuration error instead of loading. On Forgejo, use the `forgejo` backend for the editorial workflow.
## Forgejo backend
3.15
Use Decap CMS 3.16.2 or later for the editorial workflow: with some Forgejo versions, earlier releases don't list new entries. For open authoring with a contributor fork that has a different name than the repository, use 3.17.2 or later.
The `forgejo` backend supports the [editorial workflow](https://decapcms.org/docs/editorial-workflows/) and [open authoring](https://decapcms.org/docs/open-authoring/) on Forgejo instances. Create the OAuth2 application as described in [Authentication](https://decapcms.org/docs/gitea-backend/#authentication), then use a configuration similar to the following:
```yaml
backend:
name: forgejo
repo: owner-name/repo-name # Path to your Forgejo repository
app_id: your-client-id # The Client ID provided by Forgejo
api_root: https://codeberg.org/api/v1 # API URL of your Forgejo instance
# optional, defaults to main
# branch: main
publish_mode: editorial_workflow
```
It differs from the `gitea` backend in a few ways:
* `api_root` is required. Decap CMS builds the login URLs from it, so `base_url` and `auth_endpoint` aren't used.
* `branch` defaults to `main`.
* With the editorial workflow, Decap CMS tracks entry statuses with pull request labels (`decap-cms/draft`, `decap-cms/pending_review` and `decap-cms/pending_publish`) and creates them when they're missing. To change the `decap-cms/` prefix, set `cms_label_prefix`. With open authoring, contributors can't set labels, so no labels are used.
* Publishing an entry merges its pull request with a merge commit. `squash_merges` isn't supported.
* [Deploy preview links](https://decapcms.org/docs/deploy-preview-links/) aren't supported.
## Git Large File Storage (LFS)
Please note that the Gitea and Forgejo backends **do not** support [git-lfs](https://git-lfs.github.com/).
---
# GitHub
Source: https://decapcms.org/docs/github-backend/
For repositories stored on [GitHub](https://github.com), the `github` backend allows CMS users to log in directly with their GitHub account. Note that all users must have push access to your content repository for this to work.
Because GitHub [requires a server](https://github.com/decaporg/decap-cms/issues/663#issuecomment-335023723) for authentication, Netlify facilitates basic GitHub authentication.
If you'd rather not run an auth server or manage an OAuth app at all, [Decap Turbo](https://decapcms.org/turbo/) provides hosted GitHub authentication along with a request proxy that shields your GitHub API rate limit.
To enable basic GitHub authentication:
1. Follow the authentication provider setup steps in the [Netlify docs](https://www.netlify.com/docs/authentication-providers/#using-an-authentication-provider).
2. Add the following lines to your Decap CMS `config.yml` file:
```yaml
backend:
name: github
repo: owner-name/repo-name # Path to your GitHub repository
# optional, defaults to master
# branch: main
```
## Specifying a status for deploy previews
The GitHub backend supports [deploy preview links](https://decapcms.org/docs/deploy-preview-links). Decap CMS checks the
`context` of a commit's [statuses](https://help.github.com/articles/about-status-checks/) and infers
one that seems to represent a deploy preview. If you need to customize this behavior, you can
specify which context to look for using `preview_context`:
```yaml
backend:
name: github
repo: my/repo
preview_context: my-provider/deployment
```
The above configuration would look for the status whose `"context"` is `"my-provider/deployment"`.
## Git Large File Storage (LFS)
Please note that the GitHub backend **does not** support [git-lfs](https://git-lfs.github.com/), see [this issue](https://github.com/decaporg/decap-cms/issues/1206) for more information.
## GraphQL API
**Note: not compatible with `git-gateway`**
GraphQL allows to retrieve data using less individual API requests compared to a REST API. GitHub's GraphQL API still does not support all mutations necessary to completely replace their REST API, so this feature only calls the new GraphQL API where possible.
You can use the GraphQL API for the GitHub backend by setting `backend.use_graphql` to `true` in your CMS config:
```yml
backend:
name: github
repo: owner/repo # replace this with your repo info
use_graphql: true
```
Learn more about the benefits of GraphQL in the [GraphQL docs](https://graphql.org).
---
# GitLab
Source: https://decapcms.org/docs/gitlab-backend/
For repositories stored on [GitLab](https://gitlab.com), the `gitlab` backend allows CMS users to log in directly with their GitLab account. Note that all users must have push access to your content repository for this to work.
**Note:** GitLab default branch is protected by default, thus typically requires `maintainer` permissions in order for users to have push access.
**Looking for less setup?** [Decap Turbo](https://decapcms.org/turbo/) handles GitLab authentication and API rate-limit shielding for you, so you don't need to register an OAuth application or choose between the flows below.
The GitLab API allows for three types of OAuth2 flows:
* [Authorization Code Flow](https://docs.gitlab.com/ce/api/oauth2.html#authorization-code-flow), which works much like the GitHub OAuth flow described above.
* [Authorization Code with PKCE Flow](https://docs.gitlab.com/ce/api/oauth2.html#authorization-code-with-proof-key-for-code-exchange-pkce), which operates *without* the need for an authentication server.
* (DEPRECATED [Implicit Grant Flow](https://docs.gitlab.com/ce/api/oauth2.html#implicit-grant-flow), which operates *without* the need for an authentication server.
## Authorization Code Flow with Netlify
When using GitLab's Authorization Code Flow for authentication, you can use Netlify to handle the server-side authentication requests.
To enable it:
1. Follow the [GitLab docs](https://docs.gitlab.com/ee/integration/oauth_provider.html#adding-an-application-through-the-profile) to add your Decap CMS instance as an OAuth application. For the **Redirect URI**, enter `https://api.netlify.com/auth/done`, and check the box for `api` scope.
2. Follow the [Netlify docs](https://www.netlify.com/docs/authentication-providers/#using-an-authentication-provider) to add your new GitLab Application ID and Secret to your Netlify site dashboard.
3. In your repository, add the following lines to your Decap CMS `config.yml` file:
```yaml
backend:
name: gitlab
repo: owner-name/repo-name # Path to your GitLab repository
```
## Client-Side PKCE Authorization
With GitLab's PKCE authorization, users can authenticate with GitLab directly from the client. To do this:
1. Follow the [GitLab docs](https://docs.gitlab.com/ee/integration/oauth_provider.html#adding-an-application-through-the-profile) to add your Decap CMS instance as an OAuth application and uncheck the **Confidential** checkbox. For the **Redirect URI**, enter the address where you access Decap CMS, for example, `https://www.mysite.com/admin/`. For scope, select `api`.
2. GitLab gives you an **Application ID**. Copy this ID and enter it in your Decap CMS `config.yml` file, along with the following settings:
```yaml
backend:
name: gitlab
repo: owner-name/repo-name # Path to your GitLab repository
auth_type: pkce # Required for pkce
app_id: your-app-id # Application ID from your GitLab settings
```
You can also use PKCE Authorization with a self-hosted GitLab instance. This requires adding `api_root`, `base_url`, and `auth_endpoint` fields:
```yaml
backend:
name: gitlab
repo: owner-name/repo-name # Path to your GitLab repository
auth_type: pkce # Required for pkce
app_id: your-app-id # Application ID from your GitLab settings
api_root: https://my-hosted-gitlab-instance.com/api/v4
base_url: https://my-hosted-gitlab-instance.com
auth_endpoint: oauth/authorize
```
**Note:** In all cases, GitLab also provides you with a client secret. You should *never* store this in your repo or reveal it in the client.
## GraphQL API
**Note: not compatible with `git-gateway`**
GraphQL allows to retrieve data using less individual API requests compared to a REST API.
The current implementation uses the GraphQL API in specific cases, where using the REST API can be slow and lead to exceeding GitLab's rate limits. As we receive feedback and extend the feature, we'll migrate more functionality to the GraphQL API.
You can enable the GraphQL API for the GitLab backend by setting `backend.use_graphql` to `true` in your CMS config:
```yml
backend:
name: gitlab
repo: owner/repo # replace this with your repo info
use_graphql: true
# optional, defaults to 'https://gitlab.com/api/graphql'. Can be used to configure a self hosted GitLab instance.
graphql_api_root: https://my-self-hosted-gitlab.com/api/graphql
```
Learn more about the benefits of GraphQL in the [GraphQL docs](https://graphql.org).
## (DEPRECATED) Client-Side Implicit Grant
**Note:** This method is not recommended and will be deprecated both [by GitLab](https://gitlab.com/gitlab-org/gitlab/-/issues/288516) and [in the OAuth 2.1 specification](https://oauth.net/2.1/) in the future.
With GitLab's Implicit Grant, users can authenticate with GitLab directly from the client. To do this:
1. Follow the [GitLab docs](https://docs.gitlab.com/ee/integration/oauth_provider.html#adding-an-application-through-the-profile) to add your Decap CMS instance as an OAuth application and uncheck the **Confidential** checkbox. For the **Redirect URI**, enter the address where you access Decap CMS, for example, `https://www.mysite.com/admin/`. For scope, select `api`.
2. GitLab gives you an **Application ID**. Copy this ID and enter it in your Decap CMS `config.yml` file, along with the following settings:
```yaml
backend:
name: gitlab
repo: owner-name/repo-name # Path to your GitLab repository
auth_type: implicit # Required for implicit grant
app_id: your-app-id # Application ID from your GitLab settings
```
You can also use Implicit Grant with a self-hosted GitLab instance. This requires adding `api_root`, `base_url`, and `auth_endpoint` fields:
```yaml
backend:
name: gitlab
repo: owner-name/repo-name # Path to your GitLab repository
auth_type: implicit # Required for implicit grant
app_id: your-app-id # Application ID from your GitLab settings
api_root: https://my-hosted-gitlab-instance.com/api/v4
base_url: https://my-hosted-gitlab-instance.com
auth_endpoint: oauth/authorize
```
---
# Test
Source: https://decapcms.org/docs/test-backend/
You can use the `test-repo` backend to try out Decap CMS without connecting to a Git repo. With this backend, you can write and publish content normally, but any changes will disappear when you reload the page. This backend powers the Decap CMS [demo site](https://demo.decapcms.org/).
**Note:** The `test-repo` backend can't access your local file system, nor does it connect to a Git repo, thus you won't see any existing files while using it.
To enable this backend, add the following lines to your Decap CMS `config.yml` file:
```yaml
backend:
name: test-repo
```
---
# External OAuth Clients
Source: https://decapcms.org/docs/external-oauth-clients/
If you would like to facilitate your own OAuth authentication rather than use Netlify's service or a client side flow like implicit or PKCE, you can use one of the community-maintained projects below. Feel free to hit the "Edit this page" button if you'd like to add yours!
| Author | Supported Git hosts | Language(s)/Platform(s) | Link |
| ------------------------------------------------------------ | --------------------------------- | ----------------------------------------- | -------------------------------------------------------------------------------------------------------------------------------------------------------------- |
| [@vencax](https://github.com/vencax) | GitHub, GitHub Enterprise | Node.js | [Repo](https://github.com/vencax/netlify-cms-github-oauth-provider) |
| [@igk1972](https://github.com/igk1972) | GitHub, GitHub Enterprise | Go | [Repo](https://github.com/igk1972/netlify-cms-oauth-provider-go) |
| [@davidejones](https://github.com/davidejones) | GitHub, GitHub Enterprise | Python | [Repo](https://github.com/davidejones/netlify-cms-oauth-provider-python) |
| [@marcelkornblum](https://github.com/marcelkornblum) | GitHub, GitHub Enterprise | Google AppEngine with Python | [Repo](https://github.com/signal-noise/netlify-cms-oauth-provider-python-appengine) |
| [@marksteele](https://github.com/marksteele) | GitHub, GitHub Enterprise | Serverless | [Repo](https://github.com/marksteele/netlify-serverless-oauth2-backend), [Blog](https://www.control-alt-del.org/blog/serverless-blog-howto/) |
| [@Herohtar](https://github.com/Herohtar) | GitHub, GitHub Enterprise | Firebase Cloud Function | [Repo](https://github.com/Herohtar/netlify-cms-oauth-firebase) |
| [@abcalderon3](https://github.com/abcalderon3) | GitHub, GitHub Enterprise | Google Cloud Function with Python | [Repo](https://github.com/abcalderon3/netlify-cms-oauth-client-cloud-function) |
| [@TSV-Zorneding-1920](https://github.com/TSV-Zorneding-1920) | GitHub, GitHub Enterprise | PHP | [Repo](https://github.com/TSV-Zorneding-1920/netlify-cms-oauth-provider-php) |
| [@bericp1](https://github.com/bericp1) | GitHub, GitHub Enterprise | Node.js, Vercel Serverless | [Repo](https://github.com/bericp1/netlify-cms-oauth-provider-node) |
| [@mcdeck](https://github.com/mcdeck) | GitHub, GitHub Enterprise, GitLab | PHP | [Repo](https://github.com/mcdeck/netlify-cms-oauth-provider-php), [Blog](https://www.van-porten.de/blog/2021/01/netlify-auth-provider/) |
| [@deepbass](https://github.com/deepbass) | GitHub, GitHub Enterprise | Node.js Azure Functions | [Repo](https://github.com/deepbass/serverless-cms-azure), [Blog](https://www.danielbass.dev/building-a-serverless-cms-on-azure-with-netlify-cms-and-gatsby/) |
| [@adrian-ub](https://github.com/adrian-ub) | GitHub, GitLab | TypeScript | [Repo](https://github.com/ublabs/netlify-cms-oauth) |
| [@hatappo](https://github.com/hatappo) | GitHub | ClojureScript, Firebase Functions | [Repo](https://github.com/hatappo/netlifycms-oauth-server) |
| [@njfamirm](https://github.com/njfamirm) | GitHub | Node.js, Typescript | [Repo](https://github.com/njfamirm/decap-cms-github-backend), [Blog](https://medium.com/@njfamirm/a-step-by-step-guide-to-self-hosting-decap-cms-5425ab44abca) |
| [@augustogunsch](https://github.com/augustogunsch) | GitHub, GitHub Enterprise, GitLab | Rust | [Repo](https://github.com/augustogunsch/decap_oauth) |
| [@daisuke-awaji](https://github.com/daisuke-awaji) | GitHub | TypeScript, AWS Lambda, Amazon APIGateway | [Repo](https://github.com/daisuke-awaji/decapcms-lambda-oauth2-backend) |
| [@alukovenko](https://github.com/alukovenko/) | GitHub | Go | [Repo](https://github.com/alukovenko/decapcms-oauth2) |
| [@BTx123](https://github.com/BTx123) | GitHub, GitHub Enterprise, GitLab | Firebase V2 Cloud Function | [Repo](https://github.com/BTx123/decap-cms-oauth-firebase) |
| [@i40west](https://github.com/i40west) | GitHub | Cloudflare Pages | [Repo](https://github.com/i40west/netlify-cms-cloudflare-pages) |
| [@nuzulul](https://github.com/nuzulul) | GitHub | Google Apps Script | [Repo](https://github.com/nuzulul/decap-cms-google-apps-script) |
| [@loteoo](https://github.com/loteoo) | GitHub, Gitlab | Node.js | [Github](https://github.com/decapbridge),[Website](https://decapbridge.com/) |
Check each project's documentation for instructions on installation and usage.
---
# Decap Proxy: Work With a Local Repository
Source: https://decapcms.org/docs/decap-proxy/
You can connect Decap CMS to a local directory, instead of working with a remote Git repository.
1. Navigate to a local directory configured with the CMS.
2. Add the top-level property `local_backend` configuration to your `config.yml`:
```yaml
# when using the default proxy server port
local_backend: true
backend:
name: git-gateway
```
3. Run `npx decap-server` from the root directory of the above repository. It needs Node.js 20 or later.
* If the default port (8081) is in use, the proxy server won't start, and you will see an error message. In this case, configure the port number.
4. Start your local development server (e.g. run `gatsby develop`).
5. Open `http://localhost:/admin` to verify that you can administer your content locally. Replace `` with the port of your local development server. For example, Gatsby's default port is `8000`.
**Limitation:** `editorial_workflow` works only when the proxy server runs in `git` mode. See [`MODE`](https://decapcms.org/docs/decap-proxy/#environment-variables) below.
## Options
By default, the proxy server runs on port `8081`, accepts connections only from the computer it runs on, and allows requests only from local development origins that match `/^https?:\/\/(localhost|127\.0\.0\.1)(:\d+)?$/`. You can customize these settings with these options.
The proxy server has no authentication: anyone who can reach it can read and write files in your repository. The origin default was introduced in decap-server@3.8.0, and the local-only default in decap-server@3.11.6. Before, the server accepted requests from any origin and listened on every network address.
#### Environment Variables
* **`PORT`** defines the port you'd like the proxy server to use. Running `PORT=8082 npx decap-server` starts the server on port `8082` rather than the default `8081`.
* **`BIND_HOST`** sets the network address the proxy server listens on. By default it listens on `127.0.0.1` and `::1`, so only the computer it runs on can connect. Set it to `0.0.0.0` to accept connections from other devices, but only on a network you trust, such as inside a container. 3.9 The local-only default arrived in decap-server@3.11.6; before, the server listened on every address.
* **`ORIGIN`** allows overriding the default local-only CORS origin pattern (`/^https?:\/\/(localhost|127\.0\.0\.1)(:\d+)?$/`) with a specific origin. Running `ORIGIN=https://example.com npx decap-server` changes the HTTP header in responses to `Access-Control-Allow-Origin: https://example.com`, and the server refuses requests that browsers send from any other origin. 3.9
* **`MODE`** is `fs` (the default) or `git`. In `fs` mode the proxy server reads and writes files in your repository without committing them. In `git` mode it commits every change to your local repository, and supports the [editorial workflow](https://decapcms.org/docs/editorial-workflows/) by keeping unpublished entries on local branches. Each commit includes every change in the repository, not only the CMS's own, so commit or stash your work before you edit content in `git` mode.
* **`GIT_REPO_DIRECTORY`** is the path of the repository the proxy server works on. Defaults to the directory it runs in.
* **`LOG_LEVEL`** sets how much the proxy server logs, for example `debug` for more detail or `warn` for less. Defaults to `info`.
You can define them in 2 ways:
1. Create a `.env` file in the project's root folder and add these optional variables:
```ini
PORT=8082
MODE=git
ORIGIN=http://my-site.test:1313
```
2. Set these variables before the shell command, for example:
```bash
PORT=8082 npx decap-server
```
If the site runs on a host name other than `localhost` or `127.0.0.1`, as in the `.env` example above, also add it to `allowed_hosts` in `local_backend`, as shown [below](https://decapcms.org/docs/decap-proxy/#custom-port-and-host-for-the-backend-url).
### Custom Port and Host for the Backend URL
Update the `local_backend` object in `config.yml` and specify a `url` property to use your custom port number.
```yaml
backend:
name: git-gateway
local_backend:
# when using a custom proxy server port
url: http://localhost:8082/api/v1
# when accessing the local site from a host other than 'localhost' or '127.0.0.1'
allowed_hosts: ['192.168.0.1']
```
The proxy server only accepts connections from the computer it runs on. To open the CMS from another device, such as a phone on the same network, point `url` at the computer's network address, and start the proxy server with `BIND_HOST` and `ORIGIN` set to match:
```bash
BIND_HOST=0.0.0.0 ORIGIN=http://192.168.0.1:1313 npx decap-server
```
`ORIGIN` allows a single origin, so open the CMS through `http://192.168.0.1:1313` on this computer too.
---
# Configuration Options
Source: https://decapcms.org/docs/configuration-options/
## Configuration File
All configuration options for Decap CMS are specified in a `config.yml` file, in the folder where you access the editor UI (usually in the `/admin` folder).
Alternatively, you can specify a custom config file using a link tag:
```html
```
To see working configuration examples, you can [start from a template](https://decapcms.org/docs/start-with-a-template) or check out the [CMS demo site](https://demo.decapcms.org). (No login required: click the login button and the CMS will open.) You can refer to the demo [configuration code](https://github.com/decaporg/decap-cms/blob/master/dev-test/config.yml) to see how each option was configured.
You can find details about all configuration options below. Note that [YAML syntax](https://en.wikipedia.org/wiki/YAML#Basic_components) allows lists and objects to be written in block or inline style, and the code samples below include a mix of both.
## Backend
*This setting is required.*
The `backend` option specifies how to access the content for your site, including authentication. Full details and code samples can be found in [Backends](https://decapcms.org/docs/backends-overview).
**Note**: no matter where you access Decap CMS — whether running locally, in a staging environment, or in your published site — it will always fetch and commit files in your hosted repository (for example, on GitHub), on the branch you configured in your Decap CMS config.yml file. This means that content fetched in the admin UI will match the content in the repository, which may be different from your locally running site. It also means that content saved using the admin UI will save directly to the hosted repository, even if you're running the UI locally or in staging. If you want to have your local CMS write to a local repository, try the `local_backend` setting, [currently in beta](https://decapcms.org/docs/working-with-a-local-git-repository/).
### Decap Turbo options
The `turbo-github` and `turbo-gitlab` backends take one required option plus a few of their own. See [Connecting a site](https://decapcms.org/docs/turbo-connecting-a-site/).
```yaml
backend:
name: turbo-github # or turbo-gitlab
turbo_site_id: your-site-id
branch: main # optional; overrides the branch on the site row
deploy_status: false # optional; turbo-github only
```
- `turbo_site_id` **(required)** — the site's UUID from the Turbo dashboard. Everything else the backend needs is fetched from the control plane at load time.
- `branch` — optional. Overrides the branch configured on the site, so several deploys of one repo can each edit their own.
- `repo` — **ignored**. The value on the site row is authoritative.
- `deploy_status` — `turbo-github` only. `false` disables [deploy status](https://decapcms.org/docs/turbo-deploy-status/); an object with `notifications` and `page` disables either surface; `primary_target` names the host allowed to notify.
### Commit Message Templates
You can customize the templates used by Decap CMS to generate commit messages by setting the `commit_messages` option under `backend` in your Decap CMS `config.yml`.
Template tags wrapped in curly braces will be expanded to include information about the file changed by the commit. For example, `{{path}}` will include the full path to the file changed.
Setting up your Decap CMS `config.yml` to recreate the default values would look like this:
```yaml
backend:
commit_messages:
create: Create {{collection}} “{{slug}}”
update: Update {{collection}} “{{slug}}”
delete: Delete {{collection}} “{{slug}}”
uploadMedia: Upload “{{path}}”
deleteMedia: Delete “{{path}}”
openAuthoring: '{{message}}'
```
Decap CMS generates the following commit types:
| Commit type | When is it triggered? | Available template tags |
| --------------- | ---------------------------------------- | ----------------------------------------------------------- |
| `create` | A new entry is created | `slug`, `path`, `collection`, `author-login`, `author-name` |
| `update` | An existing entry is changed | `slug`, `path`, `collection`, `author-login`, `author-name` |
| `delete` | An existing entry is deleted | `slug`, `path`, `collection`, `author-login`, `author-name` |
| `uploadMedia` | A media file is uploaded | `path`, `author-login`, `author-name` |
| `deleteMedia` | A media file is deleted | `path`, `author-login`, `author-name` |
| `openAuthoring` | A commit is made via a forked repository | `message`, `author-login`, `author-name` |
Template tags produce the following output:
* `{{slug}}`: the url-safe filename of the entry changed
* `{{collection}}`: the `label_singular` or `label` of the collection containing the entry changed
* `{{path}}`: the full path to the file changed
* `{{message}}`: the relevant message based on the current change (e.g. the `create` message when an entry is created)
* `{{author-login}}`: the login/username of the author
* `{{author-name}}`: the full name of the author (might be empty based on the user's profile)
## Publish Mode
By default, all entries created or edited in the Decap CMS are committed directly into the main repository branch. The `publish_mode` option allows you to enable [Editorial Workflow](https://decapcms.org/docs/editorial-workflows/) mode for more control over the content publishing phases. You can enable the Editorial Workflow with the following line in your Decap CMS `config.yml` file:
```yaml
# /admin/config.yml
publish_mode: editorial_workflow
```
Allowed values for `publish_mode` are: `simple`, `editorial_workflow` or empty string (same as 'simple')
## Media and Public Folders
Decap CMS users can upload files to your repository using the Media Gallery. The following settings specify where these files are saved, and where they can be accessed on your built site.
### Media Folder
*This setting is required.*
The `media_folder` option specifies the folder path where uploaded files should be saved, relative to the base of the repo.
```yaml
media_folder: "static/images/uploads"
```
### Public Folder
The `public_folder` option specifies the folder path where the files uploaded by the media library will be accessed, relative to the base of the built site. For fields controlled by \[file] or \[image] widgets, the value of the field is generated by prepending this path to the filename of the selected file. Defaults to the value of `media_folder`, with an opening `/` if one is not already included.
```yaml
public_folder: "/images/uploads"
```
Based on the settings above, if a user used an image widget field called `avatar` to upload and select an image called `philosoraptor.png`, the image would be saved to the repository at `/static/images/uploads/philosoraptor.png`, and the `avatar` field for the file would be set to `/images/uploads/philosoraptor.png`.
This setting can be set to an absolute URL e.g. `https://netlify.com/media` should you wish, however in general this is not advisable as content should have relative paths to other content.
## Media Processing
The `media_processing` setting controls image transformations that run in the browser before Decap CMS saves uploads through the configured backend or asset store integration.
Image transformations apply to JPEG, PNG, and WebP files uploaded directly through Decap CMS. Unsupported image types, such as GIF and SVG, are uploaded unchanged.
`media_processing` accepts the following options. All options are optional unless marked required.
* `enabled` (required): enables or disables image processing.
* `format`: converts supported uploads to another output format.
* `enabled`: enables or disables format conversion.
* `default`: output format. Accepted values are `jpeg` and `webp`.
* `quality`: output quality from `1` to `100`. This is most useful for JPEG and WebP output.
* `strip_metadata`: when set to `true`, removes image metadata by re-encoding the uploaded image.
* `width`: output width in pixels. Set to `null` or omit it to avoid forcing a width.
* `height`: output height in pixels. Set to `null` or omit it to avoid forcing a height.
* `aspect_ratio`: optional crop ratio. Accepted values are positive numbers or ratio strings such as `16x9`, `16:9`, or `16_9`.
**Example:**
```yaml
media_processing:
enabled: true
format:
enabled: true
default: webp
quality: 80
strip_metadata: true
width: 1600
height: null
aspect_ratio: 16x9
```
The example above saves supported uploads as WebP, compresses them at 80% quality, strips metadata, center-crops them to 16:9, and resizes them to 1600 x 900.
You can also add `media_processing` to an image field. Field-level processing overrides the top-level `media_processing` configuration and is useful when a specific image field needs a different output format, dimensions, quality, or aspect ratio.
**Example:**
```yaml
collections:
- name: posts
label: Posts
folder: content/posts
fields:
- label: Featured Image
name: image
widget: image
media_processing:
enabled: true
format:
enabled: true
default: jpeg
quality: 85
width: 1200
height: null
aspect_ratio: 3x2
```
If you provide `width` without `height`, Decap CMS calculates the height from `aspect_ratio` or from the original image ratio. If you provide `height` without `width`, Decap CMS calculates the width the same way.
If you provide both `width` and `height`, Decap CMS outputs those exact dimensions. If you also provide `aspect_ratio`, the source image is center-cropped to that ratio before resizing.
If you provide `aspect_ratio` without dimensions, Decap CMS center-crops the source image to that ratio and keeps the cropped source size.
When format conversion is enabled, Decap CMS updates the uploaded file extension to match the output format. For example, `hero.png` becomes `hero.webp` when `format.default` is `webp`, and `hero.png` becomes `hero.jpg` when `format.default` is `jpeg`.
When format conversion is disabled or omitted, the output file keeps the original supported image format.
## Media Library
Media library integrations are configured via the `media_library` property, and its value should be an object with at least a `name` property. A `config` property can also be used for options that should be passed to the library in use.
**Example:**
```yaml
media_library:
name: uploadcare
config:
publicKey: demopublickey
```
## Site URL
The `site_url` setting should provide a URL to your published site. May be used by the CMS for various functionality. Used together with a collection's `preview_path` to create links to live content.
**Example:**
```yaml
site_url: https://your-site.com
```
## Display URL
When the `display_url` setting is specified, the CMS UI will include a link in the fixed area at the top of the page, allowing content authors to easily return to your main site. The text of the link consists of the URL with the protocol portion (e.g., `https://your-site.com`).
Defaults to `site_url`.
**Example:**
```yaml
display_url: https://your-site.com
```
## Custom Logo
When **`logo`** setting is specified, the CMS UI will change the logo displayed at the top of the login page, allowing you to brand the CMS with your own logo. It accepts these properties:
- **`src`**: (*required*) URL to an image file
- **`show_in_header`**: (*optional*) if set to `true`, the logo will also be shown in the header of the CMS when logged in. 3.8
**Example:**
```yaml
logo:
src: https://your-site.com/images/logo.svg
show_in_header: true
# This also works, but it's deprecated. Same as logo.src
logo_url: https://your-site.com/images/logo.svg
```
## Locale
The CMS locale.
Defaults to `en`.
Other languages than English must be registered manually.
**Example**
In your `config.yml`:
```yaml
locale: 'de'
```
And in your custom JavaScript code:
```js
import CMS from 'decap-cms-app';
import { de } from 'decap-cms-locales';
CMS.registerLocale('de', de);
```
When a translation for the selected locale is missing the English one will be used.
The available locales are `bg`, `ca`, `cs`, `da`, `de`, `en`, `es`, `fa`, `fr`, `gr`, `he`, `hr`, `hu`, `it`, `ja`, `ko`, `lt`, `mk`, `nb_no`, `nl`, `nn_no`, `pl`, `pt`, `ro`, `ru`, `sk`, `sl`, `sr_Cyrl`, `sv`, `th`, `tr`, `ua`, `uk`, `vi`, `zh_Hans` and `zh_Hant`. To translate the CMS into another language, register your own phrases with `CMS.registerLocale`, using the [English locale](https://github.com/decaporg/decap-cms/blob/main/packages/decap-cms-locales/src/en/index.js) as a template.
> When importing `decap-cms` all locales are registered by default (so you only need to update your `config.yml`).
## Show Preview Links
[Deploy preview links](https://decapcms.org/docs/deploy-preview-links) can be disabled by setting `show_preview_links` to `false`.
**Example:**
```yaml
show_preview_links: false
```
## Search
The search functionally requires loading all collection(s) entries, which can exhaust rate limits on large repositories.
It can be disabled by setting the top level `search` property to `false`.
Defaults to `true`.
**Example:**
```yaml
search: false
```
## Slug Type
The `slug` option allows you to change how filenames for entries are created and sanitized. It also applies to filenames of media inserted via the default media library.\
For modifying the actual data in a slug, see the per-collection option below.
`slug` accepts multiple options:
* `encoding`
* `unicode` (default): Sanitize filenames (slugs) according to [RFC3987](https://tools.ietf.org/html/rfc3987) and the [WHATWG URL spec](https://url.spec.whatwg.org/). This spec allows non-ASCII (or non-Latin) characters to exist in URLs.
* `ascii`: Sanitize filenames (slugs) according to [RFC3986](https://tools.ietf.org/html/rfc3986). The only allowed characters are (0-9, a-z, A-Z, `_`, `-`, `~`).
* `clean_accents`: Set to `true` to remove diacritics from slug characters before sanitizing. This is often helpful when using `ascii` encoding.
* `sanitize_replacement`: The replacement string used to substitute unsafe characters, defaults to `-`.
**Example**
```yaml
slug:
encoding: "ascii"
clean_accents: true
sanitize_replacement: "_"
```
## Issue Reports
When an error occurs in the CMS, users are presented with an option to report the issue. By default, this links to the Decap CMS GitHub repository. You can customize this URL to point to your own issue tracker using the `issue_reports` setting. If you are using a non-GitHub URL, you may want to [create a custom locale](https://decapcms.org/docs/configuration-options/#locale) and update the following translation key: `ui.errorBoundary.reportIt`.
**Example:**
```yaml
issue_reports:
url: https://github.com/your-org/your-repo/issues/new
# or
# url: https://example.com/contact-support
```
## Collections
*This setting is required.*
The `collections` setting is the heart of your Decap CMS configuration, as it determines how content types and editor fields in the UI generate files and content in your repository. Each collection you configure displays in the left sidebar of the Content page of the editor UI, in the order they are entered into your Decap CMS `config.yml` file.
`collections` accepts a list of collection objects, each with the following options:
* `name` (required): unique identifier for the collection, used as the key when referenced in other contexts (like the [relation widget](https://decapcms.org/docs/widgets/#relation))
* `identifier_field`: see detailed description below
* `label`: label for the collection in the editor UI; defaults to the value of `name`
* `label_singular`: singular label for certain elements in the editor; defaults to the value of `label`
* `description`: optional text, displayed below the label when viewing a collection
* `files` or `folder` (requires one of these): specifies the collection type and location; details in [File Collections](https://decapcms.org/docs/collection-file) and [Folder Collections](https://decapcms.org/docs/collection-folder)
* `filter`: optional filter for `folder` collections; details in [Folder Collections](https://decapcms.org/docs/collection-folder)
* `create`: for `folder` collections only; `true` allows users to create new items in the collection; defaults to `false`
* `limit`: for `folder` collections only; the maximum number of entries in the collection, counting unpublished entries in the editorial workflow. Once the collection has that many entries, saving a new one fails and the CMS hides the buttons for creating entries. No limit by default. 3.15
* `publish`: for `publish_mode: editorial_workflow` only; `false` hides UI publishing controls for a collection; defaults to `true`
* `hide`: `true` hides a collection in the CMS UI; defaults to `false`. Useful when using the relation widget to hide referenced collections.
* `delete`: `false` prevents users from deleting items in a collection; defaults to `true`
* `extension`: see detailed description below
* `format`: see detailed description below
* `frontmatter_delimiter`: see detailed description under `format`
* `slug`: see detailed description below
* `preview_path`: see detailed description below
* `preview_path_date_field`: see detailed description below
* `preview_path_preserve_slashes`: see detailed description below
* `fields` (required): see detailed description below
* `editor`: see detailed description below
* `summary`: see detailed description below
* `sortable_fields`: see detailed description below
* `view_filters`: see detailed description below
* `view_groups`: see detailed description below
The last few options require more detailed information.
### `identifier_field`
Decap CMS expects every entry to provide a field named `"title"` that serves as an identifier for the entry. The identifier field serves as an entry's title when viewing a list of entries, and is used in [slug](https://decapcms.org/docs/configuration-options/#slug) creation. If you would like to use a field other than `"title"` as the identifier, you can set `identifier_field` to the name of the other field.
**Example**
```yaml
collections:
- name: posts
identifier_field: name
```
### `extension` and `format`
These settings determine how collection files are parsed and saved. Both are optional—Decap CMS will attempt to infer your settings based on existing items in the collection. If your collection is empty, or you'd like more control, you can set these fields explicitly.
`extension` determines the file extension searched for when finding existing entries in a folder collection and it determines the file extension used to save new collection items. It accepts the following values: `yml`, `yaml`, `toml`, `json`, `md`, `markdown`, `html`.
You may also specify a custom `extension` not included in the list above, as long as the collection files can be parsed and saved in one of the supported formats below.
`format` determines how collection files are parsed and saved. It will be inferred if the `extension` field or existing collection file extensions match one of the supported extensions above. It accepts the following values:
* `yml` or `yaml`: parses and saves files as YAML-formatted data files; saves with `yml` extension by default
* `toml`: parses and saves files as TOML-formatted data files; saves with `toml` extension by default
* `json`: parses and saves files as JSON-formatted data files; saves with `json` extension by default
* `frontmatter`: parses files and saves files with data frontmatter followed by an unparsed body text (edited using a `body` field); saves with `md` extension by default; default for collections that can't be inferred. Collections with `frontmatter` format (either inferred or explicitly set) can parse files with frontmatter in YAML, TOML, or JSON format. However, they will be saved with YAML frontmatter.
* `yaml-frontmatter`: same as the `frontmatter` format above, except frontmatter will be both parsed and saved only as YAML, followed by unparsed body text. The default delimiter for this option is `---`.
* `toml-frontmatter`: same as the `frontmatter` format above, except frontmatter will be both parsed and saved only as TOML, followed by unparsed body text. The default delimiter for this option is `+++`.
* `json-frontmatter`: same as the `frontmatter` format above, except frontmatter will be both parsed and saved as JSON, followed by unparsed body text. The default delimiter for this option is `{` `}`.
JavaScript front matter, which opens with `---js` or `---javascript`, isn't supported by any format. Decap CMS doesn't run it: such a file loads with empty fields, including the body, and the error is logged to the browser console. Saving it from the CMS replaces the whole file, so convert its front matter to YAML, TOML or JSON first. 3.17.2
### `frontmatter_delimiter`
If you have an explicit frontmatter format declared, this option allows you to specify a custom delimiter like `~~~`. If you need different beginning and ending delimiters, you can use an array like `["(", ")"]`.
### `slug`
For folder collections where users can create new items, the `slug` option specifies a template for generating new filenames based on the entry's date and `title` field. (This means that all collections with `create: true` must have a `title` field (a different field can be used via [`identifier_field`](https://decapcms.org/docs/configuration-options/#identifier_field)).
The slug template can also reference a field value by name, eg. `{{title}}`. If a field name conflicts with a built in template tag name - for example, if you have a field named `slug`, and would like to reference that field via `{{slug}}`, you can do so by adding the explicit `fields.` prefix, eg. `{{fields.slug}}`.
**Available template tags:**
* Any field can be referenced by wrapping the field name in double curly braces, eg. `{{author}}`
* `{{slug}}`: a url-safe version of the `title` field (or identifier field) for the file
* `{{year}}`: 4-digit year of the entry date
* `{{month}}`: 2-digit month of the entry date
* `{{day}}`: 2-digit day of the month of the entry date
* `{{hour}}`: 2-digit hour of the entry date
* `{{minute}}`: 2-digit minute of the entry date
* `{{second}}`: 2-digit second of the entry date
The entry date comes from the entry's date field: the first field with the `datetime` widget named `date`, `publishDate` or `publish_date`. If the collection has no such field, or the field is empty, the date and time of the first save is used instead. The date tags are in UTC. The same date is used for the collection's `path` template. 3.10
The filename is generated when the entry is first saved. Changing the date or title later doesn't rename the file. Generated slugs are shortened to at most 200 bytes, or fewer when the collection name is long, so that the editorial workflow's branch name stays valid. 3.17
Template tags in `slug` accept the same [transformations](https://decapcms.org/docs/summary-strings/) as summary strings. For example, `{{title | truncate(50)}}` keeps only the first 50 characters of the title. 3.13
**Example:**
```yaml
slug: "{{year}}-{{month}}-{{day}}_{{slug}}"
```
**Example using field names:**
```yaml
slug: "{{year}}-{{month}}-{{day}}_{{title}}_{{some_other_field}}"
```
**Example using field name that conflicts with a template tag:**
```yaml
slug: "{{year}}-{{month}}-{{day}}_{{fields.slug}}"
```
**Example shortening long titles:**
```yaml
slug: "{{year}}-{{month}}-{{day}}_{{title | truncate(50)}}"
```
### `preview_path`
A string representing the path where content in this collection can be found on the live site. This allows deploy preview links to direct to a specific piece of content rather than the site root of a deploy preview.
**Available template tags:**
Template tags are the same as those for [slug](https://decapcms.org/docs/configuration-options/#slug), with the following exceptions:
* `{{slug}}` is the entire slug for the current entry (not just the url-safe identifier, as is the case with [`slug` configuration](https://decapcms.org/docs/configuration-options/#slug))
* The date based template tags, such as `{{year}}` and `{{month}}`, can be pulled from a different date field in your entry - see [`preview_path_date_field`](https://decapcms.org/docs/configuration-options/#preview_path_date_field) for details. If a date template tag is used and no date can be found, `preview_path` will be ignored.
* `{{dirname}}` The path to the file's parent directory, relative to the collection's `folder`.
* `{{filename}}` The file name without the extension part.
* `{{extension}}` The file extension.
**Examples:**
```yaml
collections:
- name: posts
preview_path: "blog/{{year}}/{{month}}/{{slug}}"
```
```yaml
collections:
- name: posts
preview_path: "blog/{{year}}/{{month}}/{{filename}}.{{extension}}"
```
### `preview_path_date_field`
The name of a date field for parsing date-based template tags from `preview_path`. If this field is not provided and `preview_path` contains date-based template tags (eg. `{{year}}`), Decap CMS will attempt to infer a usable date field by checking for common date field names, such as `date`. If you find that you need to specify a date field, you can use `preview_path_date_field` to tell Decap CMS which field to use for preview path template tags.
**Example:**
```yaml
collections:
- name: posts
preview_path_date_field: "updated_on"
```
### `preview_path_preserve_slashes`
3.12.2
Values inserted into `preview_path`, such as `{{slug}}` or `{{fields.permalink}}`, are made URL-safe the same way as [slugs](https://decapcms.org/docs/configuration-options/#slug), which replaces a `/` with the [`sanitize_replacement`](https://decapcms.org/docs/configuration-options/#slug-type) character. Set `preview_path_preserve_slashes` to `true` to keep slashes inside a value, so a `permalink` field holding `guides/getting-started` produces a link to `/guides/getting-started` instead of `/guides-getting-started`. Leading and trailing slashes are still removed.
Defaults to `true` for [nested collections](https://decapcms.org/docs/collection-nested/) and `false` for all other collections. It's set on the collection, and applies to the files of a files collection too; setting it on an individual file has no effect.
**Example:**
```yaml
collections:
- name: pages
folder: content/pages
preview_path: "{{fields.permalink}}"
preview_path_preserve_slashes: true
```
### `fields`
The `fields` option maps editor UI widgets to field-value pairs in the saved file. The order of the fields in your Decap CMS `config.yml` file determines their order in the editor UI and in the saved file.
`fields` accepts a list of collection objects, each with the following options:
* `name` (required): unique identifier for the field, used as the key when referenced in other contexts (like the [relation widget](https://decapcms.org/docs/widgets/#relation))
* `label`: label for the field in the editor UI; defaults to the value of `name`
* `widget`: defines editor UI and inputs and file field data types; details in [Widgets](https://decapcms.org/docs/widgets)
* `default`: specify a default value for a field; available for most widget types (see [Widgets](https://decapcms.org/docs/widgets) for details on each widget type). Please note that the field default value only works for folder collection type.
* `required`: specify as `false` to make a field optional; defaults to `true`
* `hint`: optionally add helper text directly below a widget. Useful for including instructions. Accepts markdown for bold, italic, strikethrough, and links.
* `pattern`: add field validation by specifying a list with a regex pattern and an error message; more extensive validation can be achieved with [custom widgets](https://decapcms.org/docs/custom-widgets/#advanced-field-validation)
* `comment`: optional comment to add before the field (only supported for `yaml`)
In files with frontmatter, one field should be named `body`. This special field represents the section of the document (usually markdown) that comes after the frontmatter.
**Example:**
```yaml
fields:
- label: "Title"
name: "title"
widget: "string"
pattern: ['.{20,}', "Must have at least 20 characters"]
- {label: "Layout", name: "layout", widget: "hidden", default: "blog"}
- {label: "Featured Image", name: "thumbnail", widget: "image", required: false}
- {label: "Body", name: "body", widget: "markdown"}
comment: 'This is a multiline\ncomment'
```
### `editor`
This setting changes options for the editor view of a collection or a file inside a files collection. It has the following options:
* `preview`: set to `false` to disable the preview pane for this collection or file; defaults to `true`
* `notes`: set to `true` to enable the [notes](https://decapcms.org/docs/notes/) pane for this collection or file; defaults to `false`
* `visualEditing`: set to `true` to let editors click on content in the preview pane to jump to the field that holds it. This works for the default preview as well as for custom preview templates. Scroll sync is turned off while visual editing is on, so the two don't interfere. Only works when set on a collection, not at the top level or on a file inside a files collection; defaults to `false` 3.6
**Example:**
```yaml
editor:
preview: false
notes: true
```
```yaml
editor:
visualEditing: true
```
To keep a single `string` or `text` field out of visual editing, set `visualEditing: false` on that field. 3.7
**Note**: Setting `preview` or `notes` as a top level configuration will set the default for all collections.
### `summary`
This setting allows the customization of the collection list view. Similar to the `slug` field, a string with templates can be used to include values of different fields, e.g. `{{title}}`. This option over-rides the default of `title` field and `identifier_field`.
**Available template tags:**
Template tags are the same as those for [slug](https://decapcms.org/docs/configuration-options/#slug), with the following additions:
* `{{dirname}}` The path to the file's parent directory, relative to the collection's `folder`.
* `{{filename}}` The file name without the extension part.
* `{{extension}}` The file extension.
* `{{commit_date}}` The file commit date on supported backends (Git-based backends).
* `{{commit_author}}` The file author date on supported backends (Git-based backends).
**Example**
```yaml
summary: "Version: {{version}} - {{title}}"
```
### `sortable_fields`
An optional list of sort fields to show in the UI.
Defaults to inferring `title`, `date`, `author` and `description` fields and will also show `Update On` sort field in Git-based backends.
When the `author` field can't be inferred, the commit author will be used.
**Example**
```yaml
# use dot notation for nested fields
sortable_fields: ['commit_date', 'title', 'commit_author', 'language.en']
```
Each item can also be an object with these properties: 3.10
* `field` (required): the name of the field to sort by
* `label`: the text shown in the sort menu; defaults to the field's `label`
* `default_sort`: sorts the collection by this field when it's opened; `asc` (or `true`) for ascending, `desc` for descending. Only one field can have `default_sort`.
**Example**
```yaml
sortable_fields:
- title
- field: date
label: Publish date
default_sort: desc
- commit_date
```
The browser remembers the last sort used for each collection, including the default one, so a changed `default_sort` doesn't apply to editors who have already opened the collection.
### `view_filters`
An optional list of predefined view filters to show in the UI.
Defaults to an empty list.
**Example**
```yaml
view_filters:
- label: "Alice's and Bob's Posts"
field: author
pattern: 'Alice|Bob'
- label: 'Posts published in 2020'
field: date
pattern: '2020'
- label: Drafts
field: draft
pattern: true
```
### `view_groups`
An optional list of predefined view groups to show in the UI.
Defaults to an empty list.
**Example**
```yaml
view_groups:
- label: Year
field: date
# groups items based on the value matched by the pattern
pattern: \d{4}
- label: Drafts
field: draft
```
---
# i18n Support
Source: https://decapcms.org/docs/i18n/
The CMS can provide a side by side interface for authoring content in multiple languages.
Configuring the CMS for i18n support requires top level configuration, collection level configuration and field level configuration.
### Top level configuration
```yaml
i18n:
# Required and can be one of multiple_folders, multiple_files or single_file
# multiple_folders - persists files in `//.`
# multiple_files - persists files in `/..`
# single_file - persists a single file in `/.`
structure: multiple_folders
# Required - a list of locales to show in the editor UI
locales: [en, de, fr]
# Optional, defaults to the first item in locales.
# The locale to be used for fields validation and as a baseline for the entry.
default_locale: en
```
### Collection level configuration
```yaml
collections:
- name: i18n_content
# same as the top level, but all fields are optional and defaults to the top level
# can also be a boolean to accept the top level defaults
i18n: true
```
When using a file collection, you must also enable i18n for each individual file:
```yaml
collections:
- name: pages
label: Pages
# Configure i18n for this collection.
i18n:
structure: single_file
locales: [en, de, fr]
files:
- name: about
label: About Page
file: site/content/about.yml
# Enable i18n for this file.
i18n: true
fields:
- { label: Title, name: title, widget: string, i18n: true }
```
### Field level configuration
```yaml
fields:
- label: Title
name: title
widget: string
# same as 'i18n: translate'. Allows translation of the title field
i18n: true
- label: Date
name: date
widget: datetime
# The date field will be duplicated from the default locale.
i18n: duplicate
- label: Body
name: body
# The markdown field will be omitted from the translation.
widget: markdown
```
Example configuration:
```yaml
i18n:
structure: multiple_folders
locales: [en, de, fr]
collections:
- name: posts
label: Posts
folder: content/posts
create: true
i18n: true
fields:
- label: Title
name: title
widget: string
i18n: true
- label: Date
name: date
widget: datetime
i18n: duplicate
- label: Body
name: body
widget: markdown
```
### Limitations
1. File collections support only `structure: single_file`.
2. List widgets only support `i18n: true`. `i18n` configuration on sub fields is ignored.
3. Object widgets only support `i18n: true` and `i18n` configuration should be done per field:
```yaml
- label: 'Object'
name: 'object'
widget: 'object'
i18n: true
fields:
- { label: 'String', name: 'string', widget: 'string', i18n: true }
- { label: 'Date', name: 'date', widget: 'datetime', i18n: duplicate }
- { label: 'Boolean', name: 'boolean', widget: 'boolean', i18n: duplicate }
- {
label: 'Object',
name: 'object',
widget: 'object',
i18n: true,
field: { label: 'String', name: 'string', widget: 'string', i18n: duplicate },
}
```
---
# Cloudinary
Source: https://decapcms.org/docs/cloudinary/
Cloudinary is a digital asset management platform with a broad feature set, including support for responsive image generation and URL-based image transformation. They also provide a powerful media library UI for managing assets, and tools for organizing your assets into a hierarchy.
The Cloudinary media library integration for Decap CMS uses Cloudinary's own media library interface within Decap CMS. To get started, you'll need a Cloudinary account and Decap CMS 2.3.0 or greater.
## Creating a Cloudinary Account
You can [sign up for Cloudinary](https://cloudinary.com/users/register/free) for free. Once you're logged in, you'll need to retrieve your Cloud name and API key from the upper left corner of the Cloudinary console.

## Connecting Cloudinary to Decap CMS
To use the Cloudinary media library within Decap CMS, you'll need to update your Decap CMS configuration file with the information from your Cloudinary account:
```yaml
media_library:
name: cloudinary
config:
cloud_name: your_cloud_name
api_key: your_api_key
```
**Note:** The user must be logged in to the Cloudinary account connected to the `api_key` used in your Decap CMS configuration.
**Note:** The Decap CMS media library extensions for Cloudinary are not included in `decap-cms-app`. If you're using `decap-cms-app`, you'll need to register the media libraries yourself.
### Security Considerations
Although this setup exposes the `cloud_name` and `api_key` publicly via the `/admin/config.yml` endpoint, this information is not sensitive. Any integration of the Cloudinary media library requires this information to be exposed publicly. To use this library or use the restricted Cloudinary API endpoints, the user must have access to the Cloudinary account login details or the `api_secret` associated with the `cloud_name` and `api_key`.
## Decap CMS configuration options
The following options are specific to the Decap CMS integration for Cloudinary:
* **`output_filename_only`**: _(default: `false`)_\
By default, the value provided for a selected image is a complete URL for the asset on Cloudinary's CDN. Setting `output_filename_only` to `true` will instead produce just the filename (e.g. `image.jpg`). This should be `true` if you will be directly embedding cloudinary transformation urls in page templates. Refer to [Inserting Cloudinary URL in page templates](https://decapcms.org/docs/cloudinary/#inserting-cloudinary-url-in-page-templates).
* **`use_transformations`**: _(default: `true`)_\
If `true`, uses derived URL when available (the url will have image transformation segments included). Has no effect if `output_filename_only` is set to `true`.
* **`use_secure_url`**: _(default: `true`)_\
Controls whether an `http` or `https` URL is provided. Has no effect if `output_filename_only` is set to `true`.
## Cloudinary configuration options
The following options are used to configure the Media Library. All options are listed in Cloudinary's [Media Library documentation](https://cloudinary.com/documentation/media_library_widget#3_set_the_configuration_options), but only options listed below are available or recommended for the Decap CMS integration:
### Authentication
* `cloud_name`
* `api_key`
### Media library behavior
* `default_transformations` _\- only the first [image transformation](https://decapcms.org/docs/cloudinary/#image-transformations) is used, be sure to use the `SDK Parameter` column transformation names from the_ [_transformation reference_](https://cloudinary.com/documentation/image_transformation_reference)
* `max_files` _\- has no impact on images inside the [Markdown widget](https://decapcms.org/docs/widgets/#markdown)_. Refer to [Media Library documentation](https://cloudinary.com/documentation/media_library_widget#3_set_the_configuration_options) for details on this property
* `multiple` _\- has no impact on images inside the [Markdown widget](https://decapcms.org/docs/widgets/#markdown)_. Refer to [Media Library documentation](https://cloudinary.com/documentation/media_library_widget#3_set_the_configuration_options) for details on this property
## Image transformations
The Cloudinary integration allows images to be transformed in two ways: directly within Decap CMS via [Cloudinary's Media Library](https://decapcms.org/docs/cloudinary/#transforming-images-via-media-library), and separately from the CMS via Cloudinary's [dynamic URLs](https://cloudinary.com/documentation/image_transformations#delivering_media_assets_using_dynamic_urls) by [inserting Cloudinary URLs](https://decapcms.org/docs/cloudinary/#inserting-cloudinary-url-in-page-templates).
### Transforming images via Media Library
If you transform and insert images from within the Cloudinary Media Library, the transformed image URL will be output by default. This gives the editor complete freedom to make changes to the image output.
There are two ways to configure image transformation via Media Library - [globally](https://decapcms.org/docs/cloudinary/#global-configuration) and per [field](https://decapcms.org/docs/cloudinary/#field-configuration). Global options will be overridden by field options.
#### Global configuration
Global configuration, which is meant to affect the Cloudinary widget at all times, can be provided
as seen below, under the primary `media_library` property. Settings applied here will affect every
instance of the Cloudinary widget.
```yaml
# global
media_library:
name: cloudinary
output_filename_only: false
config:
default_transformations:
- - fetch_format: auto
width: 160
quality: auto
crop: scale
```
#### Field configuration
Configuration can also be provided for individual fields that use the media library. The structure
is very similar to the global configuration, except the settings are added to an individual `field`.
For example:
```yaml
# field
fields: # The fields each document in this collection have
- label: 'Cover Image'
name: 'image'
widget: 'image'
required: false
tagname: ''
media_library:
config:
default_transformations:
- - fetch_format: auto
width: 300
quality: auto
crop: fill
effect: grayscale
```
## Inserting Cloudinary URL in page templates
If you prefer to provide direction so that images are transformed in a specific way, or dynamically retrieve images based on viewport size, you can do so by providing your own base Cloudinary URL and only storing the asset filenames in your content:
* Either globally or for specific fields, configure the Cloudinary extension to only output the asset filename
```yaml
# global
media_library:
name: cloudinary
output_filename_only: true
# field
media_library:
name: cloudinary
output_filename_only: true
```
* Provide a dynamic URL in the site template
```handlebars
{{! handlebars example }}
```
Your dynamic URL can be formed conditionally to provide any desired transformations - please see Cloudinary's [image transformation reference](https://cloudinary.com/documentation/image_transformation_reference) for available transformations.
---
# Netlify Large Media
Source: https://decapcms.org/docs/netlify-large-media/
**Note:** Netlify Large Media is deprecated as of September 1, 2023. Please refer to the deprecation notice in [Netlify's Support Forums](https://docs.netlify.com/large-media/overview/) (see deprecation notice).
If you're choosing a media strategy for a new site, [Decap Turbo's S3-compatible media library](https://decapcms.org/docs/turbo-media-proxy/) is a current alternative — it stores assets in your own S3-compatible bucket and doesn't depend on Git LFS or Netlify Identity.
[Netlify Large Media](https://www.netlify.com/features/large-media/) is a [Git LFS](https://git-lfs.github.com/) implementation for repositories connected to Netlify sites. This means that you can use Git to work with large asset files like images, audio, and video, without bloating your repository. It does this by replacing the asset files in your repository with text pointer files, then uploading the assets to the Netlify Large Media storage service.
If you have a Netlify site with Large Media enabled, Decap CMS (version 2.6.0 and above) will handle Large Media asset files seamlessly, in the same way as files stored directly in the repository.
## Requirements
To use Netlify Large Media with Decap CMS, you will need to do the following:
* [Upgrade Decap CMS](https://decapcms.org/docs/update-the-cms-version/) to version 2.6.0 or above.
* Configure Decap CMS to use the [Git Gateway backend with Netlify Identity](https://decapcms.org/docs/git-gateway-backend/#git-gateway-with-netlify-identity).
* Configure the Netlify site and connected repository to use Large Media, following the [Large Media docs on Netlify](https://www.netlify.com/docs/large-media/).
When these are complete, you can use Decap CMS as normal, and the configured asset files will automatically be handled by Netlify Large Media.
## Image transformations
All JPEG, PNG, and GIF files that are handled with Netlify Large Media also have access to Netlify's on-demand image transformation service. This service allows you to request an image to match the dimensions you specify in a query parameter added to the image URL.
You can learn more about this feature in [Netlify's image transformation docs](https://www.netlify.com/docs/image-transformation/).
### Transformation control for media gallery thumbnails
In repositories enabled with Netlify Large Media, Decap CMS will use the image transformation query parameters to load thumbnail-sized images for the media gallery view. This makes images in the media gallery load significantly faster.
**Note:** When using this option all tracked file types have to be imported into Large Media. For example if you track `*.jpg` but still have jpg-files that are not imported into Large Media the backend will throw an error. Check the [netlify docs](https://docs.netlify.com/large-media/setup/#migrate-files-from-git-history) on how to add previously committed files to Large Media.
You can disable the automatic image transformations with the `use_large_media_transforms_in_media_library` configuration setting, nested under `backend` in the CMS `config.yml` file:
```yaml
backend:
name: git-gateway
## Set to false to prevent transforming images in media gallery view
use_large_media_transforms_in_media_library: false
```
---
# Uploadcare
Source: https://decapcms.org/docs/uploadcare/
Uploadcare is a sleek service that allows you to upload files without worrying about maintaining a growing collection — more of an asset store than a library. Just upload when you need to, and the files are hosted on their CDN. They provide image processing controls from simple cropping and rotation to filters and face detection, and a lot more. You can check out Uploadcare's full feature set on their [website](https://uploadcare.com/).
The Uploadcare media library integration for Decap CMS allows you to use Uploadcare as your media handler within the CMS itself. It's available by default as of our 2.1.0 release, and works in tandem with the existing file and image widgets, so using it only requires creating an Uploadcare account and updating your Decap CMS configuration.
**Please make sure that Decap CMS is updated to 2.1.0 or greater before proceeding.**
## Creating an Uploadcare Account
You can [sign up](https://uploadcare.com/accounts/signup/) for a free Uploadcare account to get started. Once you've signed up, go to your dashboard, select a project, and then select "API keys" from the menu on the left. The public key on the API keys page will be needed in your Decap CMS configuration. For more info on getting your API key, visit their [walkthrough](https://uploadcare.com/docs/keys/).
## Updating Decap CMS Configuration
The next and final step is updating your Decap CMS configuration file:
1. Add a `media_library` property at the same level as `media_folder`, with an object as it's value.
2. In the `media_library` object, add the name of the media player under `name`.
3. Add a `config` object under name with a `publicKey` property with your Uploadcare public key as it's value.
Your `config.yml` should now include something like this (except with a real API key):
```yaml
media_library:
name: uploadcare
config:
publicKey: YOUR_UPLOADCARE_PUBLIC_KEY
```
Once you've finished updating your Decap CMS configuration, the Uploadcare widget will appear when using the image or file widgets.
**Note:** The Decap CMS media library extensions for Uploadcare are not included in `decap-cms-app`. If you're using `decap-cms-app`, you'll need to register the media libraries yourself.
## Configuring the Uploadcare Widget
The Uploadcare widget can be configured with settings that are outlined [in their docs](https://uploadcare.com/docs/file_uploads/widget/options/). The widget itself accepts configuration through global variables and data properties on HTML elements, but with Decap CMS you can pass configuration options directly through your `config.yml`.
**Note:** all default values described in Uploadcare's documentation also apply in the Decap CMS integration, except for `previewStep`, which is set to `true`. This was done because the preview step provides helpful information like upload status, and provides access to image editing controls. This option can be disabled through the configuration options below.
### Global configuration
Global configuration, which is meant to affect the Uploadcare widget at all times, can be provided as seen above, under the primary `media_library` property. Settings applied here will affect every instance of the Uploadcare widget.
## Field configuration
Configuration can also be provided for individual fields that use the media library. The structure is very similar to the global configuration, except the settings are added to an individual `field`. For example:
```yaml
...
fields:
name: cover
label: Cover Image
widget: image
media_library:
config:
multiple: true
previewStep: false
```
## Integration settings
There are several settings that control the behavior of integration with the widget.
* `autoFilename` (`boolean`) - specify whether to add a filename to the end of the url. Example: `http://ucarecdn.com/:uuid/filename.png`
* `defaultOperations` (`string`) - specify a string added at the end of the url. This could be useful to apply a set of CDN operations to each image, for example resizing or compression. All the possible operations are listed in the [Uploadcare API reference documentation](https://uploadcare.com/docs/api_reference/cdn/).
```yaml
media_library:
name: uploadcare
config:
publicKey: YOUR_UPLOADCARE_PUBLIC_KEY
settings:
autoFilename: true
defaultOperations: '/resize/800x600/'
```
---
# Deploy Preview Links
Source: https://decapcms.org/docs/deploy-preview-links/
When using the editorial workflow, content editors can create and save content without publishing it
to a live site. Deploy preview links provide a way to view live content when it has not been
published, provided that you're using a continuous deployment platform to provide "deploy previews"
of your unmerged content.
## Using deploy preview links
Deploy preview links will work without configuration when all of the following requirements are met:
* Decap CMS version is 2.4.0+ for GitHub support and 2.10.6+ for GitLab/Bitbucket support
* Using editorial workflow
* Have a continuous deployment platform that builds every commit and provides statuses to your repo
* The build status must include the word "deploy". To use a status with another name, set [`preview_context`](https://decapcms.org/docs/backends-overview/#backend-configuration) in `backend` to its exact name.
* Backends implement specific methodd for finding statuses
* GitHub: commit status
* Azure/Bitbucket/GitLab: Pull Request status
* Other: implemented by `getStatuses` API function
Any site created using one of the Deploy to Netlify options on our [starters
page](https://decapcms.org/docs/start-with-a-template) will automatically meet these criteria (barring any changes made to
your Netlify settings), but you may need to [update](https://decapcms.org/docs/update-the-cms-version) your Decap CMS version to get the
functionality.
**Note:** If you're using a custom backend (one that is not included with Decap CMS), please check the
documentation for that backend for more information about enabling deploy preview links.
**Not the same as deploy status.** Preview links answer "what would this unpublished change look like"; [deploy status](https://decapcms.org/docs/turbo-deploy-status/) — available on Decap Turbo — answers "has the change I published actually shipped to the live site". They use different signals and can be used together.
Deploy preview links are provided in the editor toolbar, near the publishing controls:

### Waiting for builds
Deploy your site preview may take ten seconds or ten minutes, depending on many factors. For maximum
flexibility, Decap CMS provides a "Check for Preview" refresh button when the deploy preview is
pending, which a content editor can use to manually check for a finished preview until it's ready:

## Configuring preview paths
Deploy preview links point to the site root by default, but you'll probably want them to point to
the specific piece of content that the content editor is viewing. You can do this by providing a
`preview_path` string template for each collection, or for individual files in a files collection.
Let's say we have a `blog` collection that stores content in our repo under `content/blog`. The path
to a post in your repo may look like `content/blog/2018-01-new-post.md`, but the path to that post
on your site would look more like: `/blog/2018-01-new-post/`. Here's how you would use
`preview_path` in your configuration for this scenario:
```yaml
collections:
- name: blog
folder: content/blog
slug: {{year}}-{{month}}-{{slug}}
preview_path: blog/{{slug}}
```
Similarly, for an `about` page in a files collection under `content/pages` which maps to `/about-the-project`
on your site, you would configure `preview_path` like this:
```yaml
collections:
- name: pages
files:
- name: about
file: content/pages/about.md
preview_path: about-the-project
```
With the above configuration, the deploy preview URL from your backend will be combined with your
preview path to create a URL to a specific blog post.
**Note:** `{{slug}}` in `preview_path` is different than `{{slug}}` in `slug`. In the `slug`
template, `{{slug}}` is only the url-safe [identifier
field](https://decapcms.org/docs/configuration-options/#identifier_field), while in the `preview_path` template, `{{slug}}`
is the entire slug for the entry. For example:
```yaml
# for an entry created Jan 1, 2000 with identifier "My New Post!"
collections:
- name: posts
slug: {{year}}-{{month}}-{{slug}} # {{slug}} will compile to "my-new-post"
preview_path: blog/{{slug}} # {{slug}} will compile to "2000-01-my-new-post"
```
### Dates in preview paths
Some static site generators allow URL's to be customized with date parameters - for example, Hugo
can be configured to use values like `year` and `month` in a URL. These values are generally derived
by the static site generator from a date field in the content file. `preview_path` accepts these
parameters as well, similar to the `slug` configuration, except `preview_path` populates date values
based on a date value from the entry, just like static site generators do. Decap CMS will attempt
to infer an obvious date field, but you can also specify which date field to use for `preview_path`
template tags by using
[`preview_path_date_field`](https://decapcms.org/docs/configuration-options/#preview_path_date_field).
Together with your other field values, dates can be used to configure most URL schemes available
through static site generators.
**Example**
```yaml
# This collection's date field will be inferred because it has a field named `"date"`
collections:
- name: posts
preview_path: blog/{{year}}/{{month}}/{{title}}
fields:
- { name: title, label: Title }
{ name: date, label: Date, widget: date }
{ name: body, label: Body, widget: markdown }
# This collection requires `path_preview_date_field` because the no obvious date field is available
collections:
- name: posts
preview_path: blog/{{year}}/{{month}}/{{title}}
preview_path_date_field: published_at
fields:
- { name: title, label: Title }
{ name: published_at, label: Published At, widget: date }
{ name: body, label: Body, widget: markdown }
```
## Preview links for published content
You may also want preview links for published content as a convenience. You can do this by providing
a `site_url` in your configuration, which will be used in place of the deploy preview URL that a
backend would provide for an unpublished entry. Just as for deploy preview links to unpublished
content, links to published content will use any `preview_path` values that are defined in the
collection configurations.
Preview links for published content will also work if you are not using the editorial workflow.

## Disabling deploy preview links
To disable deploy preview links, set `show_preview_links` to false in your CMS configuration.
## How it works
Deploy preview links are provided through your CMS backend, and Decap CMS is unopinionated about
where the links come from or how they're created. That said, the general approach for Git backends
like GitHub is powered by "commit statuses". Continuous deployment platforms like Netlify can deploy
a version of your site for every commit that is pushed to your remote Git repository, and then send
a commit status back to your repository host with the URL.
The deploy preview URL provided by a backend will lead to the root of the deployed site. Decap CMS
will then use the `preview_path` template in an entry's collection configuration to build a path to
a specific piece of content. If a `preview_path` is not provided for an entry's collection, the URL
will be used as is.
---
# Editorial Workflows
Source: https://decapcms.org/docs/editorial-workflows/
By default, saving a post in the CMS interface pushes a commit directly to the publication branch specified in `backend`. However, you also have the option to edit the [Publish Mode](https://decapcms.org/docs/configuration-options/#publish-mode), which adds an interface for drafting, reviewing, and approving posts. To do this, add the following line to your Decap CMS `config.yml`:
```yaml
# This line should *not* be indented
publish_mode: editorial_workflow
```
From a technical perspective, the workflow translates editor UI actions into common Git commands:
| Actions in Netlify UI | Perform these Git actions |
| ------------------------- | ----------------------------------------------------------------------------------------------------------------- |
| Save draft | Commits to a new branch (named according to the pattern `cms/collectionName/entrySlug`), and opens a pull request |
| Edit draft | Pushes another commit to the draft branch/pull request |
| Approve and publish draft | Merges pull request and deletes branch |
**Note:** Editorial workflow works with GitHub repositories, and supports [GitLab](https://decapcms.org/docs/gitlab-backend/), [Bitbucket](https://decapcms.org/docs/bitbucket-backend/), [Azure](https://decapcms.org/docs/azure-backend/), [Forgejo](https://decapcms.org/docs/gitea-backend/#forgejo-backend), [Git Gateway](https://decapcms.org/docs/git-gateway-backend/) and [Decap Turbo](https://decapcms.org/docs/turbo-overview/). The `gitea` backend doesn't support it.
### Bitbucket Support
In order to track unpublished entries statuses, the Bitbucket implementation uses
[pull requests comments](https://confluence.atlassian.com/bitbucketserver/commenting-on-a-pull-request-1027119882.html).
### GitLab Support
In order to track unpublished entries statuses, the GitLab implementation uses
[merge requests labels](https://docs.gitlab.com/ee/user/project/labels.html).
### Forgejo Support
Editorial workflow on Forgejo needs the [`forgejo` backend](https://decapcms.org/docs/gitea-backend/#forgejo-backend). In order to track unpublished entries statuses, the Forgejo implementation uses pull request labels, which it creates when they're missing.
## Unpublished entries in collections
3.8
Besides the Workflow page, unpublished entries also appear in their collection. Each entry with unpublished changes, including a published entry that is being edited, shows a badge with its status: **Draft**, **In review** or **Ready**.
Entries that haven't been published yet are listed below the published ones, under an **Unpublished Entries** heading, and sorted like the rest of the collection. When the collection is [grouped](https://decapcms.org/docs/configuration-options/#view_groups), they're listed once, below all the groups. [View filters](https://decapcms.org/docs/configuration-options/#view_filters) don't apply to them. 3.15
## Squash merge GitHub pull requests
When using the **Editorial Workflow** with the `github` or GitHub-connected `git-gateway` backends, Decap CMS creates a pull request for each unpublished entry. Every time the unpublished entry is changed and saved, a new commit is added to the pull request. When the entry is published, the pull request is merged, and all of those commits are added to your project commit history in a merge commit.
The squash merge option causes all commits to be "squashed" into a single commit when the pull request is merged, and the resulting commit is rebased onto the target branch, avoiding the merge commit altogether.
To enable this feature, you can set the following option in your Decap CMS `config.yml`:
```yaml
backend:
squash_merges: true
```
---
# Open Authoring
Source: https://decapcms.org/docs/open-authoring/
When using the [GitHub backend](https://decapcms.org/docs/github-backend) or the [Forgejo backend](https://decapcms.org/docs/gitea-backend/#forgejo-backend), you can use Decap CMS to accept contributions from users without giving them access to your repository. When they make changes in the CMS, the CMS forks your repository for them behind the scenes, and all the changes are made to the fork. When the contributor is ready to submit their changes, they can set their draft as ready for review in the CMS. This triggers a pull request to your repository, which you can merge on GitHub or Forgejo.
At the same time, any contributors who *do* have write access to the repository can continue to use Decap CMS normally.
## Requirements
* You must use [the GitHub backend](https://decapcms.org/docs/github-backend) or, from version 3.15, [the Forgejo backend](https://decapcms.org/docs/gitea-backend/#forgejo-backend). The examples on this page use GitHub. For Forgejo, set `name: forgejo` and the options from its page.
**Note that the [Git Gateway backend](https://decapcms.org/docs/git-gateway-backend/#git-gateway-with-netlify-identity) does *not* support Open Authoring, even when the underlying repo is on GitHub.**
* For private GitHub repos the user must have `read` access on the repo, and you must explicitly set the auth_scope to `repo`, for example:
```yaml
backend:
name: github
repo: owner-name/private-repo-name # path to private repo
auth_scope: repo # this is needed to fork the private repo
open_authoring: true
```
## Enabling Open Authoring
1. [Enable the editorial workflow](https://decapcms.org/docs/configuration-options/#publish-mode) by setting `publish_mode` to `editorial_workflow` in your `config.yml`.
2. Set `open_authoring` to `true` in the `backend` section of your `config.yml`, as follows:
```yaml
backend:
name: github
repo: owner-name/repo-name # Path to your GitHub repository
open_authoring: true
```
## Usage
When a user logs into Decap CMS who doesn't have write access to your repo, the CMS asks for permission to create a fork of your repo (or uses their existing fork, if they already have one). They are then presented with the normal CMS interface. The published content shown is from the original repo, so it stays up-to-date as changes are made.
On the editorial workflow screen, the normal three columns are replaced by two columns instead — "Draft" and "Ready to Review".
When they make changes to content in the CMS, the changes are made to a branch on their fork. In the editorial workflow screen, they see only their own pending changes. Once they're ready to submit their changes, they can move the card into the "Ready To Review" column to create a pull request. When the pull request is merged (by a repository maintainer via the GitHub UI), Decap CMS deletes the branch and removes the card from the user's editorial workflow screen. Open Authoring users cannot publish entries through the CMS.
Users who *do* have write access to the original repository continue to use the CMS normally. Unpublished changes made by users via Open Authoring are not visible on the editorial workflow screen, and their unpublished changes must be merged through the GitHub UI.
## Alternative for external contributors with Git Gateway
[As noted above](https://decapcms.org/docs/open-authoring/#requirements), Open Authoring does not work with the Git Gateway backend. However, you can use Git Gateway on a site with Netlify Identity that has [open registration](https://www.netlify.com/docs/identity/#adding-identity-users). This lets users create accounts on your site and log into the CMS. There are a few differences, including the following:
* Users don't need to know about GitHub or create a GitHub account. Instead, they use Netlify Identity accounts that are created on your site and managed by you.
* The CMS applies users' changes directly to your repo, not to a fork. (If you use the editorial workflow, you can use features like [GitHub's protected branches](https://help.github.com/en/articles/about-protected-branches) or [Netlify's locked deploys](https://www.netlify.com/docs/locked-deploys/) to prevent users from publishing directly to your site from the CMS.)
* There is no distinction between users with write access to the repo and users without — all editorial workflow entries are visible from within the CMS and can be published with the CMS. (Unpublished Open Authoring entries, on the other hand, are visible only to the author in the CMS UI or publicly as GitHub PRs.)
## Linking to specific entries in the CMS
Open authoring often includes some sort of "Edit this page" link on the live site. Decap CMS supports this via the **edit** path:
```js
/#/edit/{collectionName}/{entryName}
```
For the entry named "general" in the "settings" file collection
```html
https://www.example.com/path-to-cms/#/edit/settings/general
```
For blog post "test.md" in the "posts" folder collection
```html
https://www.example.com/path-to-cms/#/edit/posts/test
```
* **`collectionName`**: the name of the collection as entered in the CMS config.
* **`entryName`** *(for [file collections](https://decapcms.org/docs/collection-file/)*: the `name` of the entry from the CMS config.
* **`entryName`** *(for [folder collections](https://decapcms.org/docs/collection-folder/)*: the filename, sans extension (the slug).
---
# Notes
Source: https://decapcms.org/docs/notes/
3.15 GitHub · 3.16.3 GitLab · 3.17 Decap Turbo
Notes let editors leave comments on an entry without touching its content. A *note* is a short message attached to an entry, shown in a pane next to the editor, and stored on your repository host as comments on an issue rather than in the entry file. Use notes to ask a colleague for a second opinion, record why a wording was chosen, or leave a reminder for whoever picks the draft up next.
## Requirements
* Using the [GitHub backend](https://decapcms.org/docs/github-backend/), the [GitLab backend](https://decapcms.org/docs/gitlab-backend/), or [Decap Turbo](https://decapcms.org/docs/turbo-overview/) on either host.
* Using the [editorial workflow](https://decapcms.org/docs/editorial-workflows/).
* The entry has been saved at least once. Notes are not available while creating a new entry.
* Permission to read and write issues on the repository. On the GitHub and GitLab backends that is the signed-in user; on Decap Turbo it is the organization's shared credential — the Decap Turbo GitHub App on GitHub, or the GitLab account that authorized the connection on GitLab.
* On GitLab, the project must have issues enabled. A project with issues turned off cannot store notes.
## Enabling notes
Notes are off by default. Set `notes` to true under the [`editor`](https://decapcms.org/docs/configuration-options/#editor) option. At the root it sets the default for every collection; on a collection, or on a file in a files collection, it overrides that default:
```yaml
# on root: enables notes for all collections
editor:
notes: true
collections:
- name: blog
folder: content/blog
- name: authors
folder: content/authors
editor:
notes: false # turns notes off for this collection only
```
## Using the notes pane
The notes pane shares one space with the preview and [i18n](https://decapcms.org/docs/i18n/) panes, so opening one closes whichever was open, and selecting the pane already showing closes it. Decap CMS remembers the choice for the next entry you open.
The pane header counts unresolved notes — or every note, once none are left unresolved — and, once the entry has notes, links to its issue on your repository host.
A note is saved the moment you add it, independently of the entry: you do not need to save the entry for a note to persist.
You can read every note on an entry but act only on your own. **Edit** a note while it is unresolved, **Resolve** it once the point has been addressed, or **Delete** it — which removes it for everyone and cannot be undone. A resolved note stays in the pane, dimmed, and can be reopened with **Unresolve**. To respond to someone else's note, add your own.
Notes added by other editors appear within about 15 seconds without a reload. Polling pauses while the browser tab is in the background.
## How notes are stored
Notes live in an issue on your repository host, not in your content files.
The first time a note is added to an entry, Decap CMS opens an issue in the repository configured in `backend`, titled after the entry and labeled `decap-cms-notes` along with a `collection:` label. Each note is a comment on that issue, and its resolution status and author are kept in an HTML comment at the top of the comment body, where they stay out of the way when the issue is read on the host:
```
Should this section mention the new pricing?
```
The author is recorded in the note because the account that writes the comment is not always the person who wrote it. On Decap Turbo every comment is posted with the organization's shared credential, so the host attributes each note to that account rather than to the editor who wrote it. On Decap Turbo, `authorId` is what the CMS compares to decide whose notes you can act on; it is an opaque identifier, not an email address. `author` is the editor's display name, or their email address if they haven't set a name, so on a public repository that email is public too.
The GitHub and GitLab backends record neither `author` nor `authorId`, because the account that posts a note is the editor who wrote it; the CMS compares that account with the signed-in user. A note with no recorded author — including a comment written directly on the issue — is attributed to the account that posted it.
The issue follows the entry through the editorial workflow:
| Action on the entry | What happens to the issue |
| ---------------------------- | -------------------------------------------------- |
| Publish | Closed and labeled `entry-published` |
| Unpublish | Reopened, with the `entry-published` label removed |
| Delete the unpublished entry | Closed and labeled `entry-deleted` |
Notes remain readable in the CMS after an entry is published, and a note added to a published entry is appended to the same issue, which stays closed until the entry is unpublished.
Because notes are issue comments, anyone with access to the repository can read them on the host, and a note is as public as the repository is. Edits and deletions made on the host show up in the CMS on the next poll, and a comment written directly on the issue appears in the pane as an unresolved note.
---
# Folder Collections
Source: https://decapcms.org/docs/collection-folder/
Collections with type `folder` display in the left sidebar of the Content page of the editor UI along with other types.
Folder collections represent one or more files with the same format, fields, and configuration options, all stored within the same folder in the repository. You might use a folder collection for blog posts, product pages, author data files, etc.
Unlike file collections, folder collections have the option to allow editors to create new items in the collection. This is set by the boolean `create` field.
Folder collections must have at least one field with the name `title` for creating new entry slugs. That field should use the default `string` widget. The `label` for the field can be any string value. If you wish to use a different field as your identifier, set `identifier_field` to the field name. See the [Collections reference doc](https://decapcms.org/docs/configuration-options/#collections) for details on how collections and fields are configured. If you forget to add this field, you will get an error that your collection "must have a field that is a valid entry identifier".
Example:
```yaml
collections:
- label: "Blog"
name: "blog"
folder: "_posts/blog"
create: true
fields:
- {label: "Title", name: "title", widget: "string"}
- {label: "Publish Date", name: "date", widget: "datetime"}
- {label: "Featured Image", name: "thumbnail", widget: "image"}
- {label: "Body", name: "body", widget: "markdown"}
```
With `identifier_field`:
```yaml
- label: "Blog"
name: "blog"
folder: "_posts/blog"
create: true
identifier_field: name
fields:
- {label: "Name", name: "name", widget: "string"}
- {label: "Publish Date", name: "date", widget: "datetime"}
- {label: "Featured Image", name: "thumbnail", widget: "image"}
- {label: "Body", name: "body", widget: "markdown"}
```
### Filtered Folder Collections
The entries for any folder collection can be filtered based on the value of a single field. By filtering a folder into different collections, you can manage files with different fields, options, extensions, etc. in the same folder.
The `filter` option requires two fields:
* `field`: The name of the collection field to filter on.
* `value`: The desired field value.
The example below creates two collections in the same folder, filtered by the `language` field. The first collection includes posts with `language: en`, and the second, with `language: es`.
```yaml
collections:
- label: "Blog in English"
name: "english_posts"
folder: "_posts"
create: true
filter: {field: "language", value: "en"}
fields:
- {label: "Language", name: "language", widget: "select", options: ["en", "es"]}
- {label: "Title", name: "title", widget: "string"}
- {label: "Content", name: "body", widget: "markdown"}
- label: "Blog en Español"
name: "spanish_posts"
folder: "_posts"
create: true
filter: {field: "language", value: "es"}
fields:
- {label: "Lenguaje", name: "language", widget: "select", options: ["en", "es"]}
- {label: "Titulo", name: "title", widget: "string"}
- {label: "Contenido", name: "body", widget: "markdown"}
```
### Folder Collections Path
By default the CMS stores folder collection content under the folder specified in the collection setting.
For example configuring `folder: posts` for a collection will save the content under `posts/post-title.md`.
You can now specify an additional `path` template (similar to the `slug` template) to control the content destination.
This allows saving content in subfolders, e.g. configuring `path: '{{year}}/{{slug}}'` will save the content under `posts/2019/post-title.md`.
### Media and Public Folder
By default the CMS stores media files for all collections under a global `media_folder` directory as specified in the configuration.
When using the global `media_folder` directory any entry field that points to a media file will use the absolute path to the published file as designated by the `public_folder` configuration.
For example configuring:
```yaml
media_folder: static/media
public_folder: /media
```
And saving an entry with an image named `image.png` will result in the image being saved under `static/media/image.png` and relevant entry fields populated with the value of `/media/image.png`.
Some static site generators (e.g. Gatsby) work best when using relative image paths.
This can now be achieved using a per collection `media_folder` configuration which specifies a relative media folder for the collection.
For example, the following configuration will result in media files being saved in the same directory as the entry, and the image field being populated with the relative path to the image.
```yaml
media_folder: static/media
public_folder: /media
collections:
- name: posts
label: Posts
label_singular: 'Post'
folder: content/posts
path: '{{slug}}/index'
media_folder: ''
public_folder: ''
fields:
- label: Title
name: title
widget: string
- label: 'Cover Image'
name: 'image'
widget: 'image'
```
More specifically, saving an entry with a title of `example post` with an image named `image.png` will result in a directory structure of:
```bash
content
posts
example-post
index.md
image.png
```
And for the image field being populated with a value of `image.png`.
**Note: When specifying a `path` on a folder collection, `media_folder` defaults to an empty string.**
**Available template tags:**
Supports all of the [`slug` templates](https://decapcms.org/docs/configuration-options#slug) and:
* `{{dirname}}` The path to the file's parent directory, relative to the collection's `folder`.
* `{{filename}}` The file name without the extension part.
* `{{extension}}` The file extension.
* `{{media_folder}}` The global `media_folder`.
* `{{public_folder}}` The global `public_folder`.
---
# File Collections
Source: https://decapcms.org/docs/collection-file/
Collections with type `files` display in the left sidebar of the Content page of the editor UI along with other types.
A `files` collection contains one or more uniquely configured files. Unlike items in `folder` collections, which repeat the same configuration over all files in the folder, each item in a `files` collection has an explicitly set path, filename, and configuration. This can be useful for unique files with a custom set of fields, like a settings file or a custom landing page with a unique content structure.
When configuring a `files` collection, configure each file in the collection separately, and list them under the `files` field of the collection. Each file has its own list of `fields` and a unique filepath specified in the `file` field (relative to the base of the repo).
**Note:** Files listed in a file collection must already exist in the hosted repository branch set in your Decap CMS [backend configuration](https://decapcms.org/docs/backends-overview). Files must also have a valid value for the file type. For example, an empty file works as valid YAML, but a JSON file must have a non-empty value to be valid, such as an empty object.
Example:
```yaml
collections:
- label: "Pages"
name: "pages"
files:
- label: "About Page"
name: "about"
file: "site/content/about.yml"
fields:
- {label: Title, name: title, widget: string}
- {label: Intro, name: intro, widget: markdown}
- label: Team
name: team
widget: list
fields:
- {label: Name, name: name, widget: string}
- {label: Position, name: position, widget: string}
- {label: Photo, name: photo, widget: image}
- label: "Locations Page"
name: "locations"
file: "site/content/locations.yml"
fields:
- {label: Title, name: title, widget: string}
- {label: Intro, name: intro, widget: markdown}
- label: Locations
name: locations
widget: list
fields:
- {label: Name, name: name, widget: string}
- {label: Address, name: address, widget: string}
```
---
# Nested Collections (beta)
Source: https://decapcms.org/docs/collection-nested/
This feature is in beta, please use with discretion.
A nested collection allows a folder collection to show a nested structure of entries and edit the locations of the entries.
It is useful when you have a complex folder structure and may not want to create separate collections for every directory.
To enable it:
* Add a **`nested`** object to the collection config. Then configure it with these properties:
* `depth`**:** max depth to show in the collection tree
* `summary`**:** optional summary for a tree node, defaults to the inferred title field
* `subfolders`**:** *(default: true)* if set to false, you don't need to have md files in subfolders. 3.6
* Add a **`meta`** object with a `path` property. It allows editing the path of entries. `path` accepts these properties:
* `label` and `widget` (required): the label and widget of the path field in the editor, usually `widget: string`
* `index_file`: the name of the file, without the extension, that entries are saved as inside their path. With `index_file: '_index'`, an entry with the path `posts/hello-world` is saved as `content/pages/posts/hello-world/_index.md`. This fits `subfolders: true`.
Without `index_file`, new entries are saved in their path as a file named after their `title` field, and existing entries keep their file name. An entry titled "Hello World" with the path `posts` is saved as `content/pages/posts/hello-world.md`. This fits `subfolders: false`. 3.13
Moving an existing entry will move the entire subtree of the entry to the new location. With `subfolders: false`, only the entry's own file moves.
Example configuration:
```yaml
collections:
- name: pages
label: Pages
label_singular: Page
folder: content/pages
create: true
fields: [
{name: title, label: Title, widget: string},
{name: body, label: Body, widget: markdown},
]
# Add nested and meta objects
nested:
depth: 100
summary: '{{title}}'
subfolders: true
meta: { path: { widget: string, label: 'Path', index_file: '_index' } }
```
## Directory structure
Nested collections with `subfolders: true` (default) expect the following directory structure:
```bash
content
└── pages
├── _index.md
├── authors
│ ├── _index.md
│ └── author-1
│ └── _index.md
└── posts
├── _index.md
└── hello-world
└── _index.md
```
With `subfolders: false`, you can do it like this:
```bash
content
└── pages
├── _index.md
├── authors
│ ├── _index.md
│ └── author-1.md
└── posts
├── _index.md
└── hello-world.md
```
---
# Summary String Transformations
Source: https://decapcms.org/docs/summary-strings/
You can apply transformations on fields in a summary string template using filter notation syntax.
Example config:
```yaml
collections:
- name: 'posts'
label: 'Posts'
folder: '_posts'
summary: "{{title | upper}} - {{date | date('YYYY-MM-DD')}} – {{body | truncate(20, '***')}}"
fields:
- { label: 'Title', name: 'title', widget: 'string' }
- { label: 'Publish Date', name: 'date', widget: 'datetime' }
- { label: 'Body', name: 'body', widget: 'markdown' }
```
The above config will transform the title field to uppercase and format the date field using `YYYY-MM-DD` format.
Available transformations are `upper`, `lower`, `date('')`, `default('defaultValue')`, `ternary('valueForTrue','valueForFalse')` and `truncate()`/`truncate(, '')`
The same transformations also work in the collection [`slug`](https://decapcms.org/docs/configuration-options/#slug) template. 3.13
---
# Widgets
Source: https://decapcms.org/docs/widgets/
Widgets define the data type and interface for entry fields. Decap CMS comes with several built-in widgets. Click the widget names in the sidebar to jump to specific widget details. We're always adding new widgets, and you can also [create your own](https://decapcms.org/docs/custom-widgets)!
Widgets are specified as collection fields in the Decap CMS `config.yml` file. Note that [YAML syntax](https://en.wikipedia.org/wiki/YAML#Basic_components) allows lists and objects to be written in block or inline style, and the code samples below include a mix of both.
To see working examples of all of the built-in widgets, try making a 'Kitchen Sink' collection item on the [CMS demo site](https://demo.decapcms.org). (No login required: click the login button and the CMS will open.) You can refer to the demo [configuration code](https://github.com/decaporg/decap-cms/blob/master/dev-test/config.yml) to see how each field was configured.
## Common widget options
The following options are available on all fields:
- `required`: specify as `false` to make a field optional; defaults to `true`
- `hint`: optionally add helper text directly below a widget. Useful for including instructions. Accepts markdown for bold, italic, strikethrough, and links.
- `pattern`: add field validation by specifying a list with a [regex pattern](https://regexr.com/) and an error message; more extensive validation can be achieved with [custom widgets](https://decapcms.org/docs/custom-widgets/#advanced-field-validation)
- **Example:**
```yaml
label: "Title"
name: "title"
widget: "string"
pattern: ['.{12,}', "Must have at least 12 characters"]
```
## Default widgets
---
# Creating Custom Widgets
Source: https://decapcms.org/docs/custom-widgets/
Decap CMS exposes a `window.CMS` global object that you can use to register custom widgets, previews, and editor plugins. The same object is also the default export if you import Decap CMS as an npm module. The available widget extension methods are:
* **registerWidget:** registers a custom widget.
* **registerEditorComponent:** adds a block or inline component to the Markdown editor.
### Writing React Components inline
The `registerWidget` requires you to provide a React component. If you have a build process in place for your project, it is possible to integrate with this build process.
However, although possible, it may be cumbersome or even impractical to add a React build phase. For this reason, Decap CMS exposes two constructs globally to allow you to create components inline: `createClass` and `h` (alias for React.createElement).
## `registerWidget`
Register a custom widget.
```js
// Using global window object
CMS.registerWidget(name, control, [preview], [schema]);
// Using npm module import
import CMS from 'decap-cms-app';
CMS.registerWidget(name, control, [preview], [schema]);
```
### Params
| Param | Type | Description |
| ----------- | ------------------------------ | -------------------------------------------------------------------------------------------------------------------------------------------------------------------------------------------------------------------------------------------------------------------------------------------------------------------------------------------------------------------------------------------------------------------------------------------------------------------------------------------------------- |
| `name` | `string` | Widget name, allows this widget to be used via the field `widget` property in config |
| `control` | `React.Component` or `string` |
React component that renders the control, receives the following props:
**value:** Current field value
**field:** Immutable map of current field configuration
**forID:** Unique identifier for the field
**classNameWrapper:** class name to apply CMS styling to the field
**onChange:** Callback function to update the field value
Name of a registered widget whose control should be used (includes built in widgets).
|
| [`preview`] | `React.Component`, optional | Renders the widget preview, receives the following props:
**value:** Current preview value
**field:** Immutable map of current field configuration
**metadata:** Immutable map of any available metadata for the current field
**getAsset:** Function for retrieving an asset url for image/file fields
**entry:** Immutable Map of all entry data
**fieldsMetaData:** Immutable map of metadata from all fields.
|
| [`schema`] | `JSON Schema object`, optional | Enforces a schema for the widget's field configuration |
### Example
`admin/index.html`
```html
```
`admin/config.yml`
```yml
collections:
- name: posts
label: Posts
folder: content/posts
fields:
- name: title
label: Title
widget: string
- name: categories
label: Categories
widget: categories
separator: __
```
## `registerEditorComponent`
Register a block level component for the Markdown editor:
```js
CMS.registerEditorComponent(definition)
```
### Params
* **definition:** The component definition; must specify: id, label, fields, patterns, fromBlock, toBlock, toPreview
> Additional properties are optional and will be passed to the underlying widget control (object widget by default). For example, adding a `collapsed: true` property will collapse the widget by default.
### Example
```html
```
### Inline components
3.16.2
Components are block level by default: each one takes up its own paragraph. Add `type: 'inline'` to register a component that sits inside a line of text instead, such as a wikilink, a mention or a Hugo `ref` shortcode. Inline components work in the [markdown widget](https://decapcms.org/docs/widgets/markdown/), not in the [richtext widget](https://decapcms.org/docs/widgets/richtext/).
An inline component has no form. Instead, it takes these properties:
* `id`, `label` and `toPreview`: as for block components. `toPreview` renders the component both inside the editor and in the preview pane.
* `type`: `'inline'`
* `pattern`: a regular expression that matches the component inside a paragraph. Don't use the multiline flag (`m`), and prefer non-greedy groups such as `(.*?)`, so that a pattern doesn't swallow the rest of the line.
* `fromInline`: given the match, returns the component's data as an object
* `toInline`: given the data, returns the markdown to save
* `trigger` (optional): the text the syntax always starts with, such as `[[` or `@`. Decap CMS then finds candidates with a plain text search for the trigger instead of running the pattern over the rest of the paragraph, which makes long documents faster to parse.
* `onInsert` (optional): called when an editor adds the component from the toolbar, with `{ selectedText }`. Return a promise for the component's data, or for `null` to cancel. The component replaces the selected text. Without `onInsert`, the component is inserted with empty data.
* `onEdit` (optional): called when an editor clicks the component, with `{ data }`. Return a promise for the new data, or for `null` to leave the component unchanged.
```html
```
## Advanced field validation
All widget fields, including those for built-in widgets, [include basic validation](https://decapcms.org/docs/widgets/#common-widget-options) capability using the `required` and `pattern` options.
With custom widgets, the widget control can also optionally implement an `isValid` method to perform custom validations, in addition to presence and pattern. The `isValid` method will be automatically called, and it can return either a boolean value, an object with an error message or a promise. Examples:
### Boolean
No errors:
```javascript
isValid = () => {
// Do internal validation
return true;
};
```
Existing error:
```javascript
isValid = () => {
// Do internal validation
return false;
};
```
### Object with `error` (useful for returning custom error messages)
Existing error:
```javascript
isValid = () => {
// Do internal validation
return { error: { message: 'Your error message.' } };
};
```
### Promise
You can also return a promise from `isValid`. While the promise is pending, the widget will be marked as "in error". When the promise resolves, the error is automatically cleared.
```javascript
isValid = () => {
return this.existingPromise;
};
```
**Note:** Do not create a promise inside `isValid` - `isValid` is called right before trying to persist. This means that even if a previous promise was already resolved, when the user hits 'save', `isValid` will be called again. If it returns a new promise, it will be immediately marked as "in error" until the new promise resolves.
## Writing custom widgets as a separate package
Widgets are inputs for the Decap CMS editor interface. It's a React component that receives user input and outputs a serialized value. Those are the only rules - the component can be extremely simple, like text input, or extremely complicated, like a full-blown markdown editor. They can make calls to external services, and generally do anything that JavaScript can do.
For writing custom widgets as a separate package you should follow these steps:
1. Create a directory
```javascript
mkdir my-custom-widget
```
2. Navigate to the directory
```javascript
cd my-custom-widget
```
3. For setting up a new npm package run this command:
```javascript
npm init
```
4. Answer the questions in the command line questionnaire.
5. In order to build React components, we need to set up a build step. We'll be using Webpack. Please run the following commands to install the required dependencies:
```javascript
npm install --save-dev babel-loader@7 babel-core babel-plugin-transform-class-properties babel-plugin-transform-export-extensions babel-plugin-transform-object-rest-spread babel-preset-env babel-preset-react cross-env css-loader html-webpack-plugin decap-cms react source-map-loader style-loader webpack webpack-cli webpack-serve
```
```javascript
npm install --save prop-types
```
And you should manually add "**peerDependencies**" and "**scripts**" as shown below.
Here is the content of `package.json` that you will have at the end:
```javascript
{
"name": "decap-cms-widget-starter",
"description": "A boilerplate for creating Decap CMS widgets.",
"author": "name of developer",
"keywords": [
"netlify",
"decap-cms",
"cms",
"widget",
"starter",
"boilerplate"
],
"version": "0.0.1",
"homepage": "https://github.com/decaporg/decap-cms-widget-starter",
"license": "MIT",
"main": "dist/main.js",
"devDependencies": {
"babel-loader": "^7.1.4",
"babel-plugin-transform-class-properties": "^6.24.1",
"babel-plugin-transform-export-extensions": "^6.22.0",
"babel-plugin-transform-object-rest-spread": "^6.26.0",
"babel-preset-env": "^1.6.1",
"babel-preset-react": "^6.24.1",
"cross-env": "^5.1.4",
"css-loader": "^0.28.11",
"html-webpack-plugin": "^3.2.0",
"decap-cms": "^1.5.0",
"react": "^16.3.2",
"source-map-loader": "^0.2.3",
"style-loader": "^0.20.3",
"webpack": "^4.6.0",
"webpack-cli": "^2.0.14",
"webpack-serve": "^0.3.1"
},
"dependencies": {
"prop-types": "^15.6.1"
},
"peerDependencies": {
"react": "^16"
},
"scripts": {
"start": "webpack-serve --static public --open"
}
}
```
5. Create a Webpack configuration file with this content:
`webpack.config.js`
```javascript
const path = require('path')
const HtmlWebpackPlugin = require('html-webpack-plugin')
const developmentConfig = {
mode: 'development',
entry: './dev/index.js',
output: {
path: path.resolve(__dirname, 'public'),
},
optimization: { minimize: false },
module: {
rules: [
{
test: /\.js$/,
loader: 'source-map-loader',
enforce: 'pre',
},
{
test: /\.jsx?$/,
exclude: /node_modules/,
loader: 'babel-loader',
},
{
test: /\.css$/,
use: [{ loader: 'style-loader' }, { loader: 'css-loader' }],
},
],
},
plugins: [
new HtmlWebpackPlugin(),
],
devtool: 'eval-source-map',
}
const productionConfig = {
mode: 'production',
module: {
rules: [
{
test: /\.jsx?$/,
loader: 'babel-loader',
},
],
},
devtool: 'source-map',
}
module.exports = process.env.NODE_ENV === 'production' ? productionConfig : developmentConfig
```
6. The `.babelrc` file is our local configuration for our code in the project. You should create it under the root of the application repo. It will affect all files that Babel processes. So, create a `.babelrc` file under the main project with this content:
```javascript
{
"presets": [
"react",
"env",
],
"plugins": [
"transform-export-extensions",
"transform-class-properties",
"transform-object-rest-spread",
],
}
```
7. Create a `src` directory with the files `Control.js`, `Preview.js` and `index.js`
`src/Control.js`
```javascript
import PropTypes from 'prop-types';
import React from 'react';
export default class Control extends React.Component {
static propTypes = {
onChange: PropTypes.func.isRequired,
forID: PropTypes.string,
value: PropTypes.node,
classNameWrapper: PropTypes.string.isRequired,
}
static defaultProps = {
value: '',
}
render() {
const {
forID,
value,
onChange,
classNameWrapper,
} = this.props;
return (
onChange(e.target.value)}
/>
);
}
}
```
`src/Preview.js`
```javascript
import PropTypes from 'prop-types';
import React from 'react';
export default function Preview({ value }) {
return
{ value }
;
}
Preview.propTypes = {
value: PropTypes.node,
};
```
`src/index.js`
```javascript
import Control from './Control'
import Preview from './Preview'
if (typeof window !== 'undefined') {
window.Control = Control
window.Preview = Preview
}
export { Control, Preview }
```
8. Now you need to set up the locale example site.
Under the main project, create a `dev` directory with the files `bootstrap.js` and `index.js`
`bootstrap.js`
```javascript
window.CMS_MANUAL_INIT = true
```
`index.js`
```javascript
import './bootstrap.js'
import CMS, { init } from 'decap-cms-app'
import 'decap-cms/dist/cms.css'
import { Control, Preview } from '../src'
const config = {
backend: {
name: 'test-repo',
login: false,
},
media_folder: 'assets',
collections: [{
name: 'test',
label: 'Test',
files: [{
file: 'test.yml',
name: 'test',
label: 'Test',
fields: [
{ name: 'test_widget', label: 'Test Widget', widget: 'test'},
],
}],
}],
}
CMS.registerWidget('test', Control, Preview)
init({ config })
```
### Development
To run a copy of Decap CMS with your widget for development, use the start script:
```javascript
npm start
```
Your widget source is in the `src` directory, where there are separate files for the `Control` and `Preview` components.
### Production & Publishing
You'll want to take a few steps before publishing a production built package to npm:
1. Customize `package.json` with details for your specific widget, e.g. name, description, author, version, etc.
```json
{
"name": "decap-cms-widget-starter",
"description": "A boilerplate for creating Decap CMS widgets.",
"author": "name of developer",
"keywords": [
"netlify",
"decap-cms",
"cms",
"widget",
"starter",
"boilerplate"
],
"version": "0.0.1",
// ... rest
}
```
2. For discoverability, ensure that your package name follows the pattern `decap-cms-widget-`.
3. Delete this `README.md`, rename `README_TEMPLATE.md` to `README.md`, and update the new file for your specific widget.
4. Rename the exports in `src/index.js`. For example, if your widget is `decap-cms-widget-awesome`, you would do:
```javascript
if (typeof window !== 'undefined') {
window.AwesomeControl = Control
window.AwesomePreview = Preview
}
export { Control as AwesomeControl, Preview as AwesomePreview }
```
5. Optional: customize the component and file names in `src`.
6. If you haven't already, push your repo to your GitHub account so the source available to other developers.
7. Create a production build, which will be output to `dist`:
```javascript
npm run build
```
8. Finally, if you're sure things are tested and working, publish!
```javascript
npm publish
```
---
# Dynamic Default Values
Source: https://decapcms.org/docs/dynamic-default-values/
When linking to `/admin/#/collections/posts/new` you can pass URL parameters to pre-populate an entry.
For example given the configuration:
```yaml
collections:
- name: posts
label: Posts
folder: content/posts
create: true
fields:
- label: Title
name: title
widget: string
- label: Object
name: object
widget: object
fields:
- label: Title
name: title
widget: string
- label: body
name: body
widget: markdown
```
clicking the following link: `/#/collections/posts/new?title=first&object.title=second&body=%23%20content`
will open the editor for a new post with the `title` field populated with `first`, the nested `object.title` field
with `second` and the markdown `body` field with `# content`.
Here's an example using a multiple relation field. Given the configuration:
```yaml
collections:
- name: posts
label: Posts
folder: content/posts
create: true
fields:
- label: Title
name: title
widget: string
- label: Authors
name: authors
widget: relation
collection: "authors"
value_field: "name"
multiple: true
- name: authors
label: Authors
folder: content/authors
create: true
fields:
- label: Name
name: name
widget: string
```
clicking the following link: `/#/collections/posts/new?authors=first&authors=second`
will open the editor for a new post with the `authors` field populated with any pre-existing authors whose names match `first` and `second`.
**Note:** URL Encoding might be required for certain values (e.g. in the previous example the value for `body` is URL encoded).
---
# Variable Type Widgets
Source: https://decapcms.org/docs/variable-type-widgets/
Before this feature, the [list widget](https://decapcms.org/docs/widgets/#list) allowed a set of fields to be repeated, but every list item had the same set of fields available. With variable types, multiple named sets of fields can be defined, which opens the door to highly flexible content authoring (even page building) in Decap CMS.
**Note: this feature does not yet support default previews and requires [registering a preview template](https://decapcms.org/docs/customization#registerpreviewtemplate) in order to show up in the preview pane.**
To use variable types in the list widget, update your field configuration as follows:
1. Instead of defining your list fields under `fields` or `field`, define them under `types`. Similar to `fields`, `types` must be an array of field definition objects.
2. Each field definition under `types` must use the `object` widget (this is the default value for
`widget`).
### Additional list widget options
* `types`: a nested list of object widgets. All widgets must be of type `object`. Every object widget may define different set of fields.
* `typeKey`: the name of the field that will be added to every item in list representing the name of the object widget that item belongs to. Ignored if `types` is not defined. Default is `type`.
* `summary`: allows customization of a collapsed list item object in a similar way to a [collection summary](https://decapcms.org/docs/configuration-options/?#summary)
### Example Configuration
The example configuration below imagines a scenario where the editor can add two "types" of content,
either a "carousel" or a "spotlight". Each type has a unique name and set of fields.
```yaml
- label: 'Home Section'
name: 'sections'
widget: 'list'
types:
- label: 'Carousel'
name: 'carousel'
widget: object
summary: '{{fields.header}}'
fields:
- { label: Header, name: header, widget: string, default: 'Image Gallery' }
- { label: Template, name: template, widget: string, default: 'carousel.html' }
- label: Images
name: images
widget: list
field: { label: Image, name: image, widget: image }
- label: 'Spotlight'
name: 'spotlight'
widget: object
fields:
- { label: Header, name: header, widget: string, default: 'Spotlight' }
- { label: Template, name: template, widget: string, default: 'spotlight.html' }
- { label: Text, name: text, widget: text, default: 'Hello World' }
```
### Example Output
The output for the list widget will be an array of objects, and each object will have a `type` key
with the name of the type used for the list item. The `type` key name can be customized via the
`typeKey` property in the list configuration.
If the above example configuration were used to create a carousel, a spotlight, and another
carousel, the output could look like this:
```yaml
title: Home
sections:
- type: carousel
header: Image Gallery
template: carousel.html
images:
- images/image01.png
- images/image02.png
- images/image03.png
- type: spotlight
header: Spotlight
template: spotlight.html
text: Hello World
- type: carousel
header: Image Gallery
template: carousel.html
images:
- images/image04.png
- images/image05.png
- images/image06.png
```
---
# Gatsby
Source: https://decapcms.org/docs/gatsby/
This guide will help you get started using Decap CMS and Gatsby.
To get up and running with Gatsby, you’ll need to have [Node.js](https://nodejs.org/) installed on your computer. *Note: Gatsby's minimum supported Node.js version is Node 8.*
## Create a new Gatsby site
Let's create a new site using the default Gatsby Starter Blog. Run the following commands in the terminal, in the folder where you'd like to create the blog:
```bash
npm install -g gatsby-cli
gatsby new blog https://github.com/gatsbyjs/gatsby-starter-blog
cd blog
```
## Get to know Gatsby
In your favorite code editor, open up the code generated for your "Gatsby Starter Blog" site, and take a look at the `content` directory.
You will see that there are multiple Markdown files that represent blog posts. Open one `.md` file and you will see something like this:
```yml
---
title: New Beginnings
date: "2015-05-28T22:40:32.169Z"
description: This is an optional description for SEO and Open Graph purposes, rather than the default generated excerpt.
---
Far far away, behind the word mountains, far from the countries Vokalia and
Consonantia, there live the blind texts.
```
We can see above that each blog post has a title, a date, a description and a body. Now, let's recreate this using Decap CMS.
## Add Decap CMS to your site
First let's install some dependencies. We'll need `decap-cms-app` and `gatsby-plugin-netlify-cms`. Run the following command in the terminal at the root of your site:
```bash
npm install --save decap-cms-app gatsby-plugin-netlify-cms
```
### Configuration
For the purpose of this guide we will deploy to Netlify from a GitHub repository which requires the minimum configuration.
Create a `config.yml` file in the directory structure you see below:
```bash
├── static
│ ├── admin
│ │ ├── config.yml
```
In your `config.yml` file paste the following configuration:
```yml
backend:
name: git-gateway
branch: main # Branch to update (optional; defaults to master)
media_folder: static/img
public_folder: /img
collections:
- name: 'blog'
label: 'Blog'
folder: 'content/blog'
create: true
slug: 'index'
media_folder: ''
public_folder: ''
path: '{{title}}/index'
editor:
preview: false
fields:
- { label: 'Title', name: 'title', widget: 'string' }
- { label: 'Publish Date', name: 'date', widget: 'datetime' }
- { label: 'Description', name: 'description', widget: 'string' }
- { label: 'Body', name: 'body', widget: 'markdown' }
```
**Note:** The above configuration allows assets to be stored relative to their content. Therefore posts would be stored in the format below as it is in `gatsby-starter-blog`.
```bash
content/
├── blog
│ ├── first-post-title
│ │ ├── index.md
│ │ └── post-image.jpg
└── └── second-post-title
├── index.md
└── post-image.jpg
```
Finally, add the plugin to your `gatsby-config.js`.
```javascript
plugins: [`gatsby-plugin-netlify-cms`]
```
### Push to GitHub
It's now time to commit your changes and push to GitHub. The Gatsby starter initializes Git automatically for you, so you only need to do:
```bash
git add .
git commit -m "Initial Commit"
git remote add origin https://github.com/YOUR_USERNAME/NEW_REPO_NAME.git
git push -u origin main
```
### Add your repo to Netlify
Go to Netlify and select 'New Site from Git'. Select GitHub and the repository you just pushed to. Click Configure Netlify on GitHub and give access to your repository. Finish the setup by clicking Deploy Site. Netlify will begin reading your repository and starting building your project.
### Enable Identity and Git Gateway
Netlify's Identity and Git Gateway services allow you to manage CMS admin users for your site without requiring them to have an account with your Git host or commit access on your repo. From your site dashboard on Netlify:
1. Go to **Settings > Identity**, and select **Enable Identity service**.
2. Under **Registration preferences**, select **Open** or **Invite only**. In most cases, you want only invited users to access your CMS, but if you're just experimenting, you can leave it open for convenience.
3. If you'd like to allow one-click login with services like Google and GitHub, check the boxes next to the services you'd like to use, under **External providers**.
4. Scroll down to **Services > Git Gateway**, and click **Enable Git Gateway**. This authenticates with your Git host and generates an API access token. In this case, we're leaving the **Roles** field blank, which means any logged in user may access the CMS. For information on changing this, check the [Netlify Identity documentation](https://www.netlify.com/docs/identity/).
## Start publishing
It's time to create your first blog post. Login to your site's `/admin/` page and create a new post by clicking New Blog. Add a title, a date and some text. When you click Publish, a new commit will be created in your GitHub repo with this format `Create Blog “year-month-date-title”`.
Then Netlify will detect that there was a commit in your repo, and will start rebuilding your project. When your project is deployed you'll be able to see the post you created.
### Cleanup
It is now safe to remove the default Gatsby blog posts.
---
# Hugo
Source: https://decapcms.org/docs/hugo/
## Introduction
This guide will walk you through how to integrate Decap CMS with Hugo. This is a good place to start if you want to learn from the ground up how these two tools work together. If you want to get up-and-running quicker, you can use one of the pre-existing and amazing [starter templates](https://decapcms.org/docs/start-with-a-template/)!
## Getting started with Hugo
### Installation
To get started with Hugo, you should first install the command line tool. If you've already got it installed, you can [skip this step](https://decapcms.org/docs/hugo/#creating-a-new-site). On MacOS and Linux you can do this with:
```bash
brew install hugo
```
To test that it's successfully installed, you can try this command, to get a list of Hugo's options:
```bash
hugo help
```
### Creating a new site
Create a new Hugo project and start it up using the following commands.
```bash
hugo new site
cd
hugo server
```
You won't actually see anything, just yet, and that's because you don't have any template files. That's easily resolved. In the `layouts/` directory, create a file `index.html` and put a basic HTML structure in there:
```html
Document
Nice. It's looking good already.
```
You'll also add some files to the `content/` and `data/` directories to make sure git tracks them.
```bash
touch content/.keep data/.keep
```
This is as basic as you can get with a Hugo project. There's just enough here now for us to install Decap CMS.
## Getting Started With Decap CMS
### Add the Decap CMS files to Hugo
In Hugo, static files that don't need to be processed by the build commands live in the `static/` directory. You'll install the Decap CMS admin and config files there. Create a directory `admin/` and within it, create two files `index.html` and `config.yml`. In the `index.html`, add the following content:
```html
Content Manager
```
In the `config.yml` file, you can add this basic configuration — you can customize as you see fit, this sample file is just to get you started.
```yaml
backend:
name: git-gateway
branch: main # Branch to update (optional; defaults to master)
media_folder: static/img
public_folder: /img
collections:
- name: 'blog'
label: 'Blog'
folder: 'content/blog'
create: true
slug: '{{year}}-{{month}}-{{day}}-{{slug}}'
editor:
preview: false
fields:
- { label: 'Title', name: 'title', widget: 'string' }
- { label: 'Publish Date', name: 'date', widget: 'datetime' }
- { label: 'Description', name: 'description', widget: 'string' }
- { label: 'Body', name: 'body', widget: 'markdown' }
```
**Note:** You won't be able to access the CMS just yet — you still need to deploy the project with **Netlify** and authenticate with **Netlify Identity**. You'll handle this in the next few steps of this guide.
### Configuring Netlify Build Settings
To ensure consistent builds on Netlify, create a `netlify.toml` configuration file at your project's root with these settings:
```toml
[build]
command = "hugo"
publish = "public"
[context.production.environment]
HUGO_VERSION = "0.128.0"
```
This configuration:
1. Specifies the exact Hugo version Netlify should use (match this to your local Hugo version)
2. Defines the build command that generates your site
3. Sets the publish directory to Hugo's default output folder
**Note:** Explicitly setting the Hugo version prevents unexpected build issues from version mismatches between your local environment and Netlify's auto-detected version.
### Pushing to GitHub
It's now time to commit your changes and push to GitHub. You can run the following commands to initialize a Git repository and push the changes so far.
```bash
git init # Initialize a Git repository
git add . # Add every file
git commit -m "Initial Commit" # Commit every file with the message 'Initial Commit'
git remote add origin https://github.com/YOUR_USERNAME/NEW_REPO_NAME.git # Create a new repo on GitHub and add it to this project as a remote repository.
git push -u origin main # Push your changes
```
### Deploying With Netlify
Now you can go ahead and deploy to Netlify. Go to your Netlify dashboard and click **[New site from Git](https://app.netlify.com/start)**. Select the repo you just created. Under **Basic build settings**, you can set the build command to `hugo` and the publish directory to `public`. Click **Deploy site** to get the process going.
### Authenticating with Netlify Identity
**Add the Netlify Identity Widget**
You've already added the Netlify Identity widget to our `admin/index.html`. The next thing to do is add the Netlify Identity widget to our site's index page. In `layouts/index.html`, we can add the following to the `` tag on the page:
```html
```
Once you've added this, make sure to push your changes to GitHub!
### Enable Identity & Git Gateway in Netlify
Back in your [Netlify dashboard](https://app.netlify.com/):
1. Go to **Configuration > Identity**, and select **Enable Identity service**.
2. Once enabled, select **Settings and usage**, and scroll down to **Registration preferences**. You can set this to either **Open** or **Invite only**, but usually **Invite only** is your best bet for a personal site.
3. If you don't want to create an account, or would like to use an external provider such as GitHub or Google, you can enable those services under **External providers**.
4. Scroll down to **Services** and click **Enable Git Gateway**.
### Accessing the CMS
Once you've reached this point, you should be able to access the CMS in your browser at `http://localhost:1313/admin`. You'll be prompted to add the URL of your Netlify site. Once you've added that URL, you can log in with an Identity account or with one of the External Providers you enabled in step 3 above. For the sake of this tutorial, you can create a blog post in the CMS, and publish it! Once you `git pull` in your project, the blog post will show up in the project at `content/blog/.md`.
And that's it! From this point on, it's just a matter of following [the Hugo documentation](https://gohugo.io/templates/) for outputting the content from your `content/` directory into templates! For more information on configuring Decap CMS, feel free to check out the [Decap CMS configuration options documentation](https://decapcms.org/docs/configuration-options/).
## Using Decap CMS content in Hugo
### Creating a list of posts
In your `layouts/index.html` file, you'll create an unordered list element and use a Hugo `range` to output all posts. Inside that range, you can add a list item element with each post title and a link to the post inside it.
**Note:** To learn more about Hugo's `range` function, check out [the Hugo documentation](https://gohugo.io/functions/range).
```html
```
That link won't work just right just yet. You'll need to make a single page layout for blog posts, so Hugo can create a page for the `.RelPermalink` to link to.
### Creating a single page post layout
Create a file `layouts/blog/single.html`, and put the following content in there:
```html
{{ .Title }}
{{ .Title }}
{{ .Date }}
{{ .Params.description }}
{{ .Content }}
```
You can see this basic template includes all the fields you've specified in your Decap CMS `config.yml` file. You can access any custom front-matter fields with `.Params.`!
### Using Hugo shortcodes in the Markdown Editor
Using `registerEditorComponent` we can register a block level component for the Markdown editor. You can use it to add Hugo's inbuilt shortcodes like `gist`,`youtube` and others as block components to the markdown editor.
You can refer to [registering editor components](https://www.decapcms.org/docs/custom-widgets/#registereditorcomponent) for a getting started guide or for creating your own editor components.
**Example**
```javascript
CMS.registerEditorComponent({
id: "gist",
label: "Gist",
fields: [{
name: "username",
label: "GitHub Username",
widget: "string"
},
{
name: "gid",
label: "Gist ID",
widget: "string"
},
],
pattern: /^{{< gist ([a-zA-Z0-9]+) ([a-zA-Z0-9]+) >}}/,
fromBlock: function(match) {
return {
username: match[1],
gid: match[2],
};
},
toBlock: function(obj) {
return `{{< gist ${obj.username} ${obj.gid} >}}`;
},
toPreview: function(obj) {
return 'gist';
},
});
```
**Result**
For getting started quickly you can refer to this amazing prebuilt resource of [hugo shortcodes editor components](https://github.com/sharadcodes/hugo-shortcodes-netlify-cms)!
---
# Jekyll
Source: https://decapcms.org/docs/jekyll/
## Introduction
This section will help you integrate Decap CMS with a new or existing Jekyll project.
[Jekyll](https://jekyllrb.com/) is a blog-aware static site generator built with Ruby. [GitHub Pages](https://pages.github.com/) are powered by Jekyll, making it a popular choice for developer blogs and project pages.
If you're starting a new project, the fastest route to publishing on a Jekyll website with Decap CMS is to [deploy a template on Netlify](https://templates.netlify.com/).
## Setup
This guide will use the blog you get if you follow the [really excellent official Jekyll step by step tutorial](https://jekyllrb.com/docs/step-by-step/01-setup/) as a starting point. If you're new to Jekyll - I recommended you start by following the tutorial so you know your way around your new blog. Otherwise [you can clone this repo](https://github.com/adamwatters/jekyll-tutorial-with-netlify-cms/tree/without-cms) and checkout the `without-cms` branch.
## Add Decap CMS
### Add admin/index.html
Create a file `admin/index.html` in the root of your repo - it should look like this:
```html
Content Manager
```
### Add admin/config.yml
Create a file `admin/config.yml` in the root of your repo - it should look like this:
```yml
# config.yml
backend:
name: git-gateway
branch: main # Branch to update (optional; defaults to master)
media_folder: 'assets/uploads'
collections:
- name: 'blog'
label: 'Blog'
folder: '_posts/'
fields:
- { name: Title }
```
### Enable authentication for CMS users
Decap CMS stores content in your online Git repository. Therefore, to make content changes, users need to authenticate with the corresponding Git provider to prove that they have read and write access to that content.
Follow the directions in the Introduction section to [enable Netlify Identity and Git Gateway services](https://www.decapcms.org/docs/add-to-your-site/#enable-identity-and-git-gateway) for the backend, then [add the Identity widget](https://www.decapcms.org/docs/add-to-your-site/#add-the-netlify-identity-widget) to render a login portal on the frontend.
## CMS Configuration
### Blog Collection
We'll start by updating the `blog` collection. Blogging is baked into Jekyll, and the `_posts/` directory uses [some special conventions](https://jekyllrb.com/docs/posts/) we'll need to keep in mind as we configure Decap CMS. Copy and paste the following into your `config.yml`.
```yaml
collections:
- name: 'blog'
label: 'Blog'
folder: '_posts/'
create: true
slug: '{{year}}-{{month}}-{{day}}-{{slug}}'
editor:
preview: false
fields:
- { label: 'Layout', name: 'layout', widget: 'hidden', default: 'post' }
- { label: 'Title', name: 'title', widget: 'string' }
- { label: 'Publish Date', name: 'date', widget: 'datetime' }
- { label: 'Body', name: 'body', widget: 'markdown' }
```
A few things to note.
* We set the `slug` to `'{{year}}-{{month}}-{{day}}-{{slug}}'` because [Jekyll requires this format for blog posts](https://jekyllrb.com/docs/posts/#creating-posts). `year`, `month`, and `day` will be extracted from the `date` field, and `slug` will be generated from the `title` field.
* We added `editor` configuration with a field `preview: false`. This will eliminate the preview pane. Because Jekyll uses Liquid templates, there currently isn't a good way to provide a preview of pages as you update the content.
* The `layout` field default is set to `post` so Jekyll knows to use `_layouts/post.html` when it renders a post. This field is hidden because we want all posts to use the same layout.
* The `date` and `title` field will be used by the `slug` - as noted above, Jekyll relies on the filename to determine a post's publish date, but Decap CMS does not pull date information from the filename and requires a frontmatter `date` field. **Note** Changing the `date` or `title` fields in Decap CMS will not update the filename. This has a few implications:
* If you change the `date` or `title` fields in Decap CMS, Jekyll won't notice
* You don't necessarily need to change the `date` and `title` fields for existing posts, but if you don't the filenames and frontmatter will disagree in a way that might be confusing
* If you want to avoid these issues, use a regular Jekyll collection instead of the special `_posts` directory
### Author Collection
In addition to `_posts`, the Jekyll tutorial blog includes a collection of authors in the `_authors` directory. Before we can configure Decap CMS to work with the `authors` collection, we'll need to make a couple tweaks to our Jekyll blog. Here's the front matter for one of the authors.
```yaml
short_name: jill
name: Jill Smith
position: Chief Editor
```
`name` has special meaning as a unique identifier in Decap CMS, but as set up now our Jekyll blog is using `short_name` as the unique identifier for authors. For each author, update the frontmatter like so.
```yaml
name: jill
display_name: Jill Smith
position: Chief Editor
```
then update `_layouts/author.html`, `_layouts/post.html` and `staff.html` accordingly.
```html
--- layout: default ---
{{ page.display_name }}
{{ page.position }}
{{ content }}
Posts
{% assign filtered_posts = site.posts | where: 'author', page.name %} {% for post in
filtered_posts %}
```
Next, copy and paste the following into the collections array in `config.yml` below the `blog` collection.
```yaml
- name: 'authors'
label: 'Authors'
folder: '_authors/'
create: true
editor:
preview: false
fields:
- { label: 'Layout', name: 'layout', widget: 'hidden', default: 'author' }
- { label: 'Short Name', name: 'name', widget: 'string' }
- { label: 'Display Name', name: 'display_name', widget: 'string' }
- { label: 'Position', name: 'position', widget: 'string' }
- { label: 'Body', name: 'body', widget: 'markdown' }
```
Now that we have the `authors` collection configured, we can add an `author` field to the `blog` collection. We'll use the [relation widget](https://www.decapcms.org/docs/widgets/#relation) to define the relationship between blog posts and authors.
```yaml
# updated fields in blog collection configuration
fields:
- { label: 'Layout', name: 'layout', widget: 'hidden', default: 'post' }
- { label: 'Title', name: 'title', widget: 'string' }
- { label: 'Publish Date', name: 'date', widget: 'datetime' }
- {
label: 'Author',
name: 'author',
widget: 'relation',
collection: 'authors',
display_fields: [display_name],
search_fields: [display_name],
value_field: 'name',
}
- { label: 'Body', name: 'body', widget: 'markdown' }
```
With that configuration added, you should be able to select the author for a post from a dropdown.
### About Page
Our Jekyll blog includes an About page. It would nice to be able to edit that page just like we can edit our blog and author pages. Decap CMS provides [file collections](https://decapcms.org/docs/collection-file/) to solve this problem.
Copy and paste the following into the collections array in `config.yml`
```yaml
- name: 'pages'
label: 'Pages'
editor:
preview: false
files:
- label: 'About Page'
name: 'about'
file: 'about.md'
fields:
- { label: 'Title', name: 'title', widget: 'hidden', default: 'about' }
- { label: 'Layout', name: 'layout', widget: 'hidden', default: 'about' }
- { label: 'Body', name: 'body', widget: 'markdown' }
```
### Navigation
The last aspect of our Jekyll blog we might want to bring under the control of Decap CMS is our Navigation menu. Our Jekyll tutorial blog has a file `_data/navigation.yml` that defines the links rendered by `_includes/navigation.html`. It looks like this.
```yaml
# _data/navigation.yml
- name: Home
link: /
- name: About
link: /about.html
- name: Blog
link: /blog.html
- name: Staff
link: /staff.html
```
To make this file editable with Decap CMS, we'll need to make one minor tweak. The issue is this file contains a yaml array at the top level, but Decap CMS is designed to work with yaml objects. Update `_data/navigation.yml` so it looks like so.
```yaml
# _data/navigation.yml
items:
- name: Home
link: /
- name: About
link: /about.html
- name: Blog
link: /blog.html
- name: Staff
link: /staff.html
```
You'll need to update `_includes/navigation.html` accordingly. `{% for item in site.data.navigation %}` should be changed to `{% for item in site.data.navigation.items %}`. When you're done, the nav html should look like this.
```html
```
Finally, add the following to the collections array in `config.yml`
```yaml
- name: 'config'
label: 'Config'
editor:
preview: false
files:
- label: 'Navigation'
name: 'navigation'
file: '_data/navigation.yml'
fields:
- label: 'Navigation Items'
name: 'items'
widget: 'list'
fields:
- { label: Name, name: name, widget: string }
- { label: Link, name: link, widget: string }
```
Now you can add, rename, and rearrange the navigation items on your blog.
---
# NextJS
Source: https://decapcms.org/docs/nextjs/
This guide will help you get started using Decap CMS with NextJS.
## Creating a new project
Let's repeat some of the basics of setting up a simple NextJS project (check out [nextjs.org/learn](http://nextjs.org/learn) for a more detailed version).
```bash
# Create new directory and navigate into it
mkdir awesome-kitties
cd awesome-kitties
# Initialize a new project
npm init -y
# Install required dependencies
npm install --save react react-dom next
# Install webpack loader for Markdown (Use version 3+)
npm install --save-dev frontmatter-markdown-loader
# If using NextJS v11.0.0 or above, @babel/core and @babel/preset-react has to be installed as dependencies of frontmatter-markdown-loader
npm install --save-dev @babel/core @babel/preset-react
# Create folder for pages (default for NextJS), and add a index file
mkdir pages
touch pages/index.js
# Create a folder for content, and a markdown file:
mkdir content
touch content/home.md
# Create a folder for static assets
mkdir public
```
Next, we need to add some modifications to our `package.json` file to make it easier to run and deploy our new site:
```json
{
"scripts": {
"dev": "next",
"build": "next build",
"start": "next start",
"export": "npm run build && next export"
}
}
```
There is a lot of different ways to create and display Markdown content, but to make this as easy as possible we'll be using a webpack-loader that enables us to load markdown files directly in our React components ([frontmatter-markdown-loader](https://www.npmjs.com/package/frontmatter-markdown-loader)).
Add the following content to your `content/home.md` file:
```md
---
title: Awesome kitties
date: 2019-03-17T19:31:20.591Z
cats:
- description: 'Maru is a Scottish Fold from Japan, and he loves boxes.'
name: Maru (まる)
- description: Lil Bub is an American celebrity cat known for her unique appearance.
name: Lil Bub
- description: 'Grumpy cat is an American celebrity cat known for her grumpy appearance.'
name: Grumpy cat (Tardar Sauce)
---
Welcome to my awesome page about cats of the internet.
This page is built with NextJS, and content is managed in Decap CMS
```
Next, we need to tell webpack how to load Markdown files. Create a new `next.config.js` file at the root of your project with the following content:
```js
module.exports = {
webpack: (cfg) => {
cfg.module.rules.push(
{
test: /\.md$/,
loader: 'frontmatter-markdown-loader',
options: { mode: ['react-component'] }
}
)
return cfg
}
}
```
Almost there! The last thing we need to do is to add some content to our `pages/index.js` file. With a little help of our webpack loader, we can now easily import Markdown files:
```js
import Head from "next/head"
import { Component } from 'react'
import { attributes, react as HomeContent } from '../content/home.md'
export default class Home extends Component {
render() {
let { title, cats } = attributes
return (
<>
{title}
{cats.map((cat, k) => (
{cat.name}
{cat.description}
))}
)
}
}
```
Great! We now have a page that displays content from our Markdown file. Go ahead and start your development server to test if everything is working:
```bash
npm run dev
```
## Adding Decap CMS
There are many different ways to add Decap CMS to your project. The easiest is probably just to embed it from a CDN, and that's exactly what we're gonna do. To avoid making this guide too complicated, we're just going to add Decap into a subfolder inside the `/public` directory (which is just served as static files by Next):
```bash
# Create and navigate into public/admin folder
mkdir -p public/admin
cd public/admin
# Create index.html and config.yml file
touch index.html
touch config.yml
```
Paste HTML for Decap CMS into your `public/admin/index.html` file (check out the [Add Decap To Your Site](https://www.decapcms.org/docs/add-to-your-site/) section for more information)
```html
Content Manager
```
Notice that we also added the identity widget. This allows sign up when the project is hosted at Netlify.
Paste the following configuration into your `public/admin/config.yml` file:
```yaml
backend:
name: git-gateway
branch: main # Branch to update (optional; defaults to master)
media_folder: public/img
public_folder: img
collections:
- name: "pages"
label: "Pages"
files:
- label: "Home"
name: "home"
file: "content/home.md"
fields:
- { label: "Title", name: "title", widget: "string"}
- { label: "Publish Date", name: "date", widget: "datetime" }
- { label: "Body", name: "body", widget: "markdown"}
- label: 'Cats'
name: "cats"
widget: list
fields:
- { label: "Name", name: "name", widget: "string"}
- { label: "Description", name: "description", widget: "text"}
```
Awesome! Decap CMS should now be available at `localhost:3000/admin/index.html`. Unfortunately we can't edit our content just yet. First we need to move our code into a Git repository, and create a new Netlify site.
**Tip:** If you want to test changes made to your config.yml file locally, swap out "git-gateway" with "test-repo" and navigate to `localhost:3000/admin/index.html` to view Decap CMS locally (you can't make changes or read actual content from Git this way, but it's great to verify how things will look).
## Publishing to GitHub and Netlify
Create a new repository at GitHub (or one of the other supported Git services) and follow the instructions on how to push existing files into your new repository.
Now is probably also a good time to add a `.gitignore` file:
```bash
.next/
node_modules/
/npm-debug.log
.DS_Store
out/
```
When your project is under version control, go to Netlify and select "New Site from Git". Select GitHub (or whatever service you used in the previous step), and the repository you just pushed to.
Under the final step (Build options, and deploy!), make sure you enter the following:
| Field | Value |
| ----------------- | ------------------ |
| Build command | **npm run export** |
| Publish directory | **out** |
### Enable Identity and Git Gateway
Netlify's Identity and Git Gateway services allow you to manage CMS admin users for your site without requiring them to have an account with your Git host or commit access on your repo. From your site dashboard on Netlify:
1. Go to **Settings > Identity**, and select **Enable Identity service**.
2. Under **Registration preferences**, select **Open** or **Invite only**. In most cases, you want only invited users to access your CMS, but if you're just experimenting, you can leave it open for convenience.
3. If you'd like to allow one-click login with services like Google and GitHub, check the boxes next to the services you'd like to use, under **External providers**.
4. Scroll down to **Services > Git Gateway**, and click **Enable Git Gateway**. This authenticates with your Git host and generates an API access token. In this case, we're leaving the **Roles** field blank, which means any logged in user may access the CMS. For information on changing this, check the [Netlify Identity documentation](https://www.netlify.com/docs/identity/).
### Celebrate!
Great job - you did it! Open your new page via the new Netlify URL, and navigate to `/admin`. If you did everything correct in the previous step, you should now be able to sign up for an account, and log in.
**Tip:** Signing up with an external provider is the easiest. If you want to sign up by email, you'll have to set up a redirect in your index.js page (which we won't be covering in this guide). For more information, have a look at the [Add To Your Site](https://www.decapcms.org/docs/add-to-your-site) section.
Congratulations - you can finally manage your new list of cats!
---
# Nuxt
Source: https://decapcms.org/docs/nuxt/
This guide will walk you through how to integrate Decap CMS with Nuxt.
## Starting With `create-nuxt-app`
Follow the instructions on the [Nuxt documentation](https://nuxtjs.org/guide/installation#using-code-create-nuxt-app-code-) for creating a new project, or run:
```bash
npx create-nuxt-app
cd
npm run dev
```
## Setting Up Decap CMS
### Add the Decap CMS files to Nuxt
For nuxt 3 apps and above use the \`public/\` folder instead of \`/static\` which is for nuxt 2.
In the `static/` directory, create a new directory `admin/`. Inside that directory you'll create two files, your `index.html` and a `config.yml`. Per the [Decap CMS documentation](https://decapcms.org/docs/add-to-your-site/), we'll set the content of `static/admin/index.html` to the following:
```html
Content Manager
```
For your `static/admin/config.yml` file, you can put in a basic starter config:
```yaml
backend:
name: git-gateway
branch: main # Branch to update (optional; defaults to master)
media_folder: static/img
public_folder: /img
collections:
- name: 'blog'
label: 'Blog'
folder: 'content/blog'
format: 'frontmatter'
create: true
slug: '{{year}}-{{month}}-{{day}}-{{slug}}'
editor:
preview: false
fields:
- { label: 'Title', name: 'title', widget: 'string' }
- { label: 'Publish Date', name: 'date', widget: 'datetime' }
- { label: 'Description', name: 'description', widget: 'string' }
- { label: 'Body', name: 'body', widget: 'markdown' }
```
You can build whatever collections and content modeling you want. The important thing to note is the `format: 'frontmatter'` value on each collection. This is important for consuming content in Nuxt with the [nuxt/content](https://content.nuxtjs.org) module.
### Add the `content/` directory to Nuxt
In your root directory, you can create a new directory `content/`. As you might guess, this is where our content will live. Your filesystem should look about like this, so far:
```bash
root/
├ content/
├ components/
├ layouts/
├ middleware/
├ pages/
├ plugins/
├ static/
│ └ admin/
│ ├ index.html
│ └ config.yml
├ store/
└ // .editorconfig, .gitignore, nuxt.config.js, etc...
```
### Pushing to GitHub
It's now time to commit your changes and push to GitHub. `create-nuxt-app` initializes Git automatically for you, so you only need to do:
```bash
git add .
git commit -m "Initial Commit"
git remote add origin https://github.com/YOUR_USERNAME/NEW_REPO_NAME.git
git push -u origin main
```
### Deploying With Netlify
Now you can go ahead and deploy to Netlify. Go to your Netlify dashboard and click **[New site from Git](https://app.netlify.com/start)**. Select the repo you just created. Under **Basic build settings**, you can set the build command to `npm run generate`. Set the publish directory to `dist`. Click **Deploy site** to get the process going.
### Authenticating with Netlify Identity
**Add the Netlify Identity Widget**
You've already added the Netlify Identity widget to our `admin/index.html`. The next thing to do is add the Netlify Identity widget to our site's index page. In `pages/index.vue`, we can add the following to the page `
```
Once you've added this, make sure to push your changes to GitHub!
*See [how to add script tags to ``](https://nuxtjs.org/faq/#local-settings).*
**Enable Identity & Git Gateway in Netlify**
Back in your [Netlify dashboard](https://app.netlify.com/):
1. Go to **Settings > Identity**, and select **Enable Identity service**.
2. Once enabled, select **Settings and usage**, and scroll down to **Registration preferences**. You can set this to either **Open** or **Invite only**, but usually **Invite only** is your best bet for a personal site.
3. If you don't want to create an account, or would like to use an external provider such as GitHub or Google, you can enable those services under **External providers**.
4. Scroll down to **Services** and click **Enable Git Gateway**.
**Accessing the CMS**
Once you've reached this point, you should be able to access the CMS in your browser at `http://localhost:3000/admin`. You'll be prompted to add the URL of your Netlify site. Once you've added that URL, you can log in with an Identity account or with one of the External Providers you enabled in step 3 above. For the sake of this tutorial, you can create a blog post in the CMS, and publish it! Once you `git pull` in your project, the blog post will show up in the project at `content/blog/.md`.
## Using nuxt/content
Decap CMS and [nuxt/content](https://content.nuxtjs.org) module click together and complement each other to give you best authoring experience and developer experience respectively.
Adding nuxt/content dependency
```javascript
yarn add @nuxt/content
or
npm i @nuxt/content
```
Then, add @nuxt/content to the modules section of nuxt.config.js:
```javascript
{
modules: [
'@nuxt/content'
],
content: {
// Options
}
}
```
By adding nuxt content module you get `$content` injected into your whole app which you can use to fetch content from your content folder using `simple fetch api` or `nuxt asyncData` option.
This also gives a `` component which helps you display markdown content with ease and also gives option of live editing in dev mode.
### Example Blog Post List
`nuxt/content` module gives us `$content` which we can use to fetch the list of blog posts in `content/blog` directory.
```javascript
{{ post.title }}
```
### Example Blog Post
To generate blog posts create a `_slug.vue` file in the pages folder. By using `$content` you would get a JSON object which you can use to display. But if you are using Markdown to write and store your posts, you can use the [Nuxt Content module](https://content.nuxtjs.org/) which gives you option to edit content on page in dev mode and many more features.
```javascript
{{ post.title }}
```
### Generating pages with the `generate` property
Since Nuxt 2.13+, nuxt export has a crawler feature integrated which will crawl all your links and generate your routes based on those links. Therefore you do not need to do anything in order for your dynamic routes to be crawled. i.e, if you are on version of nuxt above 2.14 add target as static in nuxt.config.js and use `nuxt generate` to build your static site.
```javascript
// nuxt.config.js
target: 'static'
```
If you are using **nuxt version below 2.14** you have to use generate option in nuxt/content module to generate pages
```javascript
//nuxt.config.js
export default {
modules: [,
'@nuxt/content'
],
generate: {
async routes () {
const { $content } = require('@nuxt/content')
const files = await $content().only(['path']).fetch()
return files.map(file => file.path === '/index' ? '/' : file.path)
}
}
}
```
To render your site as a static site, you'll need to create or update the `generate` property in `nuxt.config.js` to create dynamic routes and provide their content as a `payload`. In `generate`, make your `routes` entry a function:
```javascript
export default {
generate: {
routes: function() {
const fs = require('fs');
const path = require('path');
return fs.readdirSync('./content/blog').map(file => {
return {
route: `/blog/${path.parse(file).name}`, // Return the slug
payload: require(`./content/blog/${file}`),
};
});
},
},
};
```
To see the generated site, navigate to name-of-your-website.netlify.app/blog
---
# Middleman
Source: https://decapcms.org/docs/middleman/
This guide will help you get started using Decap CMS and Middleman.
## Installation
To get up and running with Middleman, you need both the Ruby language runtime and RubyGems installed on your computer. Check out the [Middleman installation docs](https://middlemanapp.com/basics/install/) for more details. If you already have your environment set up, use the following command to install Middleman:
```bash
gem install middleman
```
## Create a new Middleman site
Let's create a new site from scratch. Run the following commands in the terminal, in the folder where you'd like to create the blog:
```bash
middleman init blog
cd blog
```
### Add the Middleman blog extension
Middleman has an official extension to support blogging, articles and tagging. `middleman-blog` ships as an extension and must be installed to use. Simply specify the gem in your Gemfile:
```bash
gem "middleman-blog"
```
Install the dependencies and run Middleman with the following commands:
```bash
bundle install
middleman server
```
## Get started with Middleman
Now we have our site up and running let's open up a code editor and create a new folder `source/posts` and add your first article named `2019-01-01-example-article.html.md` with the following content:
```yml
---
title: Example Article
date: 2019-01-01
---
This is an example article. You probably want to delete it and write your own articles once you finished this guide!
```
### Activate the blog extension
We can then activate the blog in `config.rb`. Be sure to check out the [Middleman blogging docs](https://middlemanapp.com/basics/blogging/) for all the configuration options.
```bash
activate :blog do | blog |
blog.permalink = "blog/{title}.html"
blog.sources = "posts/{year}-{month}-{day}-{title}.html"
blog.layout = "blog-layout"
end
```
### Load the articles
Time to load our articles in `index.html.erb`.
```ruby
Recent articles
<% blog.articles.each do | article | %>
<%= article.title %>
<%= link_to 'Read more', article %>
<% end %>
```
### Add an article layout
In the last step before we add Decap CMS, we add a layout for the article page. Create a new layout `source/layouts/blog-layout.html.erb`. For now we will get the title and the content:
```ruby
<%= current_page.data.title %>
<%= yield %>
```
Now that we have a functioning blog, let's get started with Decap CMS!
## Add Decap CMS to your site
Create two files in a new folder called `admin`, `index.html` and `config.yml`. Also add an `upload` folder in the images directory that will function as our `media_folder`.
```bash
├── source
│ ├── admin
│ │ ├── index.html
│ │ ├── config.yml
│ │
│ ├── images
│ │ ├── uploads
```
In the newly created `index.html` we add scripts for Decap CMS and the Netlify Identity Widget:
```html
Decap CMS
```
### Configuration
For the purpose of this guide we will deploy to Netlify from a GitHub repository which requires the minimum configuration. In `config.yml` file paste the following code:
```yml
backend:
name: git-gateway
branch: main # Branch to update (optional; defaults to master)
media_folder: source/images/uploads
public_folder: /images/uploads
collections:
- name: blog
label: Blog
folder: source/posts/
extension: .html.md
format: frontmatter
create: true
slug: '{{year}}-{{month}}-{{day}}-{{title}}'
fields:
- {label: Title, name: title, widget: string}
- {label: Publish Date, name: date, widget: datetime}
- {label: Body, name: body, widget: markdown}
```
### Push to GitHub
It's now time to commit your changes and push to GitHub.
```bash
git init
git add .
git commit -m "Initial Commit"
git remote add origin https://github.com/YOUR_USERNAME/NEW_REPO_NAME.git
git push -u origin main
```
### Add your repo to Netlify
Go to Netlify and select 'New Site from Git'. Select GitHub and the repository you just pushed to. Click Configure Netlify on GitHub and give access to your repository. Finish the setup by clicking Deploy Site. Netlify will begin reading your repository and starting building your project.
### Enable Identity and Git Gateway
Netlify's Identity and Git Gateway services allow you to manage CMS admin users for your site without requiring them to have an account with your Git host or commit access on your repo. From your site dashboard on Netlify:
1. Go to **Settings > Identity**, and select **Enable Identity service**.
2. Under **Registration preferences**, select **Open** or **Invite only**. In most cases, you want only invited users to access your CMS, but if you're just experimenting, you can leave it open for convenience.
3. If you'd like to allow one-click login with services like Google and GitHub, check the boxes next to the services you'd like to use, under **External providers**.
4. Scroll down to **Services > Git Gateway**, and click **Enable Git Gateway**. This authenticates with your Git host and generates an API access token. In this case, we're leaving the **Roles** field blank, which means any logged in user may access the CMS. For information on changing this, check the [Netlify Identity documentation](https://www.netlify.com/docs/identity/).
## Start publishing
It's time to create your first blog post. Login to your site's `/admin/` page and create a new post by clicking New Blog. Add a title, a date and some text. When you click Publish, a new commit will be created in your GitHub repo with this format `Create Blog “year-month-date-title”`.
Then Netlify will detect that there was a commit in your repo, and will start rebuilding your project. When your project is deployed you'll be able to see the post you created.
Be sure to checkout the official [Middleman Starter](https://github.com/tomrutgers/middleman-starter-netlify-cms) for more examples.
---
# Gridsome
Source: https://decapcms.org/docs/gridsome/
This guide will help you get started using Decap CMS and Gridsome.
## How to install Gridsome
### 1. Install Gridsome CLI tool
```bash
# Using Yarn
yarn global add @gridsome/cli
# Using NPM
npm install --global @gridsome/cli
```
## Create a new Gridsome website
```bash
# To create a new project run
gridsome create gridsome-netlify-blog
# Then navigate to the project folder
cd gridsome-netlify-blog
# To start local dev server at http://localhost:8080
gridsome develop
```
### Install Decap CMS the required dependencies to your project
```bash
# Using Yarn
yarn add decap-cms gridsome-plugin-netlify-cms @gridsome/source-filesystem @gridsome/transformer-remark
# Using NPM
npm add decap-cms gridsome-plugin-netlify-cms @gridsome/source-filesystem @gridsome/transformer-remark
```
Now that the plugins are installed, it's time to setup the configuration. Open the `gridsome.config.js` file and update its content to:
```js
module.exports = {
siteName: 'Gridsome',
transformers: {
remark: {
externalLinksTarget: '_blank',
externalLinksRel: ['nofollow', 'noopener', 'noreferrer'],
anchorClassName: 'icon icon-link'
}
},
plugins: [
{
use: '@gridsome/source-filesystem',
options: {
path: 'posts/**/*.md',
typeName: 'Post'
}
},
{
use: `gridsome-plugin-decap-cms`,
options: {
publicPath: `/admin`
}
},
]
}
```
Please read [gridsome-plugin-netlify-cms](https://gridsome.org/plugins/gridsome-plugin-netlify-cms), [transformer-remark](https://gridsome.org/plugins/@gridsome/transformer-remark) for more information.
## Decap CMS setup
1. Create an `admin` directory inside the `src`
2. Create an `uploads` directory inside the root of your project
3. Add `index.html`, `index.js` and a `config.yml` file to your `admin` directory
Your `index.html` should look like this:
```html
Decap CMS
```
Your `index.js` should look like this:
```js
import CMS from "decap-cms"
```
Your `config.yml` for GitHub should look like this:
```yml
backend:
name: git-gateway
branch: main # Branch to update (optional; defaults to master)
media_folder: "static/uploads"
public_folder: "/uploads"
collections:
- name: "posts"
label: "Posts"
folder: "posts"
create: true
slug: "{{slug}}"
fields:
- {label: "Title", name: "title", widget: "string"}
- {label: "Excerpt", name: "excerpt", widget: "string"}
- {label: "Publish Date", name: "date", widget: "datetime"}
- {label: "Body", name: "body", widget: "markdown"}
```
## Push to GitHub
It's now time to commit your changes and push to GitHub.
```bash
git init
git add .
git commit -m "Initial Commit"
git remote add origin https://github.com/YOUR_USERNAME/NEW_REPO_NAME.git
git push -u origin main
```
### Add your repo to Netlify
Go to Netlify and select 'New Site from Git'. Select GitHub and the repository you just pushed to. Click Configure Netlify on GitHub and give access to your repository. Finish the setup by clicking Deploy Site. Netlify will begin reading your repository and starting building your project.
### Enable Identity and Git Gateway
Netlify's Identity and Git Gateway services allow you to manage CMS admin users for your site without requiring them to have an account with your Git host or commit access on your repo. From your site dashboard on Netlify:
1. Go to **Settings > Identity**, and select **Enable Identity service**.
2. Under **Registration preferences**, select **Open** or **Invite only**. In most cases, you want only invited users to access your CMS, but if you're just experimenting, you can leave it open for convenience.
3. If you'd like to allow one-click login with services like Google and GitHub, check the boxes next to the services you'd like to use, under **External providers**.
4. Scroll down to **Services > Git Gateway**, and click **Enable Git Gateway**. This authenticates with your Git host and generates an API access token. In this case, we're leaving the **Roles** field blank, which means any logged in user may access the CMS. For information on changing this, check the [Netlify Identity documentation](https://www.netlify.com/docs/identity/).
## Start publishing
It's time to create your first blog post. Login to your site's `/admin/` page and create a new post by clicking New Blog. Add a title, a date and some text. When you click Publish, a new commit will be created in your GitHub repo with this format `Create Blog “year-month-date-title”`.
Then Netlify will detect that there was a commit in your repo, and will start rebuilding your project. When your project is deployed you'll be able to see the post you created.
Your basic blog scaffold is done, now you can query data from the GraphQL server just like you're working with the filesystem. For more info read [querying data](https://gridsome.org/docs/querying-data).
---
# Docusaurus
Source: https://decapcms.org/docs/docusaurus/
This guide instructs you on how to integrate Decap CMS with Docusaurus.
### Before you begin
* Sign up for [GitHub](https://www.github.com) and [Netlify](https://www.netlify.com).
* Download [Node.js](https://nodejs.org/en/download/) version 14 or above.
* Install the [GitHub CLI](https://cli.github.com/).
* Install and authenticate the [Netlify CLI](https://docs.netlify.com/cli/get-started/).
## Create a new Docusaurus project
```bash
# 1. Use Docusaurus to create a site scaffold.
npx create-docusaurus@latest my-website classic
# 2. Run the development server.
cd my-website
npm run start
```
A browser window opens at `http://localhost:3000`.
The development server now serves your website at `http://localhost:3000`. As you edit the source files in `/my-website/`, you can visit `http://localhost:3000` to preview your changes.
## Push your project to GitHub
Decap CMS requires a [backend](https://www.decapcms.org/docs/backends-overview/) to store content. Decap CMS supports using Git hosts, like GitHub or GitLab, as backends. This guide uses GitHub.
```bash
# 1. Initialize your local Git repository.
git init
# 2. Rename your initial branch to match GitHub.
git branch -m main
# 3. Stage all your local files to your repository.
git add .
# 4. Commit your staged changes.
git commit -m 'Initial commit'
# 5. Create a remote repository on GitHub using the GitHub CLI.
gh repo create my-website
```
Don't add a license or a .gitignore. Do add an "origin" git remote.

```bash
# 6. Update your remote repository with your staged changes.
git push -u origin main
```
## Publish your project using Netlify CLI
Connect Netlify CLI to your GitHub repository.
```bash
netlify init
```
Choose Create & configure a new site.
Choose your team and site name.
Choose yarn build for your build command.
Choose build for your deployment directory.

Choose the default option for everything else.
Your website is now deployed. Netlify provides you with a randomly generated domain name. Run `netlify open --site` to view your deployed site.
## Add Decap CMS to your project
### Before you begin
Remove all existing posts from /blog.
```bash
rm -rf ./blog/*
```
Create a new blog post post titled 2021-11-15-first-blog-post.md.
```bash
touch ./blog/2021-11-15-first-blog-post.md
```
Edit 2021-11-15-first-blog-post.md to look like this:
```yaml
---
title: First Blog Post
slug: first-blog-post
tags:
- foo
- bar
authors:
- name: Garrison McMullen
title: Instruction Writer
url: https://github.com/garrison0
image_url: https://avatars.githubusercontent.com/u/4089393?v=4
---
Lorem ipsum dolor sit amet, consectetur adipiscing elit. Pellentesque elementum dignissim ultricies. Fusce rhoncus ipsum tempor eros aliquam consequat.
```
### Procedure
Create an admin directory inside static.
```bash
cd static
mkdir admin
```
In the admin directory, create a config.yml file and an index.html file.
```bash
cd admin
touch config.yml
touch index.html
```
Edit index.html to look like this:
```html
Content Manager
```
`index.html` displays the Decap CMS admin interface. You'll use the admin interface to edit your blog posts.
Edit config.yml to look like this:
```yaml
backend:
name: github
branch: main
repo: /my-website
# These lines should *not* be indented
media_folder: "static/img" # Media files will be stored in the repo under static/images/uploads
public_folder: "/img/" # The src attribute for uploaded media will begin with /images/uploads
collections:
- name: blog
label: "blog"
folder: blog
identifier_field: title
extension: md
widget: "list"
create: true
slug: "{{year}}-{{month}}-{{day}}-{{slug}}" # Filename template, e.g., YYYY-MM-DD-title.md
fields:
- { name: title, label: Title, widget: string }
- { name: body, label: Body, widget: markdown }
- { name: slug, label: Slug, widget: string }
- label: "Tags"
name: "tags"
widget: "list"
- label: "Authors"
name: "authors"
widget: "list"
fields:
- { name: name, label: Name, widget: string }
- { name: title, label: Title, widget: string }
- { name: url, label: URL, widget: string }
- { name: imageUrl, label: ImageURL, widget: string }
```
`config.yml` specifies what kind of content your blog posts have. The content specification enables Decap CMS to edit existing posts and create new ones with the same format. To learn more, read about Decap CMS' [](https://www.decapcms.org/docs/configuration-options/)[Configuration options](https://www.decapcms.org/docs/configuration-options/).
Visit localhost:3000/admin
You can now view and edit `2021-11-15-first-blog-post.md` through the admin interface. You can also create new blog posts.
**Warning:** Any changes you publish through the admin interface will only effect your *remote GitHub repository*. To retrieve these changes locally, `git pull` from your local repository.
Commit and push your new changes to your remote repository.
```bash
git add .
git commit -m "Add Decap CMS"
git push
```
Netlify builds and deploys your new changes.
## Add GitHub as an authentication provider
Before you can access `/admin/` through your Netlify domain, you need to set up an authentication provider. The authentication provider allows Decap CMS to determine whether users have read and write access to `/admin/`. This guide uses GitHub credentials for authentication.
### Configure GitHub
1. Create a new [GitHub OAuth application](https://github.com/settings/applications/new).
2. Enter your Netlify domain as the **Homepage URL**.
3. Enter https://api.netlify.com/auth/done as the **Authorization callback URL**.
4. Click **Register application.**
5. Click **Generate a new client secret.**
6. Copy the provided client secret and client ID.
### Configure Netlify
1. On Netlify, select your Project, then under `Project configuration > Access & security > OAuth > Authentication providers`, click **Install provider**.
2. Enter your client secret and client ID from GitHub.
3. Click **Install**.
🎉 All done! Now you can access the admin interface through your Netlify URL.
---
# VitePress
Source: https://decapcms.org/docs/vitepress/
This guide will walk you through how to integrate Decap CMS with [VitePress](https://vitepress.dev).
If you are using [VuePress](https://v2.vuepress.vuejs.org) you can also [the VuePress template](https://vuedn.netlify.app/).
To use the [`vite-plugin-decap-cms` plugin](https://vite-plugin-decap-cms.pages.dev), follow [the plugin setup](https://decapcms.org/docs/vitepress/#vite-plugin) instructions. The plugin will simplify the configuration for you.
## Setting up VitePress
See [the VitePress prerequisites](https://vitepress.dev/guide/getting-started#prerequisites) for the minimum Node version supported.
Install VitePress using the package manager of your choice:
```bash
npm install --save-dev vitepress
```
Follow the [VitePress documentation](https://vitepress.dev/guide/getting-started#installation) to configure VitePress or use the setup wizard:
```bash
npx vitepress init
```
## Setting up Decap CMS
In the [public directory](https://vitepress.dev/guide/asset-handling#the-public-directory), create a new directory `/admin/`. Inside that directory, you will have to create two files, `config.yml` and `index.html`. For this guide you can use the example `index.html` from the [Decap CMS installation](https://decapcms.org/docs/install-decap-cms/):
```html
Content Manager
```
For your `config.yml` file, you can put in a starter config:
```yml
backend:
name: git-gateway
branch: main # Branch to update (optional; defaults to master)
media_folder: public/img
public_folder: /img
collections:
- name: 'guide'
label: 'Guide'
folder: 'guide'
create: true
slug: '{{slug}}'
editor:
preview: false
fields:
- { label: 'Title', name: 'title', widget: 'string' }
- { label: 'Description', name: 'description', widget: 'string' }
- { label: 'Body', name: 'body', widget: 'markdown' }
```
This example only includes the frontmatter included in all themes. You can visit the [default theme reference](https://vitepress.dev/reference/frontmatter-config) for all frontmatter keys for the default theme.
For VitePress you will need to [add `{target="_self"}`](https://vitepress.dev/guide/routing#linking-to-non-vitepress-pages) to all admin links since the Decap CMS page is a non-VitePress page.
### Pushing to GitHub
It's now time to commit your changes and push to GitHub.
```bash
git init
git add .
git commit -m "Initial Commit"
git branch -M main
git remote add origin https://github.com/YOUR_USERNAME/NEW_REPO_NAME.git
git push -u origin main
```
### Deploying with Netlify
Go to Netlify and select 'New Site from Git'. Select GitHub and the repository you just pushed to. Click Configure Netlify on GitHub and give access to your repository. Finish the setup by clicking Deploy Site. Netlify will begin reading your repository and starting building your project.
## Vite plugin
The steps above for VitePress will likely also work for any similar Vite-based SSG (Static Site Generator), such as VuePress.
To simplify the configuration you can use the [`vite-plugin-decap-cms`](https://vite-plugin-decap-cms.pages.dev) Vite plugin.
### Setting up the plugin
The following steps assume that you have only installed a Vite SSG, such as [VitePress](https://decapcms.org/docs/vitepress/#setting-up-vitepress). You do not need to follow the steps of [setting up Decap CMS](https://decapcms.org/docs/vitepress/#setting-up-decap-cms)! First, install the plugin:
```bash
npm install --save-dev vite-plugin-decap-cms
```
Instead of adding files to `/admin/`, you need to add the plugin to your Vite configuration and specify the Decap configuration in the plugin options.
```ts
// vite.config.ts
import { defineConfig } from 'vite'
import decap, {
createFolderCollection,
createField,
} from 'vite-plugin-decap-cms'
export default defineConfig({
publicDir: 'public',
plugins: [
decap({
config: {
backend: {
name: 'test-repo',
},
mediaFolder: '/src/public/',
collections: [
createFolderCollection({
name: 'test',
label: 'Test collection',
fields: [
createField('markdown', { name: 'body' }),
],
}),
]
}
})
],
})
```
After configuring the plugin, you can [push to GitHub](https://decapcms.org/docs/vitepress/#pushing-to-github) and [deploy your site](https://decapcms.org/docs/vitepress/#deploying-with-netlify).
---
# Creating Custom Previews
Source: https://decapcms.org/docs/customization/
Decap CMS exposes a `window.CMS` global object that you can use to register custom widgets, previews and editor plugins. The available customization methods are:
* **registerPreviewStyle:** Register a custom stylesheet to use on the preview pane.
* **registerPreviewTemplate:** Register a template for a collection.
### React Components inline interaction
Decap CMS is a collection of React components and exposes two constructs globally to allow you to create components inline: `createClass` and `h` (alias for React.createElement).
## `registerPreviewStyle`
Register a custom stylesheet to use on the preview pane.
```js
CMS.registerPreviewStyle(file);
```
**Params:**
* **file:** css file path
**Example:**
```html
// index.html
```
```css
/* example.css */
html,
body {
color: #444;
font-size: 14px;
font-family: 'Helvetica Neue', Helvetica, Arial, sans-serif;
}
body {
padding: 20px;
}
```
## Raw CSS in `registerPreviewStyle`
`registerPreviewStyle` can now accept a CSS string, in addition to accepting a url. The feature is activated by passing in an object as the second argument, with `raw` set to a truthy value. This is critical for integrating with modern build tooling. Here's an example using webpack:
```js
/**
* Assumes a webpack project with `sass-loader` and `css-loader` installed.
* Takes advantage of the `toString` method in the return value of `css-loader`.
*/
import CMS from 'decap-cms-app';
import styles from '!css-loader!sass-loader!../main.scss';
CMS.registerPreviewStyle(styles.toString(), { raw: true });
```
## `registerPreviewTemplate`
Registers a template for a folder collection or an individual file in a file collection.
`CMS.registerPreviewTemplate(name, react_component);`
**Params:**
* name: The name of the collection (or file for file collections) which this preview component will be used for.
* Folder collections: Use the name of the collection
* File collections: Use the name of the file
* react_component: A React component that renders the collection data. Seven props will be passed to your component during render:
* entry: Immutable collection containing the entry data.
* widgetFor: Returns the appropriate widget preview component for a given field.
* [widgetsFor](https://decapcms.org/docs/customization/#lists-and-objects): Returns an array of objects with widgets and associated field data. For use with list and object type entries.
* getAsset: Returns the correct filePath or in-memory preview for uploaded images.
**Example:**
```html
```
* getCollection: Returns a promise that resolves with the published entries in a collection. Without a slug, it resolves with an array of entries; with a slug, it resolves with that one entry. Each entry is an Immutable Map with `data`, `slug` and `path` keys, and `data` is a plain object.
**Params:**
* collection: The name of the collection - required
* slug: The slug of the entry - optional: if not supplied all entries will be returned
`render` can't wait for a promise, so load the entries when the component mounts and keep them in its state.
**Example:**
```html
```
* document: The preview pane iframe's [document instance](https://github.com/ryanseddon/react-frame-component/tree/9f8f06e1d3fc40da7122f0a57c62f7dec306e6cb#accessing-the-iframes-window-and-document).
* window: The preview pane iframe's [window instance](https://github.com/ryanseddon/react-frame-component/tree/9f8f06e1d3fc40da7122f0a57c62f7dec306e6cb#accessing-the-iframes-window-and-document).
### Lists and Objects
The API for accessing the individual fields of list- and object-type entries is similar to the API for accessing fields in standard entries, but there are a few key differences. Access to these nested fields is facilitated through the `widgetsFor` function, which is passed to the preview template component during render.
**Note**: as is often the case with the Decap CMS API, arrays and objects are created with Immutable.js. If some of the methods that we use are unfamiliar, such as `getIn`, check out [their docs](https://facebook.github.io/immutable-js/docs/#/) to get a better understanding.
**List Example:**
```html
```
**Object Example:**
```html
```
### Accessing Metadata
Preview Components also receive an additional prop: `fieldsMetaData`. It contains additional information (besides the plain textual value of each field) that can be useful for preview purposes. For example, the Relation widget passes the whole selected relation data in `fieldsMetaData`.
For a relation field, look up the related entry's data by the relation field's name, the related collection's name, and the value saved in the field. For a relation field inside an object or list field, start the path with the name of that object or list field. `fieldsMetaData` stays empty until the relation widget has loaded the related entry, so check for the value before using it.
The example below uses a relation field named `author` that points to the `authors` collection:
```js
export default class ArticlePreview extends React.Component {
render() {
const {entry, fieldsMetaData} = this.props;
const author = fieldsMetaData.getIn(['author', 'authors', entry.getIn(['data', 'author'])]);
return
{ entry.getIn(['data', 'title']) }
{author &&}
}
}
```
---
# Editor Tooling
Source: https://decapcms.org/docs/editor-tooling/
## Linting
If you want to lint your Markdown files as part of your development workflow through your code editor, pre-commit hooks, and/or CI, we recommend using the Remark ecosystem.
Since Decap CMS uses `remark` internally for Markdown processing, using it in your development workflow will help avoid formatting/style differences between files edited through Decap and files edited locally.
To start using it in your project, install both [`remark-cli`](https://github.com/remarkjs/remark/tree/main/packages/remark-cli) and [`remark-frontmatter`](https://github.com/remarkjs/remark-frontmatter):
```sh
npm install --save-dev remark-cli remark-frontmatter
```
Then, add the following lines to your `package.json`:
```json
{
"scripts": {
"remark:check": "remark .",
"remark:write": "remark . --output"
},
"remarkConfig": {
"plugins": ["remark-frontmatter"]
}
}
```
Now, you can use `npm run remark:check` to lint your Markdown files and `npm run remark:write` to format them.
## Custom Formatters
To manage content with other file formats than the built-in ones, you can register a custom formatter:
```js
const JSON5 = require("json5");
CMS.registerCustomFormat("json5", "json5", {
fromFile: (text) => JSON5.parse(text),
toFile: (value) => JSON5.stringify(value, null, 2),
});
```
Then include `format: json5` in your collection configuration. See the [Collection docs](https://www.decapcms.org/docs/configuration-options/#collections) for more details.
You can also override the built-in formatters. For example, to change the YAML serialization method from [`yaml`](https://npmjs.com/package/yaml) to [`js-yaml`](https://npmjs.com/package/js-yaml):
```js
const jsYaml = require("js-yaml");
CMS.registerCustomFormat("yml", "yml", {
fromFile: (text) => jsYaml.load(text),
toFile: (value) => jsYaml.dump(value),
});
```
---
# Manual Initialization
Source: https://decapcms.org/docs/manual-initialization/
Decap CMS can now be manually initialized, rather than automatically loading up the moment you import it. The whole point of this at the moment is to inject configuration into Decap CMS before it loads, bypassing need for an actual Decap CMS `config.yml`. This is important, for example, when creating tight integrations with static site generators.
Assuming you have the decap-cms package installed to your project, manual initialization works by setting `window.CMS_MANUAL_INIT = true` **before importing the CMS**:
```js
// This global flag enables manual initialization.
window.CMS_MANUAL_INIT = true
// Usage with import from npm package
import CMS, { init } from 'decap-cms-app'
// Usage with script tag
const { CMS, initCMS: init } = window
/**
* Initialize without passing in config - equivalent to just importing
* Decap CMS the old way.
*/
init()
/**
* Optionally pass in a config object. This object will be merged into
* `config.yml` if it exists, and any portion that conflicts with
* `config.yml` will be overwritten. Arrays will be replaced during merge,
* not concatenated.
*
* For example, the code below contains an incomplete config, but using it,
* your `config.yml` can be missing its backend property, allowing you
* to set this property at runtime.
*/
init({
config: {
backend: {
name: 'git-gateway',
},
},
})
/**
* Optionally pass in a complete config object and set a flag
* (`load_config_file: false`) to ignore the `config.yml`.
*
* For example, the code below contains a complete config. The
* `config.yml` will be ignored when setting `load_config_file` to false.
* It is not required if the `config.yml` file is missing to set
* `load_config_file`, but will improve performance and avoid a load error.
*/
init({
config: {
backend: {
name: 'git-gateway',
},
load_config_file: false,
media_folder: "static/images/uploads",
public_folder: "/images/uploads",
collections: [
{ label: "Blog", name: "blog", folder: "_posts/blog", create: true, fields: [
{ label: "Title", name: "title", widget: "string" },
{ label: "Publish Date", name: "date", widget: "datetime" },
{ label: "Featured Image", name: "thumbnail", widget: "image" },
{ label: "Body", name: "body", widget: "markdown" },
]},
],
},
})
// The registry works as expected, and can be used before or after init.
CMS.registerPreviewTemplate(...);
```
---
# Registering to CMS Events
Source: https://decapcms.org/docs/registering-events/
You can execute a function when a specific CMS event occurs.
Example usage:
```javascript
CMS.registerEventListener({
name: 'prePublish',
handler: ({ author, entry }) => console.log(JSON.stringify({ author, data: entry.get('data') })),
});
```
Supported events are `prePublish`, `postPublish`, `preUnpublish`, `postUnpublish`, `preSave` and `postSave`. The `preSave` hook can be used to modify the entry data like so:
```javascript
CMS.registerEventListener({
name: 'preSave',
handler: ({ entry }) => {
return entry.get('data').set('title', 'new title');
},
});
```
The handler can return either the entry's new `data`, as above, or the whole entry. Return the whole entry to change something outside `data`, such as a translation when the collection uses [i18n](https://decapcms.org/docs/i18n/): 3.17.2
```javascript
CMS.registerEventListener({
name: 'preSave',
handler: ({ entry }) => {
return entry.setIn(['i18n', 'de', 'data', 'title'], 'neuer Titel');
},
});
```
---
# Custom Mount Element
Source: https://decapcms.org/docs/custom-mounting/
Decap CMS always creates its own DOM element for mounting the application, which means it always takes over the entire page, and is generally inflexible if you're trying to do something creative, like injecting it into a shared context.
You can now provide your own element for Decap CMS to mount in by setting the target element's ID as `id="nc-root"`. If Decap CMS finds an element with this ID during initialization, it will mount within that element instead of creating its own.
This is useful if you want to create a wrapper around the CMS, like a custom header, footer, or sidebar.
Make sure to load the Decap script after the DOM is ready so that it can detect existing elements with proper ID.
**Example**
Load the script with the `defer` attribute:
``
Adding the following div to `admin/index.html` will cause the CMS to load within it:
``
---
# Contributor Guide
Source: https://decapcms.org/docs/contributor-guide/
We're hoping that Decap CMS will do for the [Jamstack](https://www.jamstack.org) what WordPress did for dynamic sites back in the day. We know we can't do that without building a thriving community of contributors and users, and we'd love to have you join us.
## Getting started with contributing
Being a developer is not a requirement for contributing to Decap CMS, you only need the desire, a web browser, and a [GitHub account](https://github.com/join). The GitHub repo has a step-by-step [guide](https://github.com/decaporg/decap-cms/blob/master/CONTRIBUTING.md) to get started with the code.
## The basics of the Decap CMS docs
The documentation for Decap CMS is written in [Markdown](https://daringfireball.net/projects/markdown/) (learn more with this [good Markdown cheatsheet](https://github.com/adam-p/markdown-here/wiki/Markdown-Cheatsheet)), with the source residing on [GitHub](https://github.com/decaporg/decap-website).
The GitHub website allows you to submit issues, work with files, search for content, and browse changes that have been submitted in the past and those that are being submitted now (aka Pull Requests).
## Style guidelines
A [style guide](https://decapcms.org/docs/writing-style-guide/) is available to help provide context around grammar, code styling, syntax, etc.
## Filing issues
If you have a GitHub account, you can file an [issue](https://github.com/decaporg/decap-website/issues) (aka bug report) against the Decap CMS docs. Even if you're not able to, or don't know how to, fix the issue (see [Improve existing content](https://decapcms.org/docs/contributor-guide/#improve-existing-content)), it helps to start the conversation.
When filing an issue, it is important to remember the [Code of Conduct](https://github.com/decaporg/decap-cms/blob/master/CODE_OF_CONDUCT.md).
## Improve existing content
If you are able to offer up a change to existing content, we welcome this. Once you've forked the repo, and changed the content, you would file a pull request (PR). The repo [Contributing file](https://github.com/decaporg/decap-cms/blob/master/CONTRIBUTING.md) lays out the correct format for PRs.
## Other places to get involved
While we work on building this page (and you can help!), here are some links with more information about getting involved:
* [Setup instructions and Contribution Guidelines](https://github.com/decaporg/decap-cms/blob/master/CONTRIBUTING.md)
* [Join our Community Chat](https://decapcms.org/chat)
* [Code of Conduct](https://github.com/decaporg/decap-cms/blob/master/CODE_OF_CONDUCT.md)
* [Project Milestones](https://github.com/decaporg/decap-cms/milestones)
* [Good First Issues](https://github.com/decaporg/decap-cms/issues?q=is%3Aissue+is%3Aopen+sort%3Aupdated-desc+label%3A%22good+first+issue%22+-label%3Aclaimed)
---
# Writing Style Guide
Source: https://decapcms.org/docs/writing-style-guide/
# Decap CMS Style Guide
*Adapted from the [Kubernetes Style Guide](https://kubernetes.io/docs/contribute/style/style-guide)*
## Documentation Formatting Standards
### Use angle brackets for placeholders
Use angle brackets for placeholders. Tell the reader what a placeholder represents.
1. Display information about a CLI command:
```bash
npm install
```
where `` is the name of a package.
### Use bold for user interface elements
Do: Click **Save**.
Don't: Click "Save".
- - -
Do: Select **Log Out**.
Don't: Select 'Log Out'.
- - -
### Use italics to define or introduce new terms
Do: A *collection* is a set of entries …
Don't: A "collection" is a set of entries …
- - -
Do: These components form the *control pane*.
Don't: These components form the **control pane**.
- - -
### Use code style for filenames, directories, and paths
Do: Open the `config.yaml` file.
Don't: Open the config.yaml file.
- - -
Do: Go to the `/docs/guides` directory.
Don't: Go to the /docs/guides directory.
- - -
Do: Open the `/admin/index.html` file.
Don't: Open the /admin/index.html file.
- - -
### Use the international standard for punctuation inside quotes
Do: Branch names begin with "cms".
Don't: Branch names begin with "stage."
- - -
Do: The copy is called a "fork".
Don't: The copy is called a "fork."
- - -
## Inline code formatting
### Use code style for inline code and commands
For inline code in an HTML document, use the `` tag. In a Markdown document, use the backtick (`).
Do: The `yarn start` command starts the development server.
Don't: The "yarn start" command starts the development server.
- - -
Do: For a production build, use `yarn build`.
Don't: For a production build, use "yarn build".
- - -
Do: Enclose code samples with triple backticks. ````(```)````
Don't: Enclose code samples with any other syntax.
- - -
### Use code style for object field names
Do: Set the value of the `media_folder` field in the configuration file.
Don't: Set the value of the "media_folder" field in the configuration file.
- - -
Do: The value of the `name` field is a string.
Don't: The value of the "name" field is a string.
- - -
### Use normal style for string and integer field values
For field values of type string or integer, use normal style without quotation marks.
Do: Set the value of `publish_mode` to editorial_workflow.
Don't: Set the value of `imagePullPolicy` to "Always".
- - -
Do: Set the value of `image` to nginx:1.8.
Don't: Set the value of `image` to `nginx:1.8`.
- - -
Do: Set the value of the `replicas` field to 2.
Don't: Set the value of the `replicas` field to 2.
- - -
## Code snippet formatting
### Don’t include the command prompt
Do: yarn start
Don't: $ yarn start
## Content best practices
This section contains suggested best practices for clear, concise, and consistent content.
### Use present tense
Do: This command starts a proxy.
Don't: This command will start a proxy.
Exception: Use future or past tense if it is required to convey the correct meaning.
### Use active voice
Do: You can explore the API using a browser.
Don't: The API can be explored using a browser.
- - -
Do: The YAML file specifies the collection name.
Don't: The collection name is specified in the YAML file.
- - -
Exception: Use passive voice if active voice leads to an awkward construction.
### Use simple and direct language
Use simple and direct language. Avoid using unnecessary phrases, such as saying “please.”
Do: To create an entry, …
Don't: In order to create an entry, …
- - -
Do: See the configuration file.
Don't: Please see the configuration file.
- - -
Do: View the fields.
Don't: With this next command, we'll view the fields.
- - -
### Address the reader as “you”
Do: You can create a Deployment by …
Don't: We'll create a Deployment by …
- - -
Do: In the preceding output, you can see…
Don't: In the preceding output, we can see …
### Avoid Latin phrases
Prefer English terms over Latin abbreviations.
Do: For example, …
Don't: e.g., …
- - -
Do: That is, …
Don't: i.e., …
- - -
Exception: Use “etc.” for et cetera.
## Patterns to avoid
### Avoid using “we”
Using “we” in a sentence can be confusing, because the reader might not know whether they’re part of the “we” you’re describing.
Do: Version 1.4 includes …
Don't: In version 1.4, we have added …
- - -
Do: Decap CMS provides a new feature for …
Don't: We provide a new feature …
- - -
Do: This page teaches you how to use Widgets.
Don't: In this page, we are going to learn about Widgets.
- - -
### Avoid jargon and idioms
Some readers speak English as a second language. Avoid jargon and idioms to help them understand better.
Do: Internally
Don't: Under the hood, …
- - -
Do: Create a new cluster.
Don't: Turn up a new cluster.
- - -
### Avoid statements about the future
Avoid making promises or giving hints about the future. If you need to talk about an alpha feature, put the text under a heading that identifies it as alpha information.
### Avoid statements that will soon be out of date
Avoid words like “currently” and “new.” A feature that is new today will not be new in a few months.
Do: In version 1.4, …
Don't: In the current version, …
- - -
Do: The Federation feature provides …
Don't: The new Federation feature provides …
- - -
---
# Examples
Source: https://decapcms.org/docs/examples/
Do you have a great, open source example? Submit a pull request to this page!
Example | Tools | Type | Source | More info |
--- | --- | --- | --- | ---
[Gatsby & Decap CMS Meetup Group Template](https://gatsby-netlify-cms-example.netlify.app/) | Gatsby | demo | [robertcoopercode/gatsby-netlify-cms](https://github.com/robertcoopercode/gatsby-netlify-cms) | [blog post](https://blog.logrocket.com/gatsby-netlify-cms-a-perfect-pairing-d50d59d16f67)
[This Developing Journey](https://briandouglas.me) | middleman | blog | [bdougie/blog](https://github.com/bdougie/blog) | [blog post](https://www.netlify.com/blog/2017/04/20/creating-a-blog-with-middleman-and-netlify-cms/)
[Jamstack Recipes](https://jamstack-cms.netlify.app/) | Hugo, Azure | demo | [hlaueriksson/jamstack-cms](https://github.com/hlaueriksson/jamstack-cms) | [blog post](http://conductofcode.io/post/managing-content-for-a-jamstack-site-with-netlify-cms/)
[Bael](https://bael-theme.jake101.com/) | Vue, Nuxt | blog | [jake-101/bael-template](https://github.com/jake-101/bael-template) | [blog post](https://bael-theme.jake101.com/blog/2018-06-19-top-10-reasons-why)
[Forest Garden Wales](https://github.com/forestgardenwales/forestgarden.wales) | Hugo | blog | [forestgardenwales/forestgarden.wales](https://github.com/forestgardenwales/forestgarden.wales) | [read me](https://github.com/forestgardenwales/forestgarden.wales)
[Jekyll Demo](https://jekyll-netlifycms.netlify.app/) | Jekyll, Gulp | demo | [NickStees/jekyll-cms](https://github.com/NickStees/jekyll-cms) | [read me](https://github.com/NickStees/jekyll-cms)
[Jekyll feat Alembic Theme Demo](https://alembic-kit-demo.netlify.app/) | Jekyll | demo | [DavidDarnes/alembic-netlifycms-kit](https://github.com/daviddarnes/alembic-netlifycms-kit) | [read me](https://github.com/daviddarnes/alembic-netlifycms-kit)
[Eleventy Starter Project](https://eleventy-netlify-boilerplate.netlify.app/) | Eleventy | demo | [danurbanowicz/eleventy-netlify-boilerplate](https://github.com/danurbanowicz/eleventy-netlify-boilerplate) | [read me](https://github.com/danurbanowicz/eleventy-netlify-boilerplate)
[YellowCake - Complete website with blog](https://yellowcake.netlify.app/) | Gatsby, Netlify-CMS, Uploadcare | demo | [thriveweb/yellowcake](https://github.com/thriveweb/yellowcake/) | [blog post](https://thriveweb.com.au/the-lab/yellowcake-gatsby-react-js-starter-project/)
[Vue.js - Nuxt.js Starter Project](https://github.com/renestalder/nuxt-netlify-cms-starter-template) | Vue, Nuxt | demo | [renestalder/nuxt-netlify-cms-starter-template](https://github.com/renestalder/nuxt-netlify-cms-starter-template) | [read me](https://github.com/renestalder/nuxt-netlify-cms-starter-template)
[Hexo Demo](https://hexo-boilerplate.netlify.app/) | Hexo | demo | [DemoMacro/Hexo-NetlifyCMS](https://github.com/DemoMacro/Hexo-NetlifyCMS) | [read me](https://github.com/DemoMacro/Hexo-NetlifyCMS)
[Gitbook Demo](https://gitbook-boilerplate.netlify.app/) | Gitbook | demo | [DemoMacro/Gitbook-NetlifyCMS](https://github.com/DemoMacro/Gitbook-NetlifyCMS) | [read me](https://github.com/DemoMacro/Gitbook-NetlifyCMS)
[VuePress Demo](https://vuedn.netlify.app/) | VuePress | demo | [NdagiStanley/VueDN](https://github.com/NdagiStanley/VueDN) | [read me](https://github.com/NdagiStanley/VueDN)
[Jigsaw Blog Starter Template Demo](https://jigsaw-blog-netlify-netlifycms-template.netlify.app/) | Jigsaw | demo | [erickpatrick/jigsaw-blog-netlify-netlifycms-template](https://github.com/erickpatrick/jigsaw-blog-netlify-netlifycms-template) | [blog post](https://www.erickpatrick.net/blog/augmenting-tightenco-jigsaw-with-netlifycms/)
[Nuxt & NetlifyCMS Boilerplate](https://nuxt-netlifycms-boilerplate.netlify.app/) | Vue, Nuxt | demo | [tylermercer/nuxt-netlifycms-boilerplate](https://github.com/tylermercer/nuxt-netlifycms-boilerplate) | [read me](https://github.com/tylermercer/nuxt-netlifycms-boilerplate)
[Next.js demo](https://netlifycms-nextjs.netlify.app) | Next.js | blog | [masives/netlifycms-nextjs](https://github.com/masives/netlifycms-nextjs) | [read me](https://github.com/masives/netlifycms-nextjs)
[Delog - Jamstack Blog with Decap CMS](https://delog-w3layouts.netlify.app/) | Gatsby, Netlify-CMS | demo | [W3Layouts/gatsby-starter-delog](https://github.com/W3Layouts/gatsby-starter-delog) | [blog post](https://w3layouts.com/articles/delog-gatsby-starter-netlify-cms/)
[Decap CMS template for Gridsome](https://netlifycms-gridsome.suits.at/) | Gridsome, Vue | demo | [suits-at/netlifycms-gridsome](https://github.com/suits-at/netlifycms-gridsome) | [read me](https://github.com/suits-at/netlifycms-gridsome)
[Next.js blogging template for Netlify](https://nextjs-netlify-blog-template.netlify.app/) | Next.js, Netlify | blog | [wutali/nextjs-netlify-blog-template](https://github.com/wutali/nextjs-netlify-blog-template) | [read me](https://github.com/wutali/nextjs-netlify-blog-template)
[Decap CMS and OAuth server on AWS](https://github.com/pulumi/examples/tree/master/aws-ts-netlify-cms-and-oauth) | Netlify, Pulumi, AWS | blog | [pulumi/examples/aws-ts-netlify-cms-and-oauth](https://github.com/pulumi/examples/tree/master/aws-ts-netlify-cms-and-oauth) | [blog post](https://www.pulumi.com/blog/deploying-the-infrastructure-of-oauth-server-for-cms-app/)
[Eleventy Starter Boilerplate](https://creativedesignsguru.com/demo/Eleventy-Starter-Boilerplate/eleventy-starter-boilerplate-presentation/) | Eleventy, Netlify | demo | [ixartz/Eleventy-Starter-Boilerplate](https://github.com/ixartz/Eleventy-Starter-Boilerplate) | [read me](https://github.com/ixartz/Eleventy-Starter-Boilerplate)
[Nuxt, Tailwind & NetlifyCMS Boilerplate](https://ntn-boilerplate.netlify.app/) | Vue, Nuxt | demo | [Knogobert/ntn-boilerplate](https://github.com/Knogobert/ntn-boilerplate) | [read me](https://github.com/Knogobert/ntn-boilerplate#readme)
[Gatsby & Decap CMS Personal Portfolio](https://kind-mestorf-5a2bc0.netlify.app/) | Gatsby | portfolio | [EarlGeorge/React-Gatsby](https://github.com/EarlGeorge/React-Gatsby) | [read me](https://github.com/EarlGeorge/React-Gatsby/blob/master/README.md)
[Gatsby, Tailwind CSS & NetlifyCMS Starter](https://infallible-varahamihira-058515.netlify.app/) | Gatsby v3, Netlify-CMS, Tailwind CSS | demo | [jimmybutton/gatsby-netlifycms-tailwind-starter](https://github.com/jimmybutton/gatsby-netlifycms-tailwind-starter) | [read me](https://github.com/jimmybutton/gatsby-netlifycms-tailwind-starter#readme)
[Metalsmith NetlifyCMS Starter](https://metalsmith-netlify-starter.netlify.app/) | Metalsmith and Netlify-CMS | demo | [metalsmith-netlify-starter](https://github.com/wernerglinka/metalsmith-netlify-starter) | [read me](https://github.com/wernerglinka/metalsmith-netlify-starter#readme)
[Design Code Tips Starter](https://design-code.tips/) | Next.js, ContentLayer and Decap-CMS | demo | [ositaka/nextjs-blog-tailwind-starter](https://github.com/ositaka/nextjs-blog-tailwind-starter) | [read me](https://github.com/ositaka/nextjs-blog-tailwind-starter/blob/main/README.md)
---
# Architecture
Source: https://decapcms.org/docs/architecture/
Decap CMS is a React application, using Redux for state management with immutable data structures (immutable.js).
The core abstractions for content editing are `collections`, `entries`, and `widgets`.
* Each `collection` represents a group of entries. This might be similar entries which share the same structure, or entries where each has its own structure.
* The structure of an `entry` is defined as a series of fields, each with a `name`, a `label`, and a `widget`.
* The `widget` determines the UI widget that the content editor will use when editing this field of an entry, as well as how the content of the field is presented in the editing preview.
Entries are loaded and persisted through a `backend` that will typically represent a Git repository.
## State shape / reducers
- **Auth:** Keeps track of the logged state and the current user.
- **Config:** Holds the environment configuration (backend type, available collections, and fields).
- **Collections:** List of available collections, their fields, and metadata information.
- **Entries:** Entries for each field.
- **EntryDraft:** Reused for each entry that is edited or created. It holds the entry's temporary data until it's persisted on the backend.
## Selectors
Selectors are functions defined within reducers used to compute derived data from the Redux store. The available selectors are:
- **`selectEntry`:** Selects a single entry, given the collection and a slug.
- **`selectEntries`:** Selects all entries for a given collection.
- **`getAsset`:** Selects a single `AssetProxy` object for the given path.
## Value Objects
**`AssetProxy`:** `AssetProxy` is a Value Object that holds information regarding an asset file (for example, an image), whether it's persisted online or held locally in cache.
For a file persisted online, the `AssetProxy` only keeps information about its URI. For local files, the AssetProxy will keep a reference to the actual `File` object while generating the expected final URIs and on-demand blobs for local preview.
The `AssetProxy` object can be used directly inside a media tag (such as ``), as it will always return something that can be used by the media tag to render correctly (either the URI for the online file or a single-use blob).
## Components structure and Workflows
Components are separated into two main categories: **Container components** and **Presentational components**.
### Entry Editing
For either updating an existing entry or creating a new one, the `EntryEditor` is used and the flow is the same:
* When mounted, the `EntryPage` container component dispatches the `createDraft` action, setting the `entryDraft` state to a blank state (in case of a new entry) or to a copy of the selected entry (in case of an edit).
* The `EntryPage` will also render widgets for each field type in the given entry.
* Widgets are used for editing entry fields. There are different widgets for different field types, and they are always defined in a pair containing a `control` component and a `preview` component. The control component is responsible for presenting the user with the appropriate interface for manipulating the current field value. The preview component is responsible for displaying the value with the appropriate styling.
#### Widget components implementation
The control component receives one (1) callback as a prop: `onChange`.
* **`onChange`** (required): Should be called when the users changes the current value. It will ultimately end up updating the `EntryDraft` object in the Redux Store, thus updating the preview component.
* **`onAddAsset`** & **`onRemoveAsset`** (optionals): Should be invoked with an `AssetProxy` value object if the field accepts file uploads for media (images, for example). `onAddAsset` will get the current media stored in the Redux state tree while `onRemoveAsset` will remove it. `AssetProxy` objects are stored in the `Medias` object and referenced in the `EntryDraft` object on the state tree.
Both control and preview widgets receive a `getAsset` selector via props. Displaying the media (or its URI) for the user should always be done via `getAsset`, as it returns an `AssetProxy` that can return the correct value for both medias already persisted on the server and cached media not yet uploaded.
The actual persistence of the content and medias inserted into the control component is delegated to the backend implementation. The backend will be called with the updated values and a list of `assetProxy` objects for each field of the entry, and should return a promise that can resolve into the persisted entry object and the list of the persisted media URIs.
## Editorial Workflow implementation
Instead of adding logic to `CollectionPage` and `EntryPage`, the Editorial Workflow is implemented as Higher Order Components, adding UI and dispatching additional actions.
Furthermore, all editorial workflow state is managed in Redux; there's an `actions/editorialWorkflow.js` file and a `reducers/editorialWorkflow.js` file.
### About metadata
Decap CMS embraces the idea of Git-as-backend for storing metadata. The first time it runs with the `editorial_workflow` setup, it creates a new ref called `meta/_decap_cms`, pointing to an empty, orphan tree.
Actual data is stored in individual JSON files committed to this tree.
---
# Decap Turbo overview
Source: https://decapcms.org/docs/turbo-overview/
[Decap Turbo](https://decapcms.org/turbo/) is a hosted backend for Decap CMS. Editors log in with a Turbo account instead of a Git host account, and API calls to GitHub or GitLab go through a server-side proxy that caches your repository's content — so large collections load in a handful of requests instead of one per entry.
Your content stays in your own Git repository. Every save is still a commit on the branch you configure.
[Sign up](https://turbo.decapcms.org/signup) to get an account.
## In this section
- **[Getting started](https://decapcms.org/docs/turbo-getting-started/)** — create an organization, connect your Git provider, create a site.
- **[Connecting a site](https://decapcms.org/docs/turbo-connecting-a-site/)** — point an existing `config.yml` at Turbo.
- **[How it works](https://decapcms.org/docs/turbo-how-it-works/)** — the org/site model, the proxy, and the login flow.
- **[Deploy status](https://decapcms.org/docs/turbo-deploy-status/)** — tell editors when their change is live. GitHub repositories only.
- **[Deploy status setup](https://decapcms.org/docs/turbo-deploy-status-setup/)** — the webhook, for hosts that don't report to GitHub.
- **[Organizations, sites, and roles](https://decapcms.org/docs/turbo-roles-and-members/)** — access control and invitations.
- **[Media library](https://decapcms.org/docs/turbo-media-proxy/)** — S3-compatible storage for uploads. Pro and above.
- **[Billing and plans](https://decapcms.org/docs/turbo-billing/)** — upgrading, downgrading, invoices, and request limits.
- **[Troubleshooting & FAQ](https://decapcms.org/docs/turbo-troubleshooting-faq/)** — common errors.
Pricing and the plan comparison live on the [product page](https://decapcms.org/turbo/).
---
# Getting started
Source: https://decapcms.org/docs/turbo-getting-started/
Three steps before your `config.yml` can point at Turbo: create an organization, connect your Git provider, create a site.
## Create an organization
[Sign up](https://turbo.decapcms.org/signup) with an email and password, or accept an invitation someone sent you. Every organization starts on the **Free** plan — one site, one seat, no payment step.
An organization is the billing and ownership unit. It owns sites and holds the seats people occupy. You can belong to several, and create more at any time from your profile.
Sign-in is email and password today. Other providers are planned.
If you accepted an invitation, you are already in someone else's organization and can skip to whatever they gave you access to — see [your profile](https://decapcms.org/docs/turbo-getting-started/#your-profile).
## Connect your Git provider
**Do this before creating a site.** Site creation is refused until the organization has a connection for the provider you pick, because the proxy uses it to reach your repository. It is one-time and per organization, not per site.
Go to **Git connection** in the organization nav.
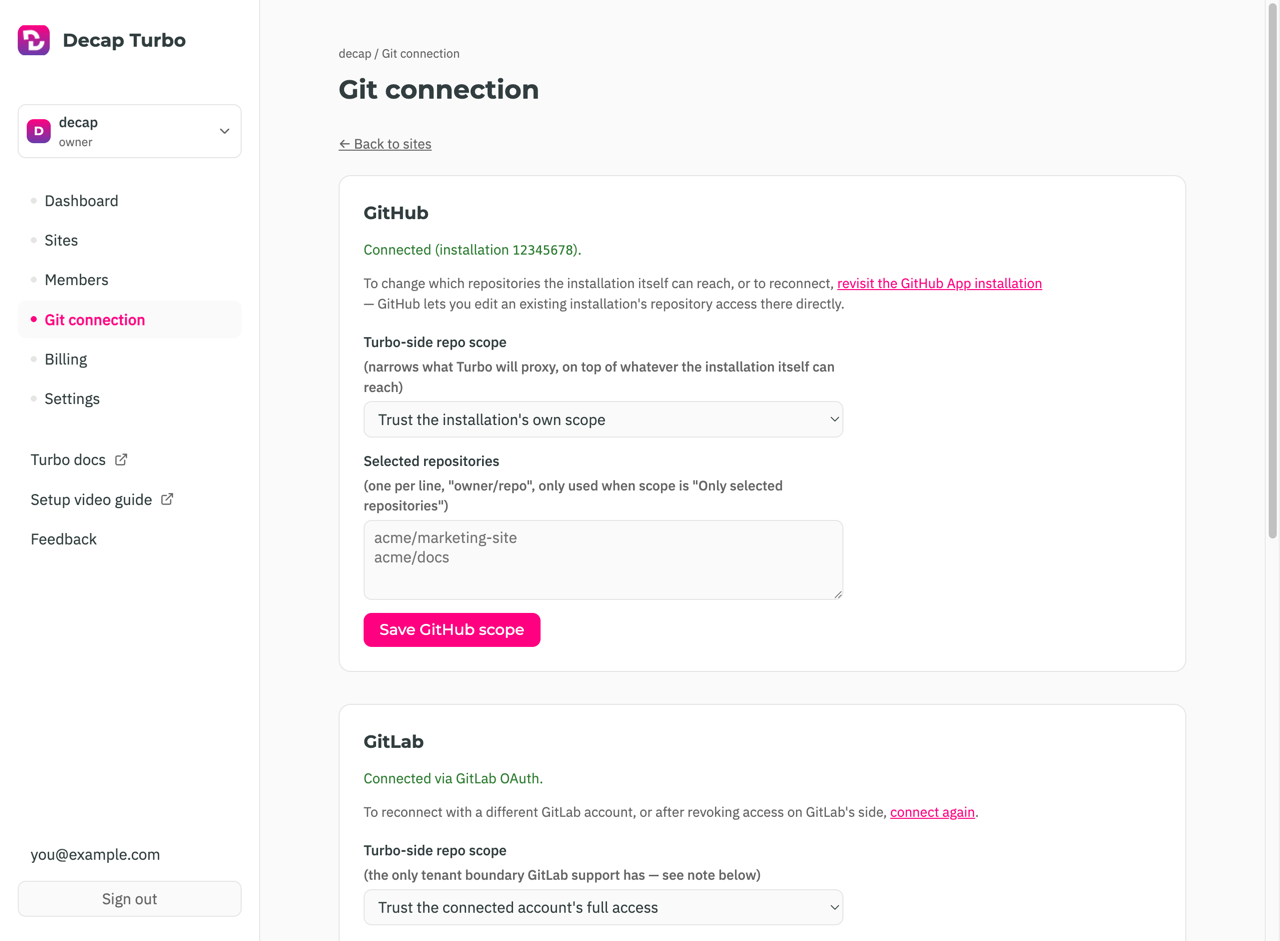
**GitHub** — install the Turbo GitHub App on the GitHub account or organization that owns your repositories, choosing all repositories or a subset. Return to this page afterwards to change that selection.
**GitLab** — authorize Turbo against your GitLab account over OAuth.
> GitLab.com gates group and project access tokens behind Premium, so Turbo authenticates as the GitLab **user** who authorizes the connection. That token can reach every project that account can reach, not just this organization's. Set **Turbo-side repo scope** to *Only selected projects* and list them if that matters to you — it is the only limit available on GitLab Free.
**Turbo-side repo scope** narrows what Turbo will proxy, on top of whatever the provider already allows. On GitHub the App installation is the outer limit and this is an extra check; on GitLab it is the only one. Listing a repository here never grants access to it — on GitHub, only the App installation does.
## Create a site
A site is one Decap CMS install — one repo, one `config.yml`. Owners only, up to the plan's site limit.
From **Sites**, create one and fill in:
| Field | |
|---|---|
| **Site name** | A label in Turbo. Not used in your CMS config. |
| **Git provider** | GitHub or GitLab. Must match a connection from the step above. |
| **Repo** | `owner/name` on GitHub; `group/project` on GitLab, subgroups allowed. |
| **Branch** | Defaults to `main`. |
| **Config path** | Repo-relative path to `config.yml`, default `admin/config.yml`. Turbo reads your collections from it for per-collection permissions, so it has to resolve. |
| **Admin interface URL(s)** | Where your CMS is served from, one per line. Checked during login, so fill it in. Deploy previews can use a wildcard — see [admin URLs](https://decapcms.org/docs/turbo-connecting-a-site/#admin-urls-deploy-previews-and-branch-deploys). |
Submitting gives you Full access on the site and opens its detail page, where the **Overview** tab shows the **Site ID** you need next.
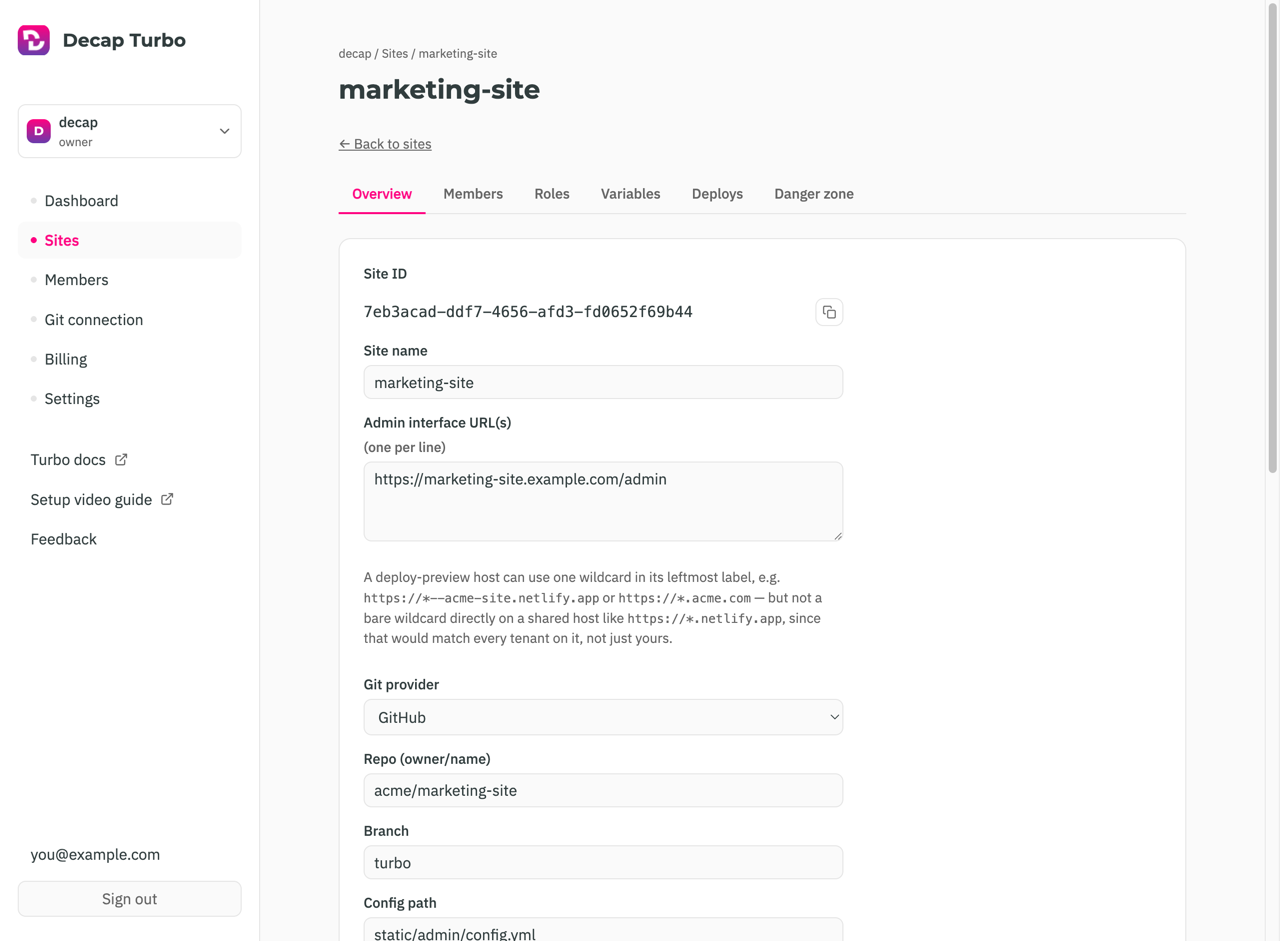
Next: [connect your `config.yml`](https://decapcms.org/docs/turbo-connecting-a-site/).
## Your profile
Your profile lists the organizations you belong to, the sites you can open, and account settings — password, usage-data collection, and account deletion. It is where you land if you belong to no organization, which is a valid state.
Someone invited only for site access never needs an organization page: their profile links straight to each site's admin interface.
---
# Connecting a site
Source: https://decapcms.org/docs/turbo-connecting-a-site/
Once you've [created a site](https://decapcms.org/docs/turbo-getting-started/#create-a-site), switch your backend to `turbo-github`, or `turbo-gitlab` if the repo is on GitLab.
## Install
The Turbo backends are part of Decap CMS from 3.17.0 onward, in the stable release.
```html
```
The standard script tag above already loads them.
```sh
npm install decap-cms-app
```
With npm, installing `decap-cms-app` registers both Turbo backends, so there's nothing extra to import.
If your site loads `decap-cms@beta` or a version pinned to a `-beta` build, switch it to the stable release.
## Configuration
```yaml
backend:
name: turbo-github # or turbo-gitlab
turbo_site_id: your-site-id
branch: main # optional
```
`turbo_site_id` is the UUID on the site's Overview tab, and the only value you have to set by hand. Everything else the backend needs — the Supabase project, the proxy endpoint, the repo — is fetched from the control plane at load time, keyed on that ID. Infrastructure changes on Turbo's side never require a `config.yml` edit.
### `repo` and `branch`
These behave differently from every other backend, and differently from each other:
- **`repo` is ignored.** The value on the site row wins. The proxy resolves permissions from it, so a stale local copy is exactly what produces `requested repo does not match`. Change the repo in the dashboard, not here.
- **`branch` wins if you set it**, and falls back to the site row if you don't. That is deliberate: one Turbo site can back several deploys of the same repo, each editing its own branch — production on `main`, staging on `develop` — with the same `turbo_site_id` in both configs.
## Logging in
The login screen shows **Login with Turbo** and opens a popup. You need [access to that specific site](https://decapcms.org/docs/turbo-roles-and-members/) — a Turbo account alone isn't enough.
Sessions refresh in the background, so editors aren't logged out mid-edit.
## Admin URLs, deploy previews and branch deploys
Turbo only hands a login to a CMS served from one of the site's **admin interface URLs**, set on the site's Overview tab. Only the origin counts — protocol, host and port — so the path doesn't have to match. Add one URL per line for every place the CMS runs: production, a staging domain, `http://localhost:1313` for local development.
Deploy previews and branch deploys get a new hostname for every build, so list them with a wildcard:
```
https://example.com/admin/
https://*--your-site.netlify.app/admin/
```
The rules:
- **One `*` per URL, in the leftmost part of the hostname only.** `https://*--your-site.netlify.app` and `https://*.example.com` work; `https://preview.*.example.com` doesn't.
- **No bare wildcard on a shared hosting domain.** `https://*.netlify.app`, `https://*.vercel.app` or `https://*.pages.dev` would match every customer of that host, so Turbo refuses them. Anchor the wildcard to your own site's name, the way your host names its previews — for example `*--your-site.netlify.app` on Netlify.
- **The `*` never spans a dot.** `*.example.com` matches `preview.example.com` but not `a.b.example.com`.
- **Put your main admin URL first.** The organization dashboard links to the first URL in the list.
Each origin keeps its own login, so an editor opening a deploy preview logs in once there too. They still need [access to the site](https://decapcms.org/docs/turbo-roles-and-members/); a matching URL doesn't grant it.
## Commit attribution
Different on each backend — check your own `git log` before assuming.
**GitLab** sends your Turbo display name and account email as `author_name` and `author_email`, so you are the commit author. The committer is the GitLab account that authorized the [Git connection](https://decapcms.org/docs/turbo-getting-started/#connect-your-git-provider).
**GitHub** makes the App the author and credits you on a trailer:
```
Author: decap-turbo[bot] <...>
Update post "my first post"
Co-authored-by: Your Name
```
GitHub's `createCommitOnBranch` authors as whoever holds the token, with no override. The alternative is the multi-step REST sequence, which costs three extra round trips on every save. GitHub renders co-author avatars and counts the commit toward your contributions, so attribution is still visible — on the trailer rather than the author field. Point any tooling that reads `git log --author` at the trailer instead.
## Config path
Turbo reads your collections from the file at the site's **config path** to support [per-collection permissions](https://decapcms.org/docs/turbo-roles-and-members/#site-roles).
| Generator | Typical path |
|---|---|
| Plain static site / Jekyll | `admin/config.yml` |
| Hugo | `static/admin/config.yml` |
| Next.js | `public/admin/config.yml` |
## Media uploads
To keep uploads out of your repo, see [Media library](https://decapcms.org/docs/turbo-media-proxy/). Pro and above.
---
# How it works
Source: https://decapcms.org/docs/turbo-how-it-works/
What Turbo does behind "Login with Turbo", for evaluating whether it fits your setup.
## Organizations, sites, members
An **organization** owns **sites**; each site is one Decap CMS install. Access is two-layered:
- **Organization membership** — owner or member. This is the paid seat.
- **Site membership** — a role on one site, on top of a seat.
Accepting any invitation grants org membership, even one whose only purpose was site access. That is why billing is per seat, not per site grant: once someone holds a seat you can add them to as many of your sites as you like at no extra cost. See [Organizations, sites, and roles](https://decapcms.org/docs/turbo-roles-and-members/).
## Content stays in Git
Every save is a real commit in your GitHub or GitLab repo, on the branch you configured — the Turbo backends extend the standard GitHub and GitLab backends. Turbo changes how the CMS reaches your Git host and how editors authenticate, not where content lives.
## Editors don't need a Git host account
The standard backends make each editor authenticate with GitHub or GitLab, which means each editor needs write access to your repo. Turbo authenticates editors against their Turbo account and makes the Git API calls server-side, using the organization's [Git connection](https://decapcms.org/docs/turbo-getting-started/#connect-your-git-provider).
So: no Git host accounts for editors, no repo collaborator list to maintain, and access governed entirely by Turbo membership.
## Why large collections load faster
Read a folder collection straight from a Git host and you list the folder, then fetch every file — one request each, against that host's rate limit. A thousand entries is a thousand requests, on every new device.
Turbo mirrors the repo into its own database and serves collections from there. Files are stored by content hash, so a version is stored once however many branches or collections contain it; only changed files are fetched; and before answering, Turbo makes one conditional request to check whether the branch has moved, which costs the same whatever the collection's size.
Saves update the mirror in the same call as the commit, so content is never stale right after an edit. Commits made outside the CMS invalidate it through a webhook.
## Login flow
1. **Login with Turbo** opens a popup on Turbo's hosted login.
2. You authenticate, or the popup recognizes an existing session.
3. Turbo hands the CMS tab a short-lived session scoped to your account.
4. The CMS refreshes it in the background before it expires.
The CMS accepts that handoff only from the exact origin it expects, so another page can't impersonate the popup and inject a session.
## Permissions are enforced server-side
With [per-collection permissions](https://decapcms.org/docs/turbo-roles-and-members/#site-roles), a collection someone can't access is hidden from their CMS UI — that's convenience. The check that matters runs on Turbo's servers on every read and write, whatever the UI showed.
---
# Deploy status
Source: https://decapcms.org/docs/turbo-deploy-status/
GitHub repositories only, on the `turbo-github` backend.
Saving tells an editor their change was committed, not that the site has rebuilt. Deploy status closes that gap: when a deploy containing their change succeeds, the CMS tells them.
> **Your change to "Spring menu" is live** · View entry
It's asynchronous — the save toast goes away, the editor carries on, the notification arrives on its own. Where a collection sets a [`preview_path`](https://decapcms.org/docs/deploy-preview-links/#configuring-preview-paths) the link opens that entry's page; one deploy carrying several changes produces one "3 changes are live".
## The Deploys page
A **Deploys** item at the end of the CMS header shows current state — grey at rest, amber while a save is publishing, red after a failure — and opens a page that refreshes itself while open.
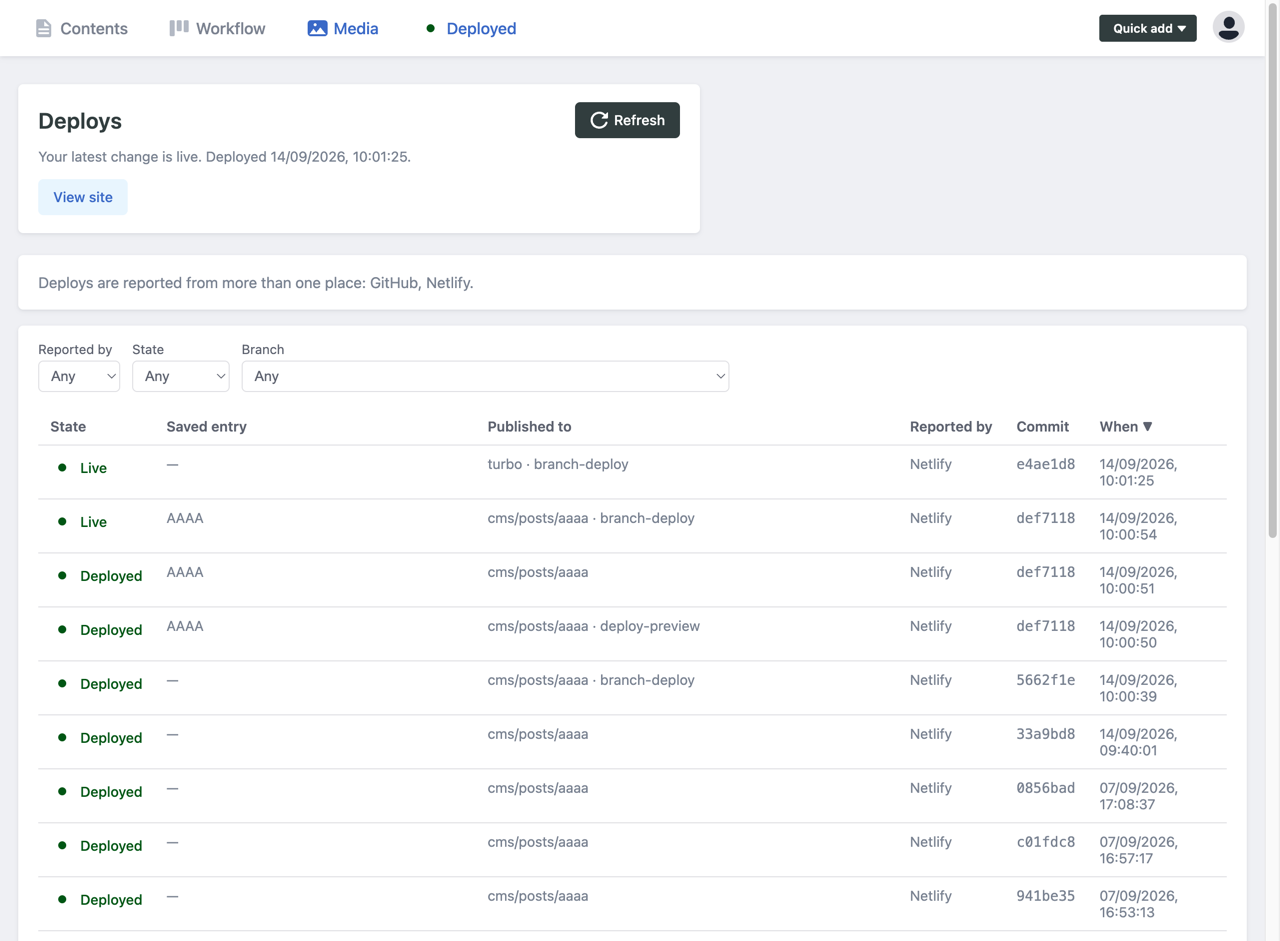
The band at the top answers "is my change live", and speaks only for the branch your site publishes from.
Each row names the saved entry and where the deploy published to — the branch, plus the host's environment when it sends one (`main · production`, `cms/posts/spring-menu · deploy-preview`). Commit ids link to your Git host; the state links to the site on success, the build log on failure. A dash in the entry column means either a commit that didn't come from the CMS, or a build that batched several commits.
**Live** marks each branch's newest success — what that branch's URL is currently serving. Earlier successes on the same branch read **Deployed**. With editorial workflow you'll see several Live rows, one per `cms/…` branch, because each has its own preview URL; only the one on your publishing branch is the published site.
Filter by reported-by, state or branch, sort any column, and page through the most recent 200 deploys at 20, 50 or 100 a time. Older than that, use your host's dashboard.
**Unknown** replaces a build still marked running half an hour after anything last mentioned it. Usually a deploy preview whose branch was deleted mid-build — merging an editorial-workflow entry removes its `cms/…` branch, and some hosts then abandon the build silently. The published deploy is unaffected.
**"Nothing has been reported since your change of…"** means half an hour has passed since a save with nothing reported at all, so the page stops claiming anything rather than leaving an old success marked Live. It isn't proof of a problem, but a build failing before the step that reports the deploy is the usual cause — see [reporting failures](https://decapcms.org/docs/turbo-deploy-status-setup/#github-actions-report-failures-too).
## Does your host need setting up?
Depends on whether it reports deploys to GitHub. Most do.
| Host | |
|---|---|
| Vercel | Nothing |
| Cloudflare Pages | Nothing |
| GitHub Pages | Nothing |
| GitHub Actions building the site itself | [Report failures](https://decapcms.org/docs/turbo-deploy-status-setup/#github-actions-report-failures-too) |
| **Netlify** | [Add the webhook](https://decapcms.org/docs/turbo-deploy-status-setup/#netlify) |
| Anything else | [Add the webhook](https://decapcms.org/docs/turbo-deploy-status-setup/#any-other-host) |
For the "nothing" hosts the Decap GitHub App already listens for `deployment_status`, `check_run`, `status` and `page_build`. Two caveats: Vercel's `deployment_status` webhook can be switched off, in which case use the webhook instead; and Cloudflare Pages doesn't report builds it skips.
## Editorial workflow
Deploys of `cms/…` branches are recorded and shown with their branch and environment, so you can see whether an entry in review has a working preview.
They never produce a notification and never feed the band at the top of the page. "Your change is live" is a claim about the published site, and an entry in review hasn't been published — for that, use [deploy preview links](https://decapcms.org/docs/deploy-preview-links/).
## Cancelled and superseded builds
A build cancelled in favour of a newer commit hasn't lost the change; it ships in the newer build. Turbo treats it as superseded, keeps waiting, and notifies when a deploy *containing* the commit succeeds.
That's the general rule — the question is "has a deploy containing my commit succeeded", not "did the deploy of my exact commit succeed" — and it's what makes several editors saving at once, one editor saving repeatedly, and hosts that batch commits all resolve correctly. Builds skipped for no content change or `[skip ci]` are treated the same way, even where Netlify reports them as errors.
## Configuration
Deploy status hides itself on sites where nothing has ever been reported. To turn it off explicitly:
```yaml
backend:
name: turbo-github
turbo_site_id: your-site-id
deploy_status: false
```
Or one surface at a time:
```yaml
backend:
deploy_status:
notifications: false # no "your change is live" toasts
page: false # no Deploys nav item or page
```
If the repo deploys to several places, each is listed separately and the notification names the host — "live on Netlify". Name one to be the only one that notifies:
```yaml
backend:
deploy_status:
primary_target: Cloudflare Pages
```
Use the name shown in the **Reported by** column.
## Nothing arrives
1. **Open the Deploys page.** Nothing recorded means your host isn't reporting — expected on Netlify until you add the webhook.
2. **Successes there but no failures?** If the newest row is an old success and your site builds in GitHub Actions, the build is failing before the step that reports it. This is the one case where the page is confidently wrong rather than empty.
3. **Check the branch.** Only the branch the site publishes from is recorded.
4. **Check the GitHub App.** An installation predating deploy status needs its new read permissions approved by an org owner.
5. **Rotated the secret?** The old one stops working immediately. On Netlify, update all three notifications.
6. **Deploy previews only?** Those are deliberately ignored here — use [deploy preview links](https://decapcms.org/docs/deploy-preview-links/) instead.
---
# Deploy status setup
Source: https://decapcms.org/docs/turbo-deploy-status-setup/
For hosts that don't report deploys to GitHub. See [Deploy status](https://decapcms.org/docs/turbo-deploy-status/) for whether yours does.
## Netlify
Netlify posts commit statuses and Checks to GitHub **only for deploy previews** — nothing for branch or production deploys, and no Netlify setting changes that. So it has to report to Turbo directly.
1. In the [Turbo dashboard](https://turbo.decapcms.org/sites), open the site's **Deploys** tab and click **Enable the deploy webhook**. You get a URL and a secret.
2. In Netlify: **Project configuration → Notifications → Deploy notifications**.
3. **Add notification → HTTP POST request**.
4. Paste the URL into **URL to notify** and the secret into **JWS secret token**.
5. Repeat for **all three** events — *Deploy started*, *Deploy succeeded*, *Deploy failed* — since Netlify configures one event per notification. Same URL and secret each time.
Only deploys of the branch your site publishes from are recorded; previews and other branches are discarded. Outgoing webhooks are on every Netlify plan.
## GitHub Actions: report failures too
If your workflow builds the site and hands the output to a deploy action — `cloudflare/pages-action`, `actions/deploy-pages`, a Vercel or S3 action — that action creates the deployment record, and it only runs if the build succeeded. A failing build stops the workflow before it and reports nothing.
That gap is one-sided and worse than silence: successes arrive, failures don't, and the Deploys page goes on showing the last success as Live while the site sits broken. The failed workflow run is no substitute — Turbo ignores `github-actions` check runs deliberately, so a green test suite can never tell an editor their change is live.
One step fixes it:
```yaml
permissions:
deployments: write
steps:
# ... checkout, build, deploy ...
- name: Report a failed build to Decap
if: failure()
uses: actions/github-script@v7
env:
DEPLOY_ENVIRONMENT: production
with:
script: |
const deployment = await github.rest.repos.createDeployment({
owner: context.repo.owner,
repo: context.repo.repo,
ref: context.sha,
environment: process.env.DEPLOY_ENVIRONMENT,
auto_merge: false,
required_contexts: [],
});
await github.rest.repos.createDeploymentStatus({
owner: context.repo.owner,
repo: context.repo.repo,
deployment_id: deployment.data.id,
state: 'failure',
log_url: `${context.serverUrl}/${context.repo.owner}/${context.repo.repo}/actions/runs/${context.runId}`,
});
```
Put it last and leave the rest of the workflow alone. `log_url` is what the editor clicks.
- **Don't create a deployment on the success path too** — your deploy action already does, and you'd get two rows per commit. `if: failure()` keeps them from colliding.
- **`if: always()` would report cancelled runs as broken builds.** `if: failure()` excludes them.
To show the build while it runs, open the deployment *before* the build with `state: 'in_progress'` and close it with `success` or `failure`. Drop `gitHubToken` from your deploy action so it stops creating a competing record.
### If you can't change the workflow
The site's **Deploys** tab has **Record failed CI runs as failed deploys**. A GitHub Actions check run that fails on your publishing branch is then recorded as a failed deploy, with no workflow change.
Off by default, and narrow on purpose:
- **Failures only.** A success is never taken from CI, so this can't make a change look live when it isn't.
- **Leave it off if that branch also runs tests** — Turbo can't tell a failing deploy from a failing test suite.
- **Per site.** One repo backing several sites reports to whichever asked.
The workflow step above is still better where you can add it: it reports a known environment with a log link, and extends to showing the build while it runs.
## Any other host
The webhook takes plain JSON from anything that can make an HTTP request:
```json
{
"provider": "My host",
"commit_sha": "9f2c1a7...",
"branch": "main",
"state": "success",
"id": "build-1234",
"url": "https://example.com"
}
```
- `state` — one of `pending`, `building`, `success`, `failed`, `canceled`. Anything else is rejected.
- `id` — stable across one build's states, so `building` and `success` collapse into one row.
- `url` — what the editor clicks: the site on success, the build log on failure.
Sign the exact body with the site's secret:
```bash
BODY='{"provider":"My host","commit_sha":"'"$COMMIT_SHA"'","branch":"main","state":"success","id":"'"$BUILD_ID"'"}'
SIG="sha256=$(printf '%s' "$BODY" | openssl dgst -sha256 -hmac "$DECAP_DEPLOY_SECRET" | awk '{print $2}')"
curl -X POST "$DECAP_DEPLOY_HOOK_URL" \
-H 'Content-Type: application/json' \
-H "X-Turbo-Signature: $SIG" \
-d "$BODY"
```
Send `Content-Type: application/json` — a form content type is rejected before the handler sees it.
## Rotating or removing the webhook
Both on the site's **Deploys** tab.
**Generate a new secret** takes effect immediately, so every report is rejected until you paste the new one into your host — all three notifications, on Netlify.
**Disable the webhook** stops reports at that URL. Recorded deploys stay; nothing new is added. Re-enabling issues a fresh URL and secret.
Neither applies to hosts that report through GitHub — they never had a webhook.
---
# Organizations, sites, and roles
Source: https://decapcms.org/docs/turbo-roles-and-members/
Access control across an organization and its sites.
## Organization roles
- **Owners** create and delete sites, invite and remove members, manage billing, and everything a member can do.
- **Members** can be given access to individual sites. Nothing else.
An organization always needs at least one owner: you can't demote or remove the last one, or leave while you're the only owner and other members remain.
Managing a site — its settings, members, roles, variables and Danger Zone — is owner-only. There is no separate site-admin role. Site membership governs content access in the CMS, nothing more.
Being an org member grants no site access on its own; an owner adds you to each site you need. That's deliberate — someone can hold a seat without being able to edit every site you run.
## Site roles
Each site member gets a role on that site:
- **Full access** — the built-in default. Every collection, no restrictions.
- **Custom roles** — named roles you define, each collection set to edit, view or none.
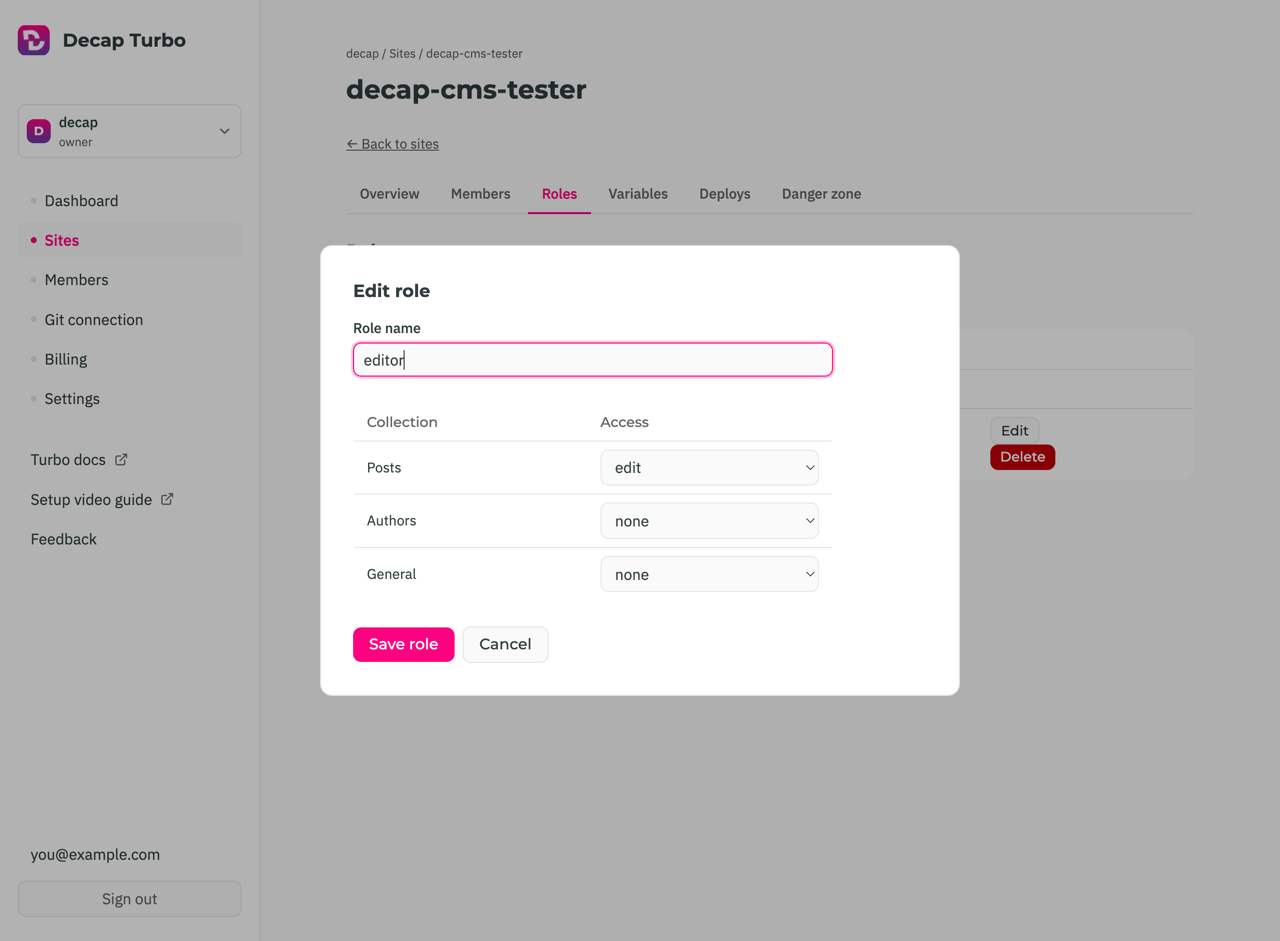
Restrictions are [enforced server-side](https://decapcms.org/docs/turbo-how-it-works/#permissions-are-enforced-server-side), not just hidden in the UI.
Creating and editing custom roles requires the **advanced roles** add-on ([plans](https://decapcms.org/turbo/#plans)). Without it every member is on Full access. Deleting a custom role puts anyone holding it back on Full access.
## Inviting people
From the organization's **Members** page, invite by email and optionally grant site access with a role for each site in the same step. Invitations expire; resend or revoke them from the same page.
Invitees don't need an existing account — accepting walks them through creating one. Accepting always adds them to the organization, even for a site-only invitation; if that's all they got, their profile links straight to the CMS.
Someone who already has a Turbo account can be added directly, with no invitation email, from the same page or from a site's Members tab.
## Site variables
**Pro and above.** Each site has a key/value store on its **Variables** tab, owner-only — config and credentials scoped to that site, including the [media library](https://decapcms.org/docs/turbo-media-proxy/) credentials.
Marking a variable **secret** encrypts it at rest and masks it in the UI; it can be replaced but never read back. Non-secret values are stored and displayed as plain text.
## Site locking
A locked site is read-only for everyone until an owner unlocks it. It happens either automatically — a downgrade or cancelled subscription leaves the organization over its site limit, so one site stays active and the rest lock — or manually, to free a site slot without deleting anything.
Locked sites don't count against the limit, so unlocking one needs a free slot. Upgrading unlocks automatically, oldest first, as far as the new plan reaches.
## Transferring a site
An owner can move a site to another organization they belong to, from its Danger Zone. Members, variables and scoping move with it. Anyone who isn't already a member of the destination organization loses access, since site access requires a seat there.
## Usage data
Turbo records product-usage events — features used, pages visited — to guide development. Two independent opt-outs:
- **Per account**, on your profile, covering everything recorded under your user.
- **Per organization**, in organization settings, covering everyone in it. This is the lever for an organization acting on behalf of the editors it invites.
Neither affects the [activity log](https://decapcms.org/docs/turbo-roles-and-members/#activity-log), which is a record of the service you're paying for rather than analytics.
## Activity log
The organization's **Activity** page lists who saved which entry, in which collection, on which site, and when — drawn from the same events the dashboard summarizes. Use it to answer "who changed this" without going to `git log`.
## Leaving or deleting an organization
Both in organization settings, under Danger Zone.
- **Leave** removes your membership only. Blocked if you're the only member, or the last owner with others remaining.
- **Delete** removes the organization and every site it owns, with their cached content, variables and memberships. The confirmation names the site count. It can't be undone.
Belonging to no organization is a normal state — you land on your profile with a prompt to create one.
---
# Media library
Source: https://decapcms.org/docs/turbo-media-proxy/
**Pro and above.** Beta: the configuration may change, and the media library will be rebuilt inside Decap CMS. Your files stay in your bucket either way.
Turbo proxies media uploads to any S3-compatible bucket, so editors browse and upload without your storage credentials reaching the browser. Credentials live in [site variables](https://decapcms.org/docs/turbo-roles-and-members/#site-variables), not in `config.yml`; the CMS calls a Turbo edge function, which reads them server-side and forwards the request.
## Configure
On the site's **Variables** tab:
| Key | Value | Secret |
|---|---|---|
| `s3_endpoint` | Your provider's S3 API endpoint | No |
| `s3_region` | Region to sign requests for | No |
| `s3_bucket` | Bucket name | No |
| `s3_access_key_id` | Access key ID | No |
| `s3_secret_access_key` | Secret access key | **Yes** |
| `s3_force_path_style` | `true` to address the bucket in the URL path instead of the host name, which most providers other than AWS need | No |
See [Provider settings](https://decapcms.org/docs/turbo-media-proxy/#provider-settings) for the values a few common providers use.
The bucket needs a public address — public read access, a custom domain, or a CDN in front of it — because the URLs the media library inserts into entries point straight at it.
Then in `config.yml`:
```yaml
media_library:
name: s3
config:
public_url_prefix: https://media.example.com
```
The script-tag build of Decap CMS already includes the media library. With `decap-cms-app`, register it yourself:
```js
import CMS from 'decap-cms-app';
import S3MediaLibrary from 'decap-cms-media-library-s3';
CMS.registerMediaLibrary(S3MediaLibrary);
```
Reload the CMS. A missing key returns a "missing storage configuration" error rather than failing silently.
## Provider settings
Any S3-compatible provider works the same way. These are the values for some common ones; for others, look up the S3 API endpoint, region and addressing style in the provider's documentation.
### AWS S3
* `s3_endpoint`: `https://s3..amazonaws.com`
* `s3_region`: the bucket's region
* `s3_force_path_style`: `false` usually works
### Bunny Storage
* `s3_endpoint`: `https://-s3.storage.bunnycdn.com`
* `s3_region`: the storage zone's region code
* `s3_bucket` and `s3_access_key_id`: the storage zone name
* `s3_secret_access_key`: the storage zone password
* `s3_force_path_style`: `true`
S3 compatibility can only be enabled when a storage zone is created, never on an existing one, so an existing zone has to be recreated.
### Cloudflare R2
* `s3_endpoint`: `https://.r2.cloudflarestorage.com`
* `s3_region`: `auto`
* `s3_force_path_style`: `true`
### Neon Object Storage
* `s3_endpoint`: the branch's storage endpoint, `https://.storage.c-..aws.neon.tech`
* `s3_region`: the project's region, such as `us-east-2`
* `s3_access_key_id` and `s3_secret_access_key`: a credential with the `storage:write` scope, which also allows reading and listing
* `s3_force_path_style`: `true`
Use a `public_read` bucket, and set `public_url_prefix` to the endpoint followed by the bucket name.
---
# Billing and plans
Source: https://decapcms.org/docs/turbo-billing/
Managing your plan, add-ons and payment details. Tiers and prices are on the [plans page](https://decapcms.org/turbo/#plans).
Billing is per organization, owner-only, from the organization's **Billing** page. [Paddle](https://www.paddle.com) is the merchant of record — you'll see Paddle's checkout when upgrading and Paddle's portal when changing a card.
## Trying Pro
New organizations start on Free. From **Plan & add-ons** you can switch Pro on with no card. The page shows the date it runs until.
It unlocks every Pro feature except **priority support**, which needs a payment method on file. Priority support is a service rather than a feature — a response-time commitment backed by people — so it isn't given away with a trial.
It's a 14-day trial, once per customer, on their first organization.
If no payment method is added before it ends, you get a week's grace at full access, then the organization moves to Free — see [Downgrading](https://decapcms.org/docs/turbo-billing/#downgrading-and-cancelling). Owners (or your billing address, if set) are emailed before the trial ends and during the grace week. Nothing is deleted.
Adding a card during a trial doesn't charge immediately: the first charge falls on the date the trial would have ended. If you're over Pro's included sites or seats, the matching add-ons are attached for you and the total is shown before you confirm.
## Upgrading
Upgrading from Free opens a checkout overlay in place, no redirect. The plan updates within seconds and the page reloads.
The four add-ons — extra sites, extra seats, advanced roles, priority support — are managed from the same page once you're on Pro, and take effect immediately.
## Billing details
The **Billing details** tab holds what appears on invoices and where they go: billing email, company name, VAT/tax ID. Fill in the company name and tax ID before your first charge if you need a VAT-usable invoice.
The billing email is only a destination. It needs no Turbo account, grants no access, and one address can serve several organizations. Because it receives financial documents it must be confirmed: saving one sends a link there, and until someone opens it, billing mail keeps going to the owners. With no billing email set, everything goes to every owner.
## Downgrading and cancelling
Downgrading is scheduled for the end of the current billing period — you keep Pro until then, and the page shows the date.
When it takes effect, or if a subscription is cancelled for payment reasons:
- Every site except one is [locked](https://decapcms.org/docs/turbo-roles-and-members/#site-locking). You choose which to keep active.
- Every organization member other than the owner is locked out.
- Pending invitations are revoked.
Nothing is deleted. Upgrading again unlocks sites and memberships oldest first, as far as the plan reaches — so an organization that had three sites and dropped to Free gets one back on Pro, and the rest stay read-only until you add extra sites. Revoked invitations aren't restored.
## Invoices and payment method
**Invoices** lists them live from Paddle with a PDF each; nothing is mirrored into Turbo. The payment method is read-only here — updating it opens Paddle's portal.
## Usage and fair use
**Usage** shows sites and seats against your limits, with locked sites counted separately.
Turbo doesn't bill on request volume or storage. Your invoice is the same every month apart from add-ons. Instead every plan is subject to the fair-use section of the [Terms](https://decapcms.org/turbo/terms/#7-plans-limits-and-fair-use); exceeding it triggers a manual review, not a charge.
### Daily request ceilings
One enforced number sits behind fair use: proxy requests per day, per organization.
| Plan | Requests/day |
|---|---|
| Free | 2,500 |
| Pro | 20,000, plus 20,000 per extra-site add-on |
| Enterprise | 100,000 |
A Pro organization with two extra sites gets 60,000. An organization on the Pro trial gets Pro's base 20,000 even though the trial allows five sites — extra-site add-ons are bought, and a trial hasn't bought any.
**Counted:** everything an editor's CMS session sends through the Git proxy — loading collections, opening entries, saving, publishing, and repo-hosted media. Requests Turbo answers from its own store count too, since the ceiling is measured at the proxy's front door.
**Not counted:** the Turbo dashboard itself, and media served through the [media library](https://decapcms.org/docs/turbo-media-proxy/), which doesn't touch the Git proxy.
It's a burst backstop, sized so a compromised account or runaway script can't exhaust shared capacity. Editorial work sits orders of magnitude below it; the realistic way to hit it is the first sync of a very large repository.
Over the ceiling, the proxy returns **429** with a `Retry-After` header, and saves and loads fail in the CMS. Nothing is charged, locked or deleted, and the counter resets on a 24-hour boundary. There's also a per-user limit of 10,000 requests a minute, which only a runaway loop reaches.
These numbers live here rather than in the Terms so they can be raised without a contract amendment. The Terms commit us to notice before **lowering** one.
## Enterprise
Custom-quoted and handled outside self-serve checkout — contact us from the Billing page or the [plans page](https://decapcms.org/turbo/#plans).
Enterprise is invoiced directly by PM, poslovni mediji d.o.o., not through Paddle, so there's no card on file and no invoice list in the dashboard. The Billing page shows a note instead of plan cards.
---
# Troubleshooting & FAQ
Source: https://decapcms.org/docs/turbo-troubleshooting-faq/
## Loading the CMS
**"Unknown site_id"** — `turbo_site_id` doesn't match a site in your organization. Check it against the Overview tab; it's easy to copy the wrong one when you manage several.
**"This site has been locked"** — the organization is over its site limit, usually after a downgrade or cancellation. Upgrade, or unlock the site if you have a free slot. See [site locking](https://decapcms.org/docs/turbo-roles-and-members/#site-locking).
**"This organization has hit its daily GitHub request limit"** (or GitLab) — you've used the plan's [daily ceiling](https://decapcms.org/docs/turbo-billing/#daily-request-ceilings). The response carries `Retry-After`; the counter resets on a 24-hour boundary. Nothing is charged or locked. Tell us if you hit it during ordinary editorial work.
**"The Decap Turbo GitHub App cannot see owner/repo"** — either the repo on the site's Overview tab isn't the exact `owner/name` (copy it from the repository's URL), or the App is installed on a different account than the one that owns the repo, or without that repo selected. Check under Settings → Applications → Decap Turbo → Configure on GitHub. "Connected" on the Git connection page only means an installation is linked, not that it covers your repo.
**`requested repo does not match`** — the `repo` in `config.yml` disagrees with the site row, and the site row is authoritative. Change it in the dashboard; see [`repo` and `branch`](https://decapcms.org/docs/turbo-connecting-a-site/#repo-and-branch).
**`use_graphql: true` throws** — on both `turbo-github` and `turbo-gitlab`. GraphQL requests would bypass per-site scoping, so the backend refuses to start. Remove it; the plain `github` and `gitlab` backends support it, the Turbo backends don't.
## Logging in
**The popup closes and nothing happens / "origin not allowed"** — the CMS is served from an origin (protocol, host and port) that none of the site's admin interface URLs match, or you aren't a member of that site. Check the Overview tab, including staging domains, and use a wildcard for deploy previews — see [Admin URLs, deploy previews and branch deploys](https://decapcms.org/docs/turbo-connecting-a-site/#admin-urls-deploy-previews-and-branch-deploys).
**"Session expired. Please log in again."** — the refresh token expired or was invalidated. Log in again. A brief pause with no error is a refresh retry succeeding in the background, not a problem.
## Managing organizations and sites
**"Only organization owners can create new sites"** — ask an owner to create it, or to promote you.
**"This organization has no GitHub connection yet"** — connect the provider before creating sites. See [Connect your Git provider](https://decapcms.org/docs/turbo-getting-started/#connect-your-git-provider).
**"This organization has reached its site limit" / "…seat limit"** — free up a slot, or add capacity from [Billing](https://decapcms.org/docs/turbo-billing/).
## Editors are never told when a change is live
Deploy status needs something reporting your builds. Most hosts do it through the Decap GitHub App; **Netlify doesn't**, for branch or production deploys, and no Netlify setting changes that. Open the site's Deploys tab — if nothing is recorded, [add the webhook](https://decapcms.org/docs/turbo-deploy-status-setup/#netlify). Other causes are in [Deploy status](https://decapcms.org/docs/turbo-deploy-status/#nothing-arrives).
## Reporting a bug
Organization owners can report issues from the **Feedback** page — bugs and feature requests about Turbo itself, not your site's content. A duplicate is added as a comment on the existing report rather than opening a second one, and you can follow status and reply from the same page.
## FAQ
**Does Turbo change how my content is stored?**
No. Content is committed to your repository exactly as the standard backends do. See [How it works](https://decapcms.org/docs/turbo-how-it-works/#content-stays-in-git).
**Can I move off Turbo later?**
Yes — your content is already in Git, so switching to the plain [GitHub](https://decapcms.org/docs/github-backend/) or [GitLab](https://decapcms.org/docs/gitlab-backend/) backend is a `config.yml` change.
**Can I self-host instead?**
Yes. Decap CMS is free and open source either way; self-hosting means running your own auth — a Git provider's OAuth, [Git Gateway](https://decapcms.org/docs/git-gateway-backend/), or [decap-proxy](https://decapcms.org/docs/decap-proxy/) — instead of Turbo's hosted auth and proxy.
**Do editors need GitHub or GitLab accounts?**
No. See [How it works](https://decapcms.org/docs/turbo-how-it-works/#editors-dont-need-a-git-host-account).
**Can editors sign in with Google or GitHub?**
Sign-in is email and password today. Other providers are planned.
**Is deploy status available on GitLab?**
Not yet. It's `turbo-github` only.
**How do I ask about Enterprise?**
From the [plans page](https://decapcms.org/turbo/#plans) or your organization's Billing page. It's custom-quoted and handled outside self-serve checkout.
---
# Widget: Boolean
Source: https://decapcms.org/docs/widgets/boolean/
The boolean widget translates a toggle switch input to a true/false value.
**Name:** `boolean`
**UI:** toggle switch
**Data type:** boolean
**Options**
- `default`: accepts `true` or `false`; defaults to `false` when `required` is set to `false`
**Example config**
```yaml
- {label: "Draft", name: "draft", widget: "boolean", default: true}
```
**Result**

---
# Widget: Code
Source: https://decapcms.org/docs/widgets/code/
The code widget provides a code editor (powered by [Codemirror](https://codemirror.net)) with optional syntax awareness. Can output the raw code value or an object with the selected language and the raw code value.
**Name:** `code`
**UI:** code editor
**Data type:** string
**Options:**
- `default_language`: optional; default language to use
- `allow_language_selection`: optional; defaults to `false`: allows syntax to be changed
- `keys`: optional; sets key names for code and lang if outputting an object; defaults to `{ code: 'code', lang: 'lang' }`
- `output_code_only`: set to `true` to output the string value only, defaults to `false`
**Example**
```yaml
- label: 'Code'
name: 'code'
widget: 'code'
```
**Result**
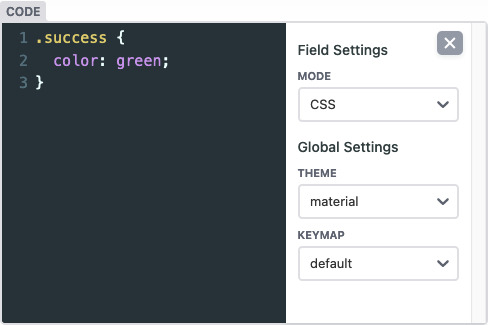
---
# Widget: Color
Source: https://decapcms.org/docs/widgets/color/
The color widget translates a color picker to a color string.
**Name:** `color`
**UI:** color picker
**Data type:** string
**Options:**
- `default`: accepts a string; defaults to an empty string. Sets the default value
- `allowInput`: accepts a boolean, defaults to `false`. Allows manual editing of the color input value
- `enableAlpha`: accepts a boolean, defaults to `false`. Enables Alpha editing
**Example**
```yaml
- { label: 'Color', name: 'color', widget: 'color' }
```
**Example**
```yaml
- { label: 'Color', name: 'color', widget: 'color', enableAlpha: true, allowInput: true }
```
**Result**
---
# Widget: Datetime
Source: https://decapcms.org/docs/widgets/datetime/
The datetime widget translates a datetime picker to a datetime string.
**Name:** `datetime`
**UI:** datetime-local input / date input / time input
**Data type:** [Day.js](https://day.js.org/)-formatted datetime string
**Options:**
- `default`: accepts a datetime string, or `'{{now}}'` to fill in the current datetime; otherwise defaults to empty string.
Until 3.2.1 it defaults to current datetime. To get an empty field, set default to empty string.
- `format`: sets storage format, displays the full date and time input in the UI. Accepts [Day.js formats](https://day.js.org/docs/en/display/format); defaults to ISO8601 (if supported by output format). If set, `date_format` and `time_format` are not used.
- `date_format`: sets storage format and UI input type as date picker (without time). Boolean or [Day.js formats](https://day.js.org/docs/en/display/format).
- `time_format`: sets storage format and UI input type as time picker (without date). Boolean or [Day.js formats](https://day.js.org/docs/en/display/format). If used together with `date_format`, the UI input will be a full datetime picker.
- `picker_utc`: _(default: `false`)_ when set to `true`, the datetime picker will display times in UTC. When `false`, the datetime picker will display times in the user's local timezone. When using date-only formats, it can be helpful to set this to `true` so users in all time zones will see the same date in the datetime picker.
The display format of the input element depends on browser locale.
**Example:**
```yaml
- label: "Start time"
name: "start"
widget: "datetime"
default: "{{now}}"
date_format: "DD.MM.YYYY" # e.g. 24.12.2021
time_format: "HH:mm" # e.g. 21:07
format: "LLL"
picker_utc: false
```
**Result**

---
# Widget: File
Source: https://decapcms.org/docs/widgets/file/
The file widget allows editors to upload a file or select an existing one from the media library. The path to the file will be saved to the field as a string.
**Name:** `file`
**UI:** file picker button opens media gallery
**Data type:** file path string
**Options:**
- `default`: accepts a file path string; defaults to null
- `media_folder` (Beta): file path where uploaded files will be saved specific to this control. Paths can be relative to a collection folder (e.g. `files` will add the file to a sub-folder in the collection folder) or absolute with reference to the base of the repo which needs to begin with `/` (e.g `/static/files` will save uploaded files to the `static` folder in a sub folder named `files`)
- `public_folder` *(defaults to the value of `media_folder`)*: specifies the folder path where the files uploaded for this control will be accessed, relative to the base of the built site. The value of the field is generated by prepending this path to the filename of the selected file.
- `choose_url`: *(default: `true`)* when set to `false`, the "Insert from URL" button will be hidden
- `media_library`: media library settings to apply when a media library is opened by the current widget. It accepts these options:
- `allow_multiple`: *(default: `true`)* when set to `false`, prevents multiple selection for any media library extension, but must be supported by the extension in use
- `config`: a configuration object that will be passed directly to the media library being used - available options are determined by the library
`media_folder`, `public_folder` and `choose_url` are options of the field itself. Don't put them under `media_library`.
**Example**
```yaml
- label: "Manual PDF"
name: "manual_pdf"
widget: "file"
default: "/uploads/general-manual.pdf"
media_folder: "/static/files"
public_folder: "/files"
media_library:
config:
multiple: true
```
### File Size Limit
You can set a limit to as what the maximum file size of a file is that users can upload directly into a file field.
**Example**
```yaml
media_library:
config:
max_file_size: 1024000 # in bytes, only for default media library
```
**Result**
---
# Widget: Hidden
Source: https://decapcms.org/docs/widgets/hidden/
Hidden widgets do not display in the UI. In folder collections that allow users to create new items, you will often want to set a default for hidden fields, so they will be set without requiring an input.
**Name:** `hidden`
**UI:** none
**Data type:** any valid data type
**Options:**
- `default`: accepts any valid data type; recommended for collections that allow adding new items
**Example**
```yaml
- {label: "Layout", name: "layout", widget: "hidden", default: "blog"}
```
---
# Widget: Image
Source: https://decapcms.org/docs/widgets/image/
The image widget allows editors to upload an image or select an existing one from the media library. The path to the image file will be saved to the field as a string.
**Name:** `image`
**UI:** file picker button opens media gallery allowing image files (jpg, jpeg, webp, gif, png, bmp, tiff, svg) only; displays selected image thumbnail
**Data type:** file path string
**Options**
- `default`: accepts a file path string; defaults to null
- `media_folder` (Beta): file path where uploaded images will be saved specific to this control. Paths can be relative to a collection folder (e.g. `images` will add the image to a sub-folder in the collection folder) or absolute with reference to the base of the repo which needs to begin with `/` (e.g `/static/images` will save uploaded images to the `static` folder in a sub folder named `images`)
- `public_folder` *(defaults to the value of `media_folder`)*: specifies the folder path where the files uploaded by the media library will be accessed, relative to the base of the built site. The value of the field is generated by prepending this path to the filename of the selected file.
- `media_processing`: image transformation settings to apply to uploads from this field. Field-level settings override the top-level `media_processing` configuration. See [Media Processing](https://decapcms.org/docs/configuration-options/#media-processing) for available options.
- `choose_url`: *(default: `true`)* when set to `false`, the "Insert from URL" button will be hidden
- `media_library`: settings to apply when a media library is opened by the current widget. It accepts these options:
- `allow_multiple`: *(default: `true`)* when set to `false`, multiple selection will be disabled even if the media library extension supports it
- `config`: a configuration object passed directly to the media library; check the documentation of your media library extension for available `config` options
`media_folder`, `public_folder`, `media_processing` and `choose_url` are options of the field itself. Don't put them under `media_library`.
**Example**
```yaml
- label: "Featured Image"
name: "thumbnail"
widget: "image"
choose_url: true
default: "/uploads/chocolate-dogecoin.jpg"
media_library:
config:
multiple: true
```
### Image Size Limit
You can set a limit on the maximum file size that users can upload directly into an image field.
**Example**
```yaml
media_library:
config:
max_file_size: 512000 # in bytes, only for default media library
```
**Result**
---
# Widget: List
Source: https://decapcms.org/docs/widgets/list/
The list widget allows you to create a repeatable item in the UI which saves as a list of widget values. map a user-provided string with a comma delimiter into a list. You can choose any widget as a child of a list widget—even other lists.
**Name:** `list`
**UI:** without any `fields` specified, the list widget defaults to a text input for entering comma-separated values; with `fields` specified, the list widget contains a repeatable child widget, with controls for adding, deleting, and re-ordering the repeated widgets.
**Data type:** list of widget values
**Options**
- `default`: you may specify a list of strings to populate the basic text
field, or an array of list items for lists using the `fields` option. If no
default is declared when using `field` or `fields`, will default to a single
list item using the defaults on the child widgets
- `allow_add`: `false` hides the button to add additional items
- `allow_remove`: `false` hides the button to remove items 3.8
- `allow_reorder`: `false` hides the controls to reorder items 3.8
- `collapsed`: when `true`, the entries collapse by default
- `summary`: specify the label displayed on collapsed entries
- `minimize_collapsed`: when `true`, collapsing the list widget will hide all of its entries instead of showing summaries
- `label_singular`: the text to show on the add button
- `field`: a single widget field to be repeated
- `fields`: a nested list of multiple widget fields to be included in each repeatable iteration
- `max`: maximum number of items in the list (works only if `min` is also specified)
- `min`: minimum number of items in the list (works only if `max` is also specified)
- `add_to_top`: when `true`, new entries will be added to the top of the list
**Example** (`field`/`fields` not specified):
```yaml
- label: "Tags"
name: "tags"
widget: "list"
default: ["news"]
```
**Example** (`allow_add` marked `false`):
```yaml
- label: "Tags"
name: "tags"
widget: "list"
allow_add: false
default: ["news"]
```
**Example** (with `field`):
```yaml
- label: "Gallery"
name: "galleryImages"
widget: "list"
summary: '{{fields.image}}'
field: {label: Image, name: image, widget: image}
```
**Example** (with `fields`):
```yaml
- label: "Testimonials"
name: "testimonials"
widget: "list"
summary: '{{fields.quote}} - {{fields.author.name}}'
fields:
- {label: Quote, name: quote, widget: string, default: "Everything is awesome!"}
- label: Author
name: author
widget: object
fields:
- {label: Name, name: name, widget: string, default: "Emmet"}
- {label: Avatar, name: avatar, widget: image, default: "/img/emmet.jpg"}
```
**Example** (with `default`):
```yaml
- label: "Gallery"
name: "galleryImages"
widget: "list"
fields:
- { label: "Source", name: "src", widget: "string" }
- { label: "Alt Text", name: "alt", widget: "string" }
default:
- { src: "/img/tennis.jpg", alt: "Tennis" }
- { src: "/img/footbar.jpg", alt: "Football" }
```
* **Example** (`collapsed` marked `false`):
```yaml
- label: "Testimonials"
name: "testimonials"
collapsed: false
widget: "list"
fields:
- {label: Quote, name: quote, widget: string, default: "Everything is awesome!"}
- {label: Author, name: author, widget: string }
```
**Example** (`minimize_collapsed` marked `true`):
```yaml
- label: "Testimonials"
name: "testimonials"
minimize_collapsed: true
widget: "list"
fields:
- {label: Quote, name: quote, widget: string, default: "Everything is awesome!"}
- {label: Author, name: author, widget: string }
```
**Example** (with `max` & `min`):
```yaml
- label: "Tags"
name: "tags"
widget: "list"
max: 3
min: 1
default: ["news"]
```
**Example** (`add_to_top` marked `true`):
```yaml
- label: "Tags"
name: "tags"
widget: "list"
add_to_top: true
```
**Result**
---
# Widget: Map
Source: https://decapcms.org/docs/widgets/map/
The map widget allows you to edit spatial data using an interactive map. Spatial data for a single piece of geometry saves as a GeoJSON string in WGS84 projection.
**Name:** `map`
**UI:** interactive map
**Data type:** GeoJSON string
**Options:**
- `decimals`: accepts a number to specify precision of saved coordinates; defaults to 7 decimals
- `default`: accepts a GeoJSON string containing a single geometry; defaults to an empty string
- `type`: accepts one string value of `Point`, `LineString` or `Polygon`; defaults to `Point`
**Example**
```yaml
- {label: "Location", name: "location", widget: "map" }
```
**Result**
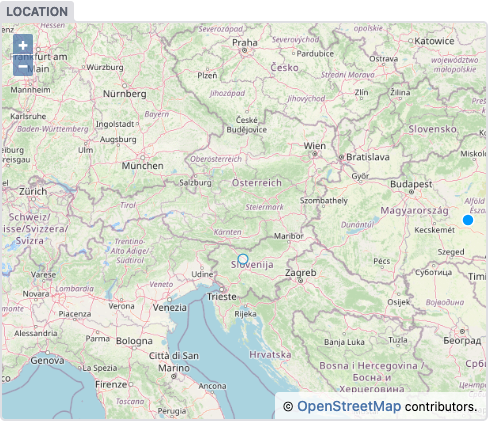
---
# Widget: Richtext (Beta)
Source: https://decapcms.org/docs/widgets/richtext/
*3.12.0 Richtext widget is a new and improved version of the markdown widget.*
The richtext widget provides a full-fledged text editor, allowing users to format text with features such as headings and blockquotes. Users can change their editing view with a handy toggle button.
*Please note:* If you want to use your richtext editor to fill a markdown file's contents after its frontmatter, you'll have to name the field `body` so the CMS recognizes it and saves the file accordingly.
**Name:** `richtext`
**UI:** full text editor
**Data type:** markdown
**Options**
* `default`: accepts markdown content
* `minimal`: accepts a boolean value, `false` by default. Sets the widget height to the minimum possible.
* `buttons`: an array of strings representing the formatting buttons to display (all shown by default). Buttons include: `bold`, `italic`, `strikethrough`, `code`, `link`, `heading-one`, `heading-two`, `heading-three`, `heading-four`, `heading-five`, `heading-six`, `quote`, `bulleted-list`, and `numbered-list`.
* `editor_components`: an array of strings representing the names of editor components to display (all shown by default). Decap CMS includes `image` and `code-block` editor components by default, and custom components may be [created and registered](https://decapcms.org/docs/custom-widgets/#registereditorcomponent).
* `modes`: an array of strings representing the names of allowed editor modes. Possible modes are `raw` and `rich_text`. A toggle button appears in the toolbar when more than one mode is available.
* `sanitize_preview`: accepts a boolean value, `true` by default. Sanitizes the markdown preview to prevent XSS attacks and might alter the preview content. *This default changed from `false` to `true` in decap-cms@3.13.0 as a security hardening measure.*
**Example**
```yaml
- { label: 'Blog post content', name: 'body', widget: 'richtext' }
```
This would render as:

*Please note:* The richtext widget outputs a raw markdown string. Your static site generator may or may not render the markdown to HTML automatically. Consult with your static site generator's documentation for more information about rendering markdown.
### Remark plugins
You can register plugins to customize [`remark`](https://github.com/remarkjs/remark), the library used by the richtext editor for serializing and deserializing markdown.
```js
// register a plugin
CMS.registerRemarkPlugin(plugin);
// provide global settings to all plugins, e.g. for customizing `remark-stringify`
CMS.registerRemarkPlugin({ settings: { bullet: '-' } });
```
Note that `decap-cms-widget-richtext` currently uses `remark@10`, so you should check a plugin's compatibility first.
---
# Widget: Markdown (deprecated)
Source: https://decapcms.org/docs/widgets/markdown/
*Markdown widget is being deprecated in favor of the richtext widget, which provides all the same features and more. We recommend switching to the richtext widget for a better editing experience and continued support.*
The markdown widget provides a full-fledged text editor, allowing users to format text with features such as headings and blockquotes. Users can change their editing view with a handy toggle button.
*Please note:* If you want to use your markdown editor to fill a markdown file's contents after its frontmatter, you'll have to name the field `body` so the CMS recognizes it and saves the file accordingly.
**Name:** `markdown`
**UI:** full text editor
**Data type:** markdown
**Options**
* `default`: accepts markdown content
* `minimal`: accepts a boolean value, `false` by default. Sets the widget height to minimum possible.
* `buttons`: an array of strings representing the formatting buttons to display (all shown by default). Buttons include: `bold`, `italic`, `strikethrough`, `code`, `link`, `heading-one`, `heading-two`, `heading-three`, `heading-four`, `heading-five`, `heading-six`, `quote`, `bulleted-list`, and `numbered-list`.
* `editor_components`: an array of strings representing the names of editor components to display (all shown by default). Decap CMS includes `image` and `code-block` editor components by default, and custom components may be [created and registered](https://decapcms.org/docs/custom-widgets/#registereditorcomponent).
* `modes`: an array of strings representing the names of allowed editor modes. Possible modes are `raw` and `rich_text`. A toggle button appears in the toolbar when more than one mode is available.
* `sanitize_preview`: accepts a boolean value, `true` by default. Sanitizes the markdown preview to prevent XSS attacks and might alter the preview content. *This default changed from `false` to `true` in decap-cms@3.13.0 as a security hardening measure.*
**Example**
```yaml
- { label: 'Blog post content', name: 'body', widget: 'markdown' }
```
This would render as:
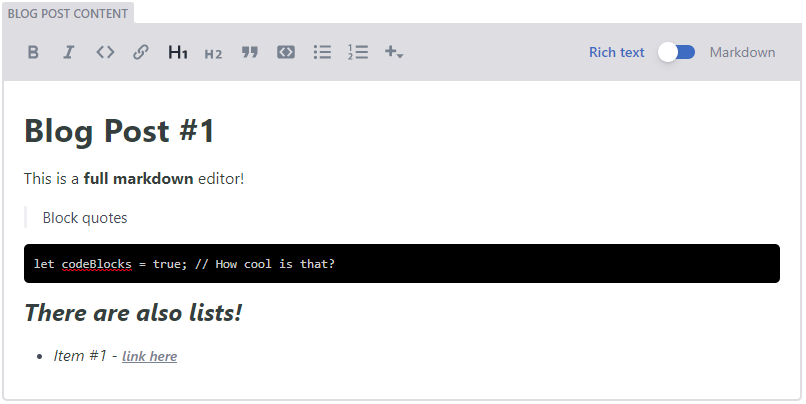
*Please note:* The markdown widget outputs a raw markdown string. Your static site generator may or may not render the markdown to HTML automatically. Consult with your static site generator's documentation for more information about rendering markdown.
### Remark plugins
You can register plugins to customize [`remark`](https://github.com/remarkjs/remark), the library used by the richtext editor for serializing and deserializing markdown.
```js
// register a plugin
CMS.registerRemarkPlugin(plugin);
// provide global settings to all plugins, e.g. for customizing `remark-stringify`
CMS.registerRemarkPlugin({ settings: { bullet: '-' } });
```
Note that `decap-cms-widget-markdown` currently uses `remark@10`, so you should check a plugin's compatibility first.
**Result**
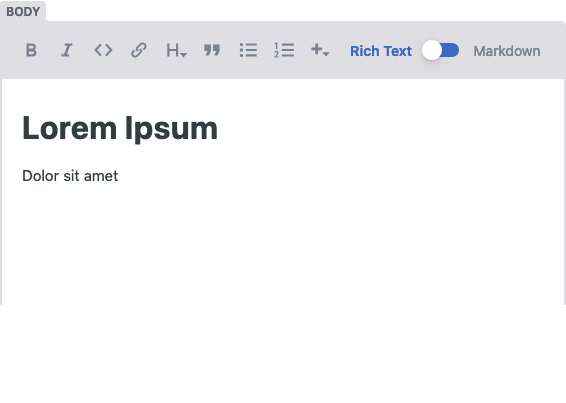
---
# Widget: Number
Source: https://decapcms.org/docs/widgets/number/
The number widget uses an HTML number input, saving the value as a string, integer, or floating point number.
**Name:** `number`
**UI:** HTML [number input](https://developer.mozilla.org/en-US/docs/Web/HTML/Element/input/number)
**Data type:** string by default; configured by `value_type` option
**Options**
- `default`: accepts string or number value; defaults to empty string
- `value_type`: accepts `int` or `float`; any other value results in saving as a string
- `min`: accepts a number for minimum value accepted; unset by default
- `max`: accepts a number for maximum value accepted; unset by default
- `step`: accepts a number for stepping up/down values in the input; 1 by default
**Example**
```yaml
- label: "Puppy Count"
name: "puppies"
widget: "number"
default: 2
value_type: "int"
min: 1
max: 101
step: 2
```
**Result**

---
# Widget: Object
Source: https://decapcms.org/docs/widgets/object/
The object widget allows you to group multiple widgets together, nested under a single field. You can choose any widget as a child of an object widget—even other objects.
**Name:** `object`
**UI:** a field containing one or more child widgets
**Data type:** list of child widget values
**Options**
- `default`: you can set defaults within each sub-field's configuration
- `collapsed`: if added and labeled `true`, collapse the widget's content by default
- `summary`: specify the label displayed when the object is collapsed
- `fields`: (**required**) a nested list of widget fields to include in your widget
**Example**
```yaml
- label: "Profile"
name: "profile"
widget: "object"
summary: '{{fields.name}}: {{fields.birthdate}}'
fields:
- {label: "Public", name: "public", widget: "boolean", default: true}
- {label: "Name", name: "name", widget: "string"}
- label: "Birthdate"
name: "birthdate"
widget: "date"
default: ""
format: "MM/DD/YYYY"
- label: "Address"
name: "address"
widget: "object"
collapsed: true
fields:
- {label: "Street Address", name: "street", widget: "string"}
- {label: "City", name: "city", widget: "string"}
- {label: "Postal Code", name: "post-code", widget: "string"}
```
**Result**
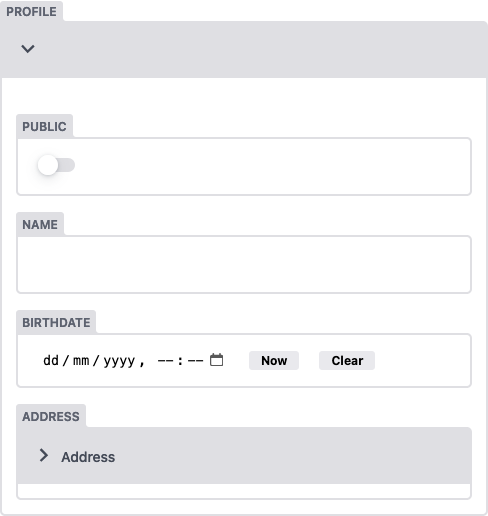
---
# Widget: Relation
Source: https://decapcms.org/docs/widgets/relation/
The relation widget allows you to reference items from another collection. It provides a search input with a list of entries from the collection you're referencing, and the list automatically updates with matched entries based on what you've typed.
**Note:** On large collections, populating this dropdown means fetching many entries from your Git host's API, which can be slow or hit rate limits. [Decap Turbo](https://decapcms.org/turbo/) serves collection data from a database cache instead, so large relation lists load quickly without spending your API rate limit.
**Name:** `relation`
**UI:** text input with search result dropdown
**Data type:** data type of the value pulled from the related collection item
**Options:**
- `collection`: (**required**) name of the referenced collection (string)
- `value_field`: (**required**) name of the field from the referenced collection whose value will be stored for the relation. For nested fields, separate each subfield with a `.` (e.g. `name.first`). For list fields use a wildcard `*` to target all list items (e.g. `categories.*`).
- `search_fields`: (**required**) list of one or more names of fields in the referenced collection to search for the typed value. Syntax to reference nested fields is similar to that of *value_field*.
- `file`: allows referencing a specific file when the referenced collection is a files collection (string)
- `display_fields`: list of one or more names of fields in the referenced collection that will render in the autocomplete menu of the control. Defaults to `value_field`. Syntax to reference nested fields is similar to that of *value_field*.
- `default`: accepts any widget data type; defaults to an empty string
- `multiple`: accepts a boolean, defaults to `false`
- `min`: minimum number of items; ignored if **multiple** is `false`
- `max`: maximum number of items; ignored if **multiple** is `false`
- `options_length`: accepts integer to override number of options presented to user. Defaults to `20`.
- `filters`: 3.1.5 allows adding filters by which the available options are filtered. You can add filters which are a pair of `field` and the allowed `values`, where the widget will only show options (collection items) that satisfy all the filters. A collection item satisfies a filter if the value of `field` is one of the values in `values`. If `field` holds a list, such as a `select` field with `multiple: true`, the item satisfies the filter when any of the list's values is in `values`. 3.17.2
- **Referencing a folder collection example** (assuming a separate "authors" collection with "name" and "twitterHandle" fields with subfields "first" and "last" for the "name" field):
```yaml
- label: "Post Author"
name: "author"
widget: "relation"
collection: "authors"
search_fields: ["name.first", "twitterHandle"]
value_field: "name.first"
display_fields: ["twitterHandle", "followerCount"]
```
The generated UI input will search the authors collection by name and twitterHandle, and display each author's handle and follower count. On selection, the author's name is saved for the field.
**String templates example**
This assumes a separate "authors" collection with "name" and "twitterHandle" fields with subfields "first" and "last" for the "name" field:
```yaml
- label: "Post Author"
name: "author"
widget: "relation"
collection: "authors"
search_fields: ['name.first']
value_field: "{{slug}}"
display_fields: ["{{twitterHandle}} - {{followerCount}}"]
```
The generated UI input will search the authors collection by name, and display each author's handle and follower count. On selection, the author entry slug is saved for the field.
**Referencing a file collection list field example**
This assumes a separate "relation_files" collection with a file named "cities" with a list field "cities" with subfields "name" and "id":
```yaml
- label: "City"
name: "city"
widget: "relation"
collection: "relation_files"
file: "cities"
search_fields: ["cities.*.name"]
display_fields: ["cities.*.name"]
value_field: "cities.*.id"
```
The generated UI input will search the cities file by city name, and display each city's name. On selection, the city id is saved for the field.
* **Filters example**
```yaml
- label: Posts
name: posts
widget: relation
collection: posts
multiple: true
search_fields: [title]
display_fields: [title]
value_field: '{{slug}}'
filters:
- field: draft
values: [false]
```
In this example, the relation widget will only show and allow posts that are not a draft (i.e. `draft` field is `false`). For example, if we have 20 posts in the CMS of which 5 have `draft` set to `true`, then we will only see the other 15 posts as options in the relation widget.
Multiple filters can be added:
```yaml
filters:
- field: draft
values: [false]
- field: title
values: ['post about cats', 'post about dogs']
```
In this case only the posts with `draft` set to `false` and a title that is either 'posts about cats' or 'post about dogs' will be options seen in the relation widget.
**Result**
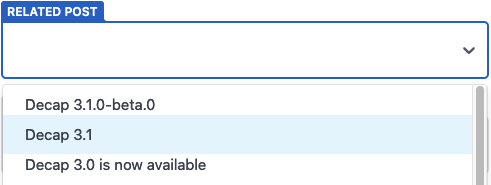
---
# Widget: Select
Source: https://decapcms.org/docs/widgets/select/
The select widget allows you to pick a string value from a dropdown menu.
**Name:** `select`
**UI:** select input
**Data type:** string or array
**Options:**
- `default`: `options` must contain any default values
- string values: accepts a string; defaults to an empty string. Accepts an array of strings and defaults to an empty array with `multiple: true` enabled.
- object with `label` and `value` fields: accepts an object with `label` and `value` field or an array of such objects when `multiple: true` is enable. Defaults to no value
- `options`: (**required**) there are two ways to list of options for the dropdown menu:
- string values: the dropdown displays the value directly
- object with `label` and `value` fields: the label displays in the dropdown; the value saves in the file
- `multiple`: accepts a boolean; defaults to `false`
- `min`: minimum number of items; ignored if **multiple** is `false`
- `max`: maximum number of items; ignored if **multiple** is `false`
**Example** (options as strings):
```yaml
- label: "Align Content"
name: "align"
widget: "select"
options: ["left", "center", "right"]
```
Selecting the `center` option, will save the value as:
```yaml
align: "center"
```
**Example** (options as objects):
```yaml
- label: "City"
name: "airport-code"
widget: "select"
options:
- { label: "Chicago", value: "ORD" }
- { label: "Paris", value: "CDG" }
- { label: "Tokyo", value: "HND" }
```
Selecting the `Chicago` option, will save the value as:
```yaml
airport-code: "ORD"
```
**Example** (multiple):
```yaml
- label: "Tags"
name: "tags"
widget: "select"
multiple: true
options: ["Design", "UX", "Dev"]
default: ["Design"]
```
**Example** (min/max):
```yaml
- label: "Tags"
name: "tags"
widget: "select"
multiple: true
min: 1
max: 3
options: ["Design", "UX", "Dev"]
default: ["Design"]
```
**Result**
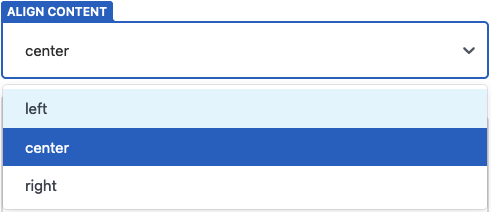
---
# Widget: String
Source: https://decapcms.org/docs/widgets/string/
The string widget translates a basic text input to a string value. For larger textarea inputs, use the text widget.
**Name:** `string`
**UI:** text input
**Data type:** string
**Options:**
- `default`: accepts a string; defaults to an empty string
**Example**
```yaml
- {label: "Title", name: "title", widget: "string"}
```
**Result**

---
# Widget: Text
Source: https://decapcms.org/docs/widgets/text/
The text widget takes a multiline text field and saves it as a string. For shorter text inputs, use the string widget.
**Name:** `text`
**UI:** HTML textarea
**Data type:** string
**Options:**
- `default`: accepts a string; defaults to an empty string
**Example**
```yaml
- {label: "Description", name: "description", widget: "text"}
```
**Result**
---
# Widget: UUID
Source: https://decapcms.org/docs/widgets/uuid/
3.15
The UUID widget generates a unique identifier when an entry is created, for example to give an entry a stable ID that doesn't change when its title or file name does. The value is generated once, the first time the field is shown without a value, and is kept on later edits.
**Name:** `uuid`
**UI:** read-only text input
**Data type:** string
**Options:**
- `read_only`: *(default: `true`)* set to `false` to let editors change the generated value
- `prefix`: a string added in front of the generated UUID; defaults to an empty string
- `use_b32_encoding`: *(default: `false`)* when `true`, saves the UUID as unpadded, lowercase Base32 ([RFC 4648](https://datatracker.ietf.org/doc/html/rfc4648)) instead of the usual hexadecimal form with dashes, which gives a shorter value
With [i18n](https://decapcms.org/docs/i18n/), the value is generated in the default locale. Other locales get their own value only when the field has `i18n: translate`.
**Example**
```yaml
- {label: "ID", name: "id", widget: "uuid"}
```
This saves a value such as `7c9e6679-7425-40de-944b-e07fc1f90ae7`.
```yaml
- {label: "ID", name: "id", widget: "uuid", prefix: "post-", use_b32_encoding: true}
```
For the same UUID, this saves `post-pspgm6luevan5fcl4b74d6ik44`.
 ```
Your dynamic URL can be formed conditionally to provide any desired transformations - please see Cloudinary's [image transformation reference](https://cloudinary.com/documentation/image_transformation_reference) for available transformations.
---
# Netlify Large Media
Source: https://decapcms.org/docs/netlify-large-media/
**Note:** Netlify Large Media is deprecated as of September 1, 2023. Please refer to the deprecation notice in [Netlify's Support Forums](https://docs.netlify.com/large-media/overview/) (see deprecation notice).
If you're choosing a media strategy for a new site, [Decap Turbo's S3-compatible media library](https://decapcms.org/docs/turbo-media-proxy/) is a current alternative — it stores assets in your own S3-compatible bucket and doesn't depend on Git LFS or Netlify Identity.
[Netlify Large Media](https://www.netlify.com/features/large-media/) is a [Git LFS](https://git-lfs.github.com/) implementation for repositories connected to Netlify sites. This means that you can use Git to work with large asset files like images, audio, and video, without bloating your repository. It does this by replacing the asset files in your repository with text pointer files, then uploading the assets to the Netlify Large Media storage service.
If you have a Netlify site with Large Media enabled, Decap CMS (version 2.6.0 and above) will handle Large Media asset files seamlessly, in the same way as files stored directly in the repository.
## Requirements
To use Netlify Large Media with Decap CMS, you will need to do the following:
* [Upgrade Decap CMS](https://decapcms.org/docs/update-the-cms-version/) to version 2.6.0 or above.
* Configure Decap CMS to use the [Git Gateway backend with Netlify Identity](https://decapcms.org/docs/git-gateway-backend/#git-gateway-with-netlify-identity).
* Configure the Netlify site and connected repository to use Large Media, following the [Large Media docs on Netlify](https://www.netlify.com/docs/large-media/).
When these are complete, you can use Decap CMS as normal, and the configured asset files will automatically be handled by Netlify Large Media.
## Image transformations
All JPEG, PNG, and GIF files that are handled with Netlify Large Media also have access to Netlify's on-demand image transformation service. This service allows you to request an image to match the dimensions you specify in a query parameter added to the image URL.
You can learn more about this feature in [Netlify's image transformation docs](https://www.netlify.com/docs/image-transformation/).
### Transformation control for media gallery thumbnails
In repositories enabled with Netlify Large Media, Decap CMS will use the image transformation query parameters to load thumbnail-sized images for the media gallery view. This makes images in the media gallery load significantly faster.
**Note:** When using this option all tracked file types have to be imported into Large Media. For example if you track `*.jpg` but still have jpg-files that are not imported into Large Media the backend will throw an error. Check the [netlify docs](https://docs.netlify.com/large-media/setup/#migrate-files-from-git-history) on how to add previously committed files to Large Media.
You can disable the automatic image transformations with the `use_large_media_transforms_in_media_library` configuration setting, nested under `backend` in the CMS `config.yml` file:
```yaml
backend:
name: git-gateway
## Set to false to prevent transforming images in media gallery view
use_large_media_transforms_in_media_library: false
```
---
# Uploadcare
Source: https://decapcms.org/docs/uploadcare/
Uploadcare is a sleek service that allows you to upload files without worrying about maintaining a growing collection — more of an asset store than a library. Just upload when you need to, and the files are hosted on their CDN. They provide image processing controls from simple cropping and rotation to filters and face detection, and a lot more. You can check out Uploadcare's full feature set on their [website](https://uploadcare.com/).
The Uploadcare media library integration for Decap CMS allows you to use Uploadcare as your media handler within the CMS itself. It's available by default as of our 2.1.0 release, and works in tandem with the existing file and image widgets, so using it only requires creating an Uploadcare account and updating your Decap CMS configuration.
**Please make sure that Decap CMS is updated to 2.1.0 or greater before proceeding.**
## Creating an Uploadcare Account
You can [sign up](https://uploadcare.com/accounts/signup/) for a free Uploadcare account to get started. Once you've signed up, go to your dashboard, select a project, and then select "API keys" from the menu on the left. The public key on the API keys page will be needed in your Decap CMS configuration. For more info on getting your API key, visit their [walkthrough](https://uploadcare.com/docs/keys/).
## Updating Decap CMS Configuration
The next and final step is updating your Decap CMS configuration file:
1. Add a `media_library` property at the same level as `media_folder`, with an object as it's value.
2. In the `media_library` object, add the name of the media player under `name`.
3. Add a `config` object under name with a `publicKey` property with your Uploadcare public key as it's value.
Your `config.yml` should now include something like this (except with a real API key):
```yaml
media_library:
name: uploadcare
config:
publicKey: YOUR_UPLOADCARE_PUBLIC_KEY
```
Once you've finished updating your Decap CMS configuration, the Uploadcare widget will appear when using the image or file widgets.
**Note:** The Decap CMS media library extensions for Uploadcare are not included in `decap-cms-app`. If you're using `decap-cms-app`, you'll need to register the media libraries yourself.
## Configuring the Uploadcare Widget
The Uploadcare widget can be configured with settings that are outlined [in their docs](https://uploadcare.com/docs/file_uploads/widget/options/). The widget itself accepts configuration through global variables and data properties on HTML elements, but with Decap CMS you can pass configuration options directly through your `config.yml`.
**Note:** all default values described in Uploadcare's documentation also apply in the Decap CMS integration, except for `previewStep`, which is set to `true`. This was done because the preview step provides helpful information like upload status, and provides access to image editing controls. This option can be disabled through the configuration options below.
### Global configuration
Global configuration, which is meant to affect the Uploadcare widget at all times, can be provided as seen above, under the primary `media_library` property. Settings applied here will affect every instance of the Uploadcare widget.
## Field configuration
Configuration can also be provided for individual fields that use the media library. The structure is very similar to the global configuration, except the settings are added to an individual `field`. For example:
```yaml
...
fields:
name: cover
label: Cover Image
widget: image
media_library:
config:
multiple: true
previewStep: false
```
## Integration settings
There are several settings that control the behavior of integration with the widget.
* `autoFilename` (`boolean`) - specify whether to add a filename to the end of the url. Example: `http://ucarecdn.com/:uuid/filename.png`
* `defaultOperations` (`string`) - specify a string added at the end of the url. This could be useful to apply a set of CDN operations to each image, for example resizing or compression. All the possible operations are listed in the [Uploadcare API reference documentation](https://uploadcare.com/docs/api_reference/cdn/).
```yaml
media_library:
name: uploadcare
config:
publicKey: YOUR_UPLOADCARE_PUBLIC_KEY
settings:
autoFilename: true
defaultOperations: '/resize/800x600/'
```
---
# Deploy Preview Links
Source: https://decapcms.org/docs/deploy-preview-links/
When using the editorial workflow, content editors can create and save content without publishing it
to a live site. Deploy preview links provide a way to view live content when it has not been
published, provided that you're using a continuous deployment platform to provide "deploy previews"
of your unmerged content.
## Using deploy preview links
Deploy preview links will work without configuration when all of the following requirements are met:
* Decap CMS version is 2.4.0+ for GitHub support and 2.10.6+ for GitLab/Bitbucket support
* Using editorial workflow
* Have a continuous deployment platform that builds every commit and provides statuses to your repo
* The build status must include the word "deploy". To use a status with another name, set [`preview_context`](https://decapcms.org/docs/backends-overview/#backend-configuration) in `backend` to its exact name.
* Backends implement specific methodd for finding statuses
* GitHub: commit status
* Azure/Bitbucket/GitLab: Pull Request status
* Other: implemented by `getStatuses` API function
Any site created using one of the Deploy to Netlify options on our [starters
page](https://decapcms.org/docs/start-with-a-template) will automatically meet these criteria (barring any changes made to
your Netlify settings), but you may need to [update](https://decapcms.org/docs/update-the-cms-version) your Decap CMS version to get the
functionality.
**Note:** If you're using a custom backend (one that is not included with Decap CMS), please check the
documentation for that backend for more information about enabling deploy preview links.
**Not the same as deploy status.** Preview links answer "what would this unpublished change look like"; [deploy status](https://decapcms.org/docs/turbo-deploy-status/) — available on Decap Turbo — answers "has the change I published actually shipped to the live site". They use different signals and can be used together.
Deploy preview links are provided in the editor toolbar, near the publishing controls:

### Waiting for builds
Deploy your site preview may take ten seconds or ten minutes, depending on many factors. For maximum
flexibility, Decap CMS provides a "Check for Preview" refresh button when the deploy preview is
pending, which a content editor can use to manually check for a finished preview until it's ready:

## Configuring preview paths
Deploy preview links point to the site root by default, but you'll probably want them to point to
the specific piece of content that the content editor is viewing. You can do this by providing a
`preview_path` string template for each collection, or for individual files in a files collection.
Let's say we have a `blog` collection that stores content in our repo under `content/blog`. The path
to a post in your repo may look like `content/blog/2018-01-new-post.md`, but the path to that post
on your site would look more like: `/blog/2018-01-new-post/`. Here's how you would use
`preview_path` in your configuration for this scenario:
```yaml
collections:
- name: blog
folder: content/blog
slug: {{year}}-{{month}}-{{slug}}
preview_path: blog/{{slug}}
```
Similarly, for an `about` page in a files collection under `content/pages` which maps to `/about-the-project`
on your site, you would configure `preview_path` like this:
```yaml
collections:
- name: pages
files:
- name: about
file: content/pages/about.md
preview_path: about-the-project
```
With the above configuration, the deploy preview URL from your backend will be combined with your
preview path to create a URL to a specific blog post.
**Note:** `{{slug}}` in `preview_path` is different than `{{slug}}` in `slug`. In the `slug`
template, `{{slug}}` is only the url-safe [identifier
field](https://decapcms.org/docs/configuration-options/#identifier_field), while in the `preview_path` template, `{{slug}}`
is the entire slug for the entry. For example:
```yaml
# for an entry created Jan 1, 2000 with identifier "My New Post!"
collections:
- name: posts
slug: {{year}}-{{month}}-{{slug}} # {{slug}} will compile to "my-new-post"
preview_path: blog/{{slug}} # {{slug}} will compile to "2000-01-my-new-post"
```
### Dates in preview paths
Some static site generators allow URL's to be customized with date parameters - for example, Hugo
can be configured to use values like `year` and `month` in a URL. These values are generally derived
by the static site generator from a date field in the content file. `preview_path` accepts these
parameters as well, similar to the `slug` configuration, except `preview_path` populates date values
based on a date value from the entry, just like static site generators do. Decap CMS will attempt
to infer an obvious date field, but you can also specify which date field to use for `preview_path`
template tags by using
[`preview_path_date_field`](https://decapcms.org/docs/configuration-options/#preview_path_date_field).
Together with your other field values, dates can be used to configure most URL schemes available
through static site generators.
**Example**
```yaml
# This collection's date field will be inferred because it has a field named `"date"`
collections:
- name: posts
preview_path: blog/{{year}}/{{month}}/{{title}}
fields:
- { name: title, label: Title }
{ name: date, label: Date, widget: date }
{ name: body, label: Body, widget: markdown }
# This collection requires `path_preview_date_field` because the no obvious date field is available
collections:
- name: posts
preview_path: blog/{{year}}/{{month}}/{{title}}
preview_path_date_field: published_at
fields:
- { name: title, label: Title }
{ name: published_at, label: Published At, widget: date }
{ name: body, label: Body, widget: markdown }
```
## Preview links for published content
You may also want preview links for published content as a convenience. You can do this by providing
a `site_url` in your configuration, which will be used in place of the deploy preview URL that a
backend would provide for an unpublished entry. Just as for deploy preview links to unpublished
content, links to published content will use any `preview_path` values that are defined in the
collection configurations.
Preview links for published content will also work if you are not using the editorial workflow.

## Disabling deploy preview links
To disable deploy preview links, set `show_preview_links` to false in your CMS configuration.
## How it works
Deploy preview links are provided through your CMS backend, and Decap CMS is unopinionated about
where the links come from or how they're created. That said, the general approach for Git backends
like GitHub is powered by "commit statuses". Continuous deployment platforms like Netlify can deploy
a version of your site for every commit that is pushed to your remote Git repository, and then send
a commit status back to your repository host with the URL.
The deploy preview URL provided by a backend will lead to the root of the deployed site. Decap CMS
will then use the `preview_path` template in an entry's collection configuration to build a path to
a specific piece of content. If a `preview_path` is not provided for an entry's collection, the URL
will be used as is.
---
# Editorial Workflows
Source: https://decapcms.org/docs/editorial-workflows/
By default, saving a post in the CMS interface pushes a commit directly to the publication branch specified in `backend`. However, you also have the option to edit the [Publish Mode](https://decapcms.org/docs/configuration-options/#publish-mode), which adds an interface for drafting, reviewing, and approving posts. To do this, add the following line to your Decap CMS `config.yml`:
```yaml
# This line should *not* be indented
publish_mode: editorial_workflow
```
From a technical perspective, the workflow translates editor UI actions into common Git commands:
| Actions in Netlify UI | Perform these Git actions |
| ------------------------- | ----------------------------------------------------------------------------------------------------------------- |
| Save draft | Commits to a new branch (named according to the pattern `cms/collectionName/entrySlug`), and opens a pull request |
| Edit draft | Pushes another commit to the draft branch/pull request |
| Approve and publish draft | Merges pull request and deletes branch |
**Note:** Editorial workflow works with GitHub repositories, and supports [GitLab](https://decapcms.org/docs/gitlab-backend/), [Bitbucket](https://decapcms.org/docs/bitbucket-backend/), [Azure](https://decapcms.org/docs/azure-backend/), [Forgejo](https://decapcms.org/docs/gitea-backend/#forgejo-backend), [Git Gateway](https://decapcms.org/docs/git-gateway-backend/) and [Decap Turbo](https://decapcms.org/docs/turbo-overview/). The `gitea` backend doesn't support it.
### Bitbucket Support
In order to track unpublished entries statuses, the Bitbucket implementation uses
[pull requests comments](https://confluence.atlassian.com/bitbucketserver/commenting-on-a-pull-request-1027119882.html).
### GitLab Support
In order to track unpublished entries statuses, the GitLab implementation uses
[merge requests labels](https://docs.gitlab.com/ee/user/project/labels.html).
### Forgejo Support
Editorial workflow on Forgejo needs the [`forgejo` backend](https://decapcms.org/docs/gitea-backend/#forgejo-backend). In order to track unpublished entries statuses, the Forgejo implementation uses pull request labels, which it creates when they're missing.
## Unpublished entries in collections
3.8
Besides the Workflow page, unpublished entries also appear in their collection. Each entry with unpublished changes, including a published entry that is being edited, shows a badge with its status: **Draft**, **In review** or **Ready**.
Entries that haven't been published yet are listed below the published ones, under an **Unpublished Entries** heading, and sorted like the rest of the collection. When the collection is [grouped](https://decapcms.org/docs/configuration-options/#view_groups), they're listed once, below all the groups. [View filters](https://decapcms.org/docs/configuration-options/#view_filters) don't apply to them. 3.15
## Squash merge GitHub pull requests
When using the **Editorial Workflow** with the `github` or GitHub-connected `git-gateway` backends, Decap CMS creates a pull request for each unpublished entry. Every time the unpublished entry is changed and saved, a new commit is added to the pull request. When the entry is published, the pull request is merged, and all of those commits are added to your project commit history in a merge commit.
The squash merge option causes all commits to be "squashed" into a single commit when the pull request is merged, and the resulting commit is rebased onto the target branch, avoiding the merge commit altogether.
To enable this feature, you can set the following option in your Decap CMS `config.yml`:
```yaml
backend:
squash_merges: true
```
---
# Open Authoring
Source: https://decapcms.org/docs/open-authoring/
When using the [GitHub backend](https://decapcms.org/docs/github-backend) or the [Forgejo backend](https://decapcms.org/docs/gitea-backend/#forgejo-backend), you can use Decap CMS to accept contributions from users without giving them access to your repository. When they make changes in the CMS, the CMS forks your repository for them behind the scenes, and all the changes are made to the fork. When the contributor is ready to submit their changes, they can set their draft as ready for review in the CMS. This triggers a pull request to your repository, which you can merge on GitHub or Forgejo.
At the same time, any contributors who *do* have write access to the repository can continue to use Decap CMS normally.
## Requirements
* You must use [the GitHub backend](https://decapcms.org/docs/github-backend) or, from version 3.15, [the Forgejo backend](https://decapcms.org/docs/gitea-backend/#forgejo-backend). The examples on this page use GitHub. For Forgejo, set `name: forgejo` and the options from its page.
**Note that the [Git Gateway backend](https://decapcms.org/docs/git-gateway-backend/#git-gateway-with-netlify-identity) does *not* support Open Authoring, even when the underlying repo is on GitHub.**
* For private GitHub repos the user must have `read` access on the repo, and you must explicitly set the auth_scope to `repo`, for example:
```yaml
backend:
name: github
repo: owner-name/private-repo-name # path to private repo
auth_scope: repo # this is needed to fork the private repo
open_authoring: true
```
## Enabling Open Authoring
1. [Enable the editorial workflow](https://decapcms.org/docs/configuration-options/#publish-mode) by setting `publish_mode` to `editorial_workflow` in your `config.yml`.
2. Set `open_authoring` to `true` in the `backend` section of your `config.yml`, as follows:
```yaml
backend:
name: github
repo: owner-name/repo-name # Path to your GitHub repository
open_authoring: true
```
## Usage
When a user logs into Decap CMS who doesn't have write access to your repo, the CMS asks for permission to create a fork of your repo (or uses their existing fork, if they already have one). They are then presented with the normal CMS interface. The published content shown is from the original repo, so it stays up-to-date as changes are made.
On the editorial workflow screen, the normal three columns are replaced by two columns instead — "Draft" and "Ready to Review".
When they make changes to content in the CMS, the changes are made to a branch on their fork. In the editorial workflow screen, they see only their own pending changes. Once they're ready to submit their changes, they can move the card into the "Ready To Review" column to create a pull request. When the pull request is merged (by a repository maintainer via the GitHub UI), Decap CMS deletes the branch and removes the card from the user's editorial workflow screen. Open Authoring users cannot publish entries through the CMS.
Users who *do* have write access to the original repository continue to use the CMS normally. Unpublished changes made by users via Open Authoring are not visible on the editorial workflow screen, and their unpublished changes must be merged through the GitHub UI.
## Alternative for external contributors with Git Gateway
[As noted above](https://decapcms.org/docs/open-authoring/#requirements), Open Authoring does not work with the Git Gateway backend. However, you can use Git Gateway on a site with Netlify Identity that has [open registration](https://www.netlify.com/docs/identity/#adding-identity-users). This lets users create accounts on your site and log into the CMS. There are a few differences, including the following:
* Users don't need to know about GitHub or create a GitHub account. Instead, they use Netlify Identity accounts that are created on your site and managed by you.
* The CMS applies users' changes directly to your repo, not to a fork. (If you use the editorial workflow, you can use features like [GitHub's protected branches](https://help.github.com/en/articles/about-protected-branches) or [Netlify's locked deploys](https://www.netlify.com/docs/locked-deploys/) to prevent users from publishing directly to your site from the CMS.)
* There is no distinction between users with write access to the repo and users without — all editorial workflow entries are visible from within the CMS and can be published with the CMS. (Unpublished Open Authoring entries, on the other hand, are visible only to the author in the CMS UI or publicly as GitHub PRs.)
## Linking to specific entries in the CMS
Open authoring often includes some sort of "Edit this page" link on the live site. Decap CMS supports this via the **edit** path:
```js
/#/edit/{collectionName}/{entryName}
```
For the entry named "general" in the "settings" file collection
```html
https://www.example.com/path-to-cms/#/edit/settings/general
```
For blog post "test.md" in the "posts" folder collection
```html
https://www.example.com/path-to-cms/#/edit/posts/test
```
* **`collectionName`**: the name of the collection as entered in the CMS config.
* **`entryName`** *(for [file collections](https://decapcms.org/docs/collection-file/)*: the `name` of the entry from the CMS config.
* **`entryName`** *(for [folder collections](https://decapcms.org/docs/collection-folder/)*: the filename, sans extension (the slug).
---
# Notes
Source: https://decapcms.org/docs/notes/
3.15 GitHub · 3.16.3 GitLab · 3.17 Decap Turbo
Notes let editors leave comments on an entry without touching its content. A *note* is a short message attached to an entry, shown in a pane next to the editor, and stored on your repository host as comments on an issue rather than in the entry file. Use notes to ask a colleague for a second opinion, record why a wording was chosen, or leave a reminder for whoever picks the draft up next.
## Requirements
* Using the [GitHub backend](https://decapcms.org/docs/github-backend/), the [GitLab backend](https://decapcms.org/docs/gitlab-backend/), or [Decap Turbo](https://decapcms.org/docs/turbo-overview/) on either host.
* Using the [editorial workflow](https://decapcms.org/docs/editorial-workflows/).
* The entry has been saved at least once. Notes are not available while creating a new entry.
* Permission to read and write issues on the repository. On the GitHub and GitLab backends that is the signed-in user; on Decap Turbo it is the organization's shared credential — the Decap Turbo GitHub App on GitHub, or the GitLab account that authorized the connection on GitLab.
* On GitLab, the project must have issues enabled. A project with issues turned off cannot store notes.
## Enabling notes
Notes are off by default. Set `notes` to true under the [`editor`](https://decapcms.org/docs/configuration-options/#editor) option. At the root it sets the default for every collection; on a collection, or on a file in a files collection, it overrides that default:
```yaml
# on root: enables notes for all collections
editor:
notes: true
collections:
- name: blog
folder: content/blog
- name: authors
folder: content/authors
editor:
notes: false # turns notes off for this collection only
```
## Using the notes pane
The notes pane shares one space with the preview and [i18n](https://decapcms.org/docs/i18n/) panes, so opening one closes whichever was open, and selecting the pane already showing closes it. Decap CMS remembers the choice for the next entry you open.
The pane header counts unresolved notes — or every note, once none are left unresolved — and, once the entry has notes, links to its issue on your repository host.
A note is saved the moment you add it, independently of the entry: you do not need to save the entry for a note to persist.
You can read every note on an entry but act only on your own. **Edit** a note while it is unresolved, **Resolve** it once the point has been addressed, or **Delete** it — which removes it for everyone and cannot be undone. A resolved note stays in the pane, dimmed, and can be reopened with **Unresolve**. To respond to someone else's note, add your own.
Notes added by other editors appear within about 15 seconds without a reload. Polling pauses while the browser tab is in the background.
## How notes are stored
Notes live in an issue on your repository host, not in your content files.
The first time a note is added to an entry, Decap CMS opens an issue in the repository configured in `backend`, titled after the entry and labeled `decap-cms-notes` along with a `collection: